
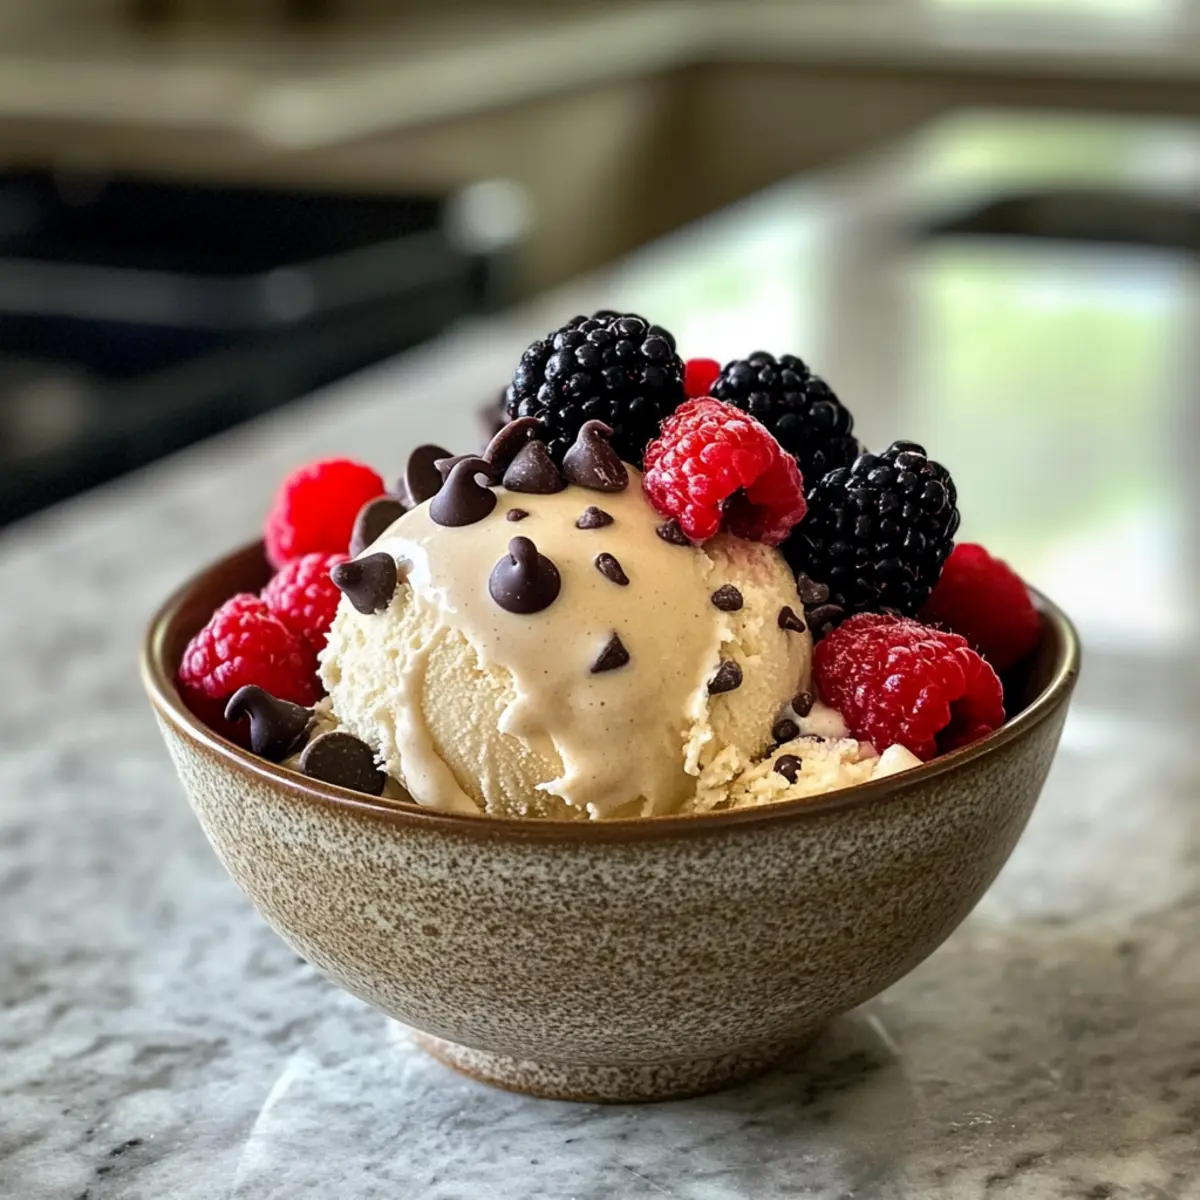
On a balmy summer evening, there’s nothing quite like the comforting embrace of a bowl of creamy, cold homemade vanilla ice cream. This recipe is your ticket to nostalgia, reviving memories of family gatherings and ice cream trucks rolling through your neighborhood. With no cooking required and an egg-free twist, it’s quick to whip up, making it the perfect indulgence for any occasion. Plus, it’s incredibly versatile! You can easily mix in your favorite fruits, chocolate chips, or nuts to tailor each scoop to your mood. Whether you’re serving it at a festive barbecue or enjoying a quiet night at home, this homemade vanilla ice cream promises to be a crowd-pleaser that brings joy with every spoonful. Ready to create your very own frozen delight? Let’s dive in!
Why is Homemade Vanilla Ice Cream Special?
Nostalgic Delight: Each scoop brings back cherished memories of childhood summers, making it a perfect treat for the whole family.
No Cooking Required: This simple, egg-free recipe saves you time and effort, letting you indulge without the hassle.
Customize to Your Taste: Whether you prefer a fruit-infused twist or a chocolatey addition, you can easily adapt the flavors to your liking—try it with a drizzle of caramel for extra excitement!
Smooth and Creamy Texture: Achieve that luxurious consistency you crave, reminiscent of your favorite ice cream shop treats.
Crowd-Pleasing Fun: Ideal for parties or cozy nights in, this homemade vanilla ice cream is bound to impress friends and family alike. Enjoy with brownies or drizzle some chocolate sauce for an elegant finish!
Homemade Vanilla Ice Cream Ingredients
• Here’s everything you need to create your creamy masterpiece!
For the Base
- Heavy Cream – Provides richness and that delightful creamy texture; half-and-half can be used for a lighter option.
- Whole Milk – Adds body and softness to your homemade vanilla ice cream; consider using 2% milk for a lower-fat alternative.
- Salt – Balances sweetness and enhances the overall flavor profile.
- Sugar – Sweetens the ice cream; feel free to substitute with honey or agave syrup, just adjust to your taste.
- Vanilla Extract – Infuses that classic flavor we all love; opt for pure vanilla extract for optimal taste or vanilla bean paste for a fancier touch.
Optional Add-Ins
- Fruits – Fold in strawberries or blueberries for a fruity twist during the last moments of churning.
- Chocolate Chips – Add during the final minutes of churning for delightful bursts of chocolate in each scoop.
- Nuts – Stir in toasted pecans or walnuts for added texture and flavor right before the churning finishes.
Now, gather these ingredients and prepare to make a refreshing batch of homemade vanilla ice cream that’s perfect for any occasion!
Step‑by‑Step Instructions for Homemade Vanilla Ice Cream
Step 1: Mix Ingredients
In a large mixing bowl, combine 2 cups of heavy cream, 1 cup of whole milk, 3/4 cup of sugar, a pinch of salt, and 2 teaspoons of pure vanilla extract. Whisk vigorously for about 2-3 minutes until the sugar dissolves and the mixture is smooth and creamy. This is the base for your delightful homemade vanilla ice cream, so ensure everything is well incorporated.
Step 2: Prepare Freezer Container
Pour the creamy mixture into the container of your ice cream maker. Ensure the container is properly chilled if your ice cream maker requires pre-freezing. If not using an ice cream maker, use a shallow dish that can fit in your freezer for an easier manual process. This step sets the stage for achieving that perfect, creamy consistency.
Step 3: Churn the Mixture
Next, churn the mixture according to the manufacturer’s instructions of your ice cream maker, which usually takes about 20-25 minutes. You’ll know it’s ready when the ice cream thickens and has a soft-serve texture. If you’re using a manual churner, be prepared to stir it every 30 minutes for 3-4 hours until it reaches a similar consistency.
Step 4: Add Mix-ins (Optional)
If you’d like to customize your homemade vanilla ice cream, gently fold in your desired mix-ins, such as chocolate chips, fresh fruit, or toasted nuts during the last 5 minutes of churning. This is the perfect time to get creative and tailor the flavor to your liking, making every scoop extra special.
Step 5: Freeze for Firmness
Once churning is complete, transfer the ice cream to an airtight container. Use a spatula to smooth the top and seal it tightly. Place it in the freezer for about 2-4 hours to achieve a firmer consistency. This final freezing step ensures your homemade vanilla ice cream is scoopable and delicious when you’re ready to serve it.
Step 6: Serve and Enjoy
After freezing, it’s time to serve your homemade vanilla ice cream! Use a warm scoop in case it feels too firm, and enjoy it on its own or as a topping for brownies, pies, or fruit salad. Delight in the creamy texture and classic flavor that’s sure to spark sweet memories for you and your loved ones.
Storage Tips for Homemade Vanilla Ice Cream
Fridge: Store leftovers in an airtight container for up to 3 days if you’ve made extra; however, the texture may not be as creamy after refrigeration.
Freezer: Keep your homemade vanilla ice cream in an airtight container for optimal freshness, best consumed within 2 weeks for the richest flavor and texture.
Serving: When serving, use a warm scoop or let the ice cream sit at room temperature for a few minutes to soften, making it easier to serve while maintaining that perfect consistency.
Reheating: Avoid reheating, as this can alter the texture; simply let thawing occur naturally before scooping.
What to Serve with Homemade Vanilla Ice Cream?
Elevate your dessert experience with delightful pairings that make every scoop a true treat!
- Brownies: Rich, fudgy brownies create a luscious contrast with the creamy vanilla ice cream, perfect for indulging your sweet tooth.
- Fresh Berries: Serve with a vibrant medley of strawberries, blueberries, or raspberries for a refreshing burst of flavor and natural sweetness.
- Chocolate Sauce: Drizzling warm chocolate sauce over ice cream adds an extra layer of richness that’s hard to resist.
- Caramel Swirls: Sweet, sticky caramel complements the smooth texture of vanilla ice cream for an indulgent finish.
- Oreo Crumbles: Crushed Oreos provide a delightful crunch and a hint of chocolate, balancing the creaminess of the ice cream beautifully.
- Pecan Pie: The nutty sweetness of pecan pie pairs nicely, creating a warm and comforting dessert experience.
- Fruit Salad: Tossed with a touch of mint, a light fruit salad can cleanse the palate and elevate your creamy delight.
- Coffee: A strong cup of coffee serves as a perfect contrast, enhancing the sweetness of the homemade vanilla ice cream.
- Coconut Macaroons: The chewy texture and coconut flavor add a fun contrast, making every bite feel special and festive!
Make Ahead Options
These delicious Homemade Vanilla Ice Cream is perfect for meal prep! You can mix the ice cream base (heavy cream, whole milk, sugar, salt, and vanilla) and refrigerate it up to 24 hours in advance, allowing the flavors to meld beautifully. Just remember to give it a good whisk before pouring it into your ice cream maker, as this helps maintain a smooth consistency. Additionally, you can prep any add-ins you desire, such as chopped fruits or chocolate chips, and keep them in the fridge for up to 3 days. When you’re ready to churn, simply follow the steps as usual, and you’ll enjoy a creamy, nostalgic dessert with minimal effort, even on the busiest of days!
Expert Tips for Homemade Vanilla Ice Cream
Chill Properly: Allow your ice cream maker container to chill overnight for the best texture; a well-frozen base ensures creaminess.
Avoid Over-Churning: Stop churning once the ice cream reaches soft-serve consistency; over-churning can lead to a dense, icy texture.
Customize Wisely: Fold in mix-ins like chocolate chips or fruits carefully to maintain the smoothness of your homemade vanilla ice cream.
Storage Matters: Store your ice cream in an airtight container to prevent ice crystals; consume within two weeks for the best flavor.
Make-Ahead Magic: Prepare your ice cream mixture a day before serving; this allows flavors to meld beautifully for a richer taste.
Homemade Vanilla Ice Cream Variations & Substitutions
Unleash your creativity in the kitchen by customizing your homemade vanilla ice cream with these delightful twists!
- Chocolate Twist: Stir in 1/2 cup of cocoa powder before churning for a rich chocolate variation that chocolate lovers will adore.
- Fruity Delight: Incorporate 1 cup of fresh fruit puree, like strawberries or blueberries, during the last moments of churning for a vibrant, fruity flair.
- Nutty Crunch: Add 1/2 cup of toasted nuts, such as pecans or walnuts, just before the churning ends for delightful texture and flavor.
- Caramel Swirl: Drizzle in caramel sauce during the last minute of churning for a sweet surprise that enhances every scoop.
- Minty Fresh: Replace vanilla extract with peppermint extract for a refreshing twist, perfect for warm summer days.
- Cookie Crumble: Fold in crushed cookies like Oreos or chocolate chip cookies during the last few minutes of churning for a fun treat.
- Spiced-Up Delight: Add a pinch of cinnamon or nutmeg to the base mixture for a lovely warmth that complements the vanilla.
- Vegan Option: Substitute the heavy cream and whole milk with coconut cream and almond milk for a dairy-free version that still tastes incredible.
Explore these variations to make each batch a new adventure! And if you’re feeling inspired, why not pair your homemade ice cream with some delicious Holiday Creamed Spinach for a delightful family gathering or serve it alongside a warm slice of Spice Cake Eggnog for an unbeatable dessert combo? Indulge in the fun of flavor!
Homemade Vanilla Ice Cream Recipe FAQs
What are the best ingredients for a creamy vanilla ice cream?
Absolutely! For the richest flavor and texture, using heavy cream, whole milk, sugar, and high-quality vanilla extract is essential. If you’re looking for alternatives, consider half-and-half instead of heavy cream for a lighter option, or 2% milk for a lower-fat version. The purity of your ingredients significantly impacts the ice cream’s flavor, so opt for pure vanilla extract or vanilla bean paste when possible.
How should I store leftover homemade vanilla ice cream?
To ensure your homemade vanilla ice cream stays fresh and creamy, store it in an airtight container in the freezer. This method keeps ice crystals at bay and preserves flavor. It’s best enjoyed within two weeks for optimal taste and texture, though it can last longer if properly stored. Remember to use a spatula to smooth the surface before sealing to minimize air exposure.
Can I freeze homemade vanilla ice cream for longer periods?
Very! You can freeze your homemade vanilla ice cream for up to 3 months, although the flavor may degrade over time. For long-term storage, ensure your container is well-sealed to prevent freezer burn. To enjoy it again, simply thaw the ice cream in the fridge for 20-30 minutes before serving for easy scooping.
What if my ice cream turned icy instead of creamy?
If your homemade vanilla ice cream ends up icy, it could be due to over-churning. To fix this, make sure to stop churning once it reaches a soft-serve consistency. If it has already been turned icy, try letting it sit at room temperature for about 10-15 minutes before serving to soften. Repeat this once if necessary. To avoid this, follow proper storage methods by sealing it well and consuming it within the recommended timeframe.
Can I make this recipe dairy-free?
Absolutely! For a dairy-free version of homemade vanilla ice cream, substitute heavy cream and milk with full-fat coconut milk or cashew milk. Opt for a dairy-free vanilla extract, and adjust the sweetener to your liking. This way, you can still enjoy a rich and creamy treat without dairy!
How can I incorporate mix-ins into my vanilla ice cream?
To add your favorite mix-ins like chocolate chips, fruits, or nuts, fold them in during the last 5 minutes of churning. This timing helps ensure they’re evenly distributed without compromising the smooth texture of the ice cream. If you prefer larger chunks, add them right before transferring the ice cream to the freezer for a delightful surprise in every scoop!

Creamy Homemade Vanilla Ice Cream That'll Spark Sweet Memories
Ingredients
Equipment
Method
- In a large mixing bowl, combine heavy cream, whole milk, sugar, salt, and vanilla extract. Whisk vigorously for about 2-3 minutes until the sugar dissolves and the mixture is smooth and creamy.
- Pour the creamy mixture into the container of your ice cream maker. Ensure the container is properly chilled.
- Churn the mixture according to the manufacturer's instructions of your ice cream maker, usually about 20-25 minutes until thickened.
- Gently fold in your desired mix-ins during the last 5 minutes of churning.
- Transfer the ice cream to an airtight container and smooth the top. Freeze for about 2-4 hours to achieve firmer consistency.
- After freezing, serve your homemade vanilla ice cream using a warm scoop.
Leave a Reply