
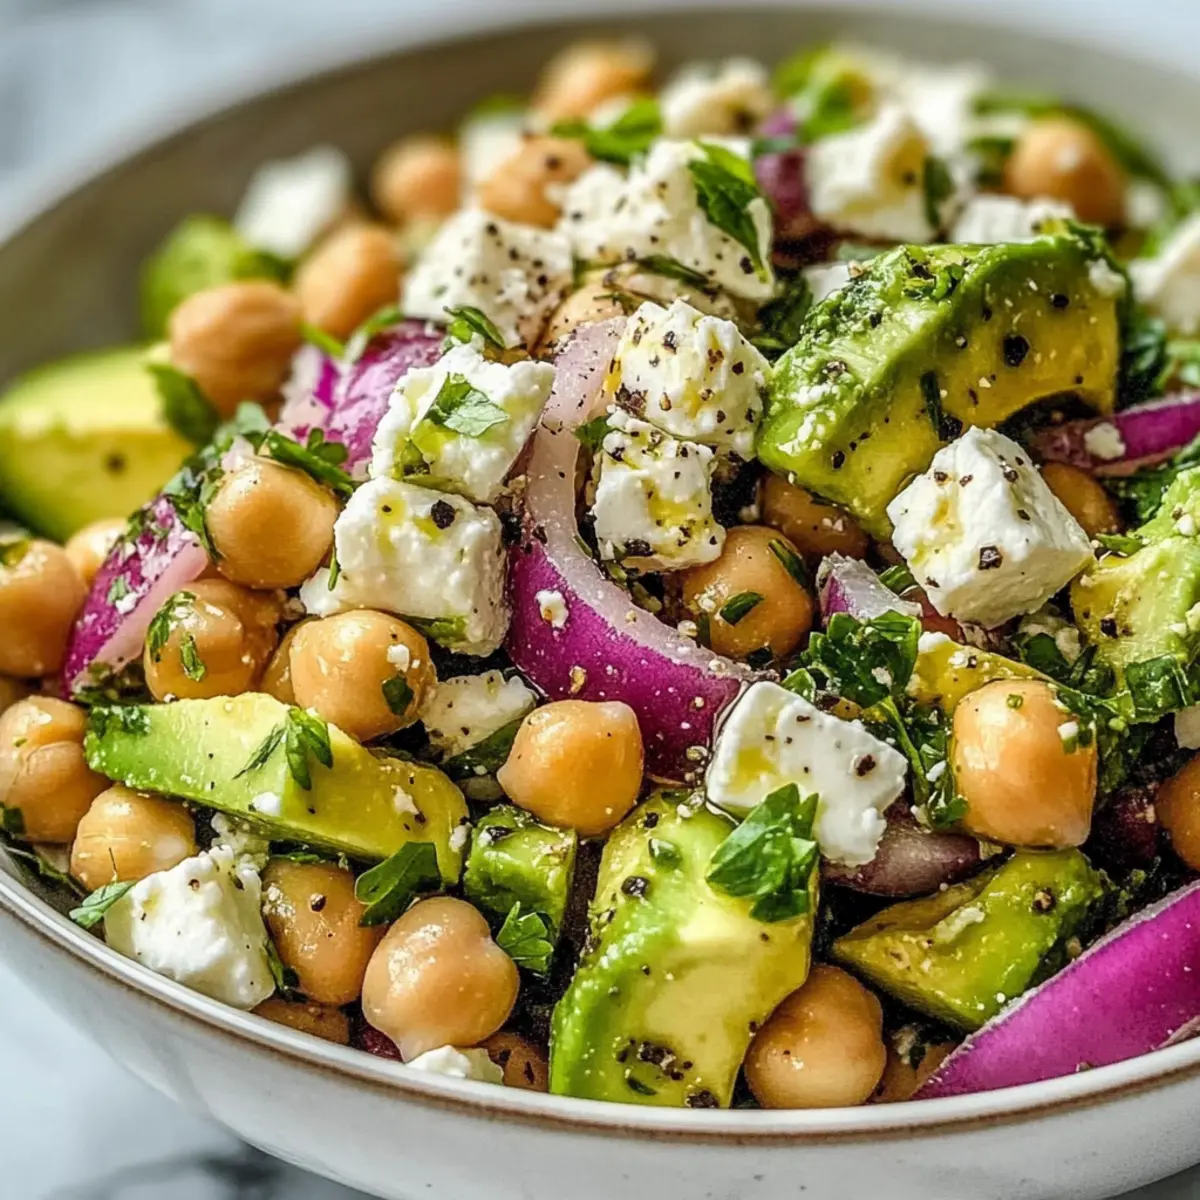
A delightful combination of fresh flavors greets me every time I prepare this Chickpea Feta Avocado Salad. In just 15 minutes, I can whip up a dish that feels both indulgent and nourishing. The creamy avocado complements the salty tang of feta and the hearty texture of chickpeas, creating a meal that’s as satisfying as it is healthy. Whether I’m enjoying it as a quick lunch, serving it as a vibrant side at dinner, or bringing it to a gathering, this salad is sure to impress. Plus, it’s gluten-free and perfect for those busy days when time is scarce. Curious how a few simple ingredients can come together for such a tasty treat? Let’s dive in!
Why is this salad a must-try?
Quick and Easy: This Chickpea Feta Avocado Salad can be prepped in just 15 minutes, making it a perfect choice for anyone on a tight schedule.
Nutritious Powerhouse: Packed with protein, healthy fats, and essential nutrients, it’s a wholesome option that fuels your day.
Vibrant Flavors: The creamy avocado and tangy feta create a delicious balance that keeps your taste buds dancing.
Versatile Dish: Enjoy it as a standalone meal, pair it with grilled chicken, or serve it alongside your favorite dish—like a hearty Steakhouse Potato Salad.
Crowd-Pleasing: Perfect for gatherings, this salad’s bright colors and flavors will impress your guests and leave them asking for the recipe!
Chickpea Feta Avocado Salad Ingredients
For the Salad
• Chickpeas – use canned chickpeas for convenience or soaked dried ones for a fresher touch.
• Avocado – choose a ripe but firm avocado for that perfect creaminess and healthy fats.
• Feta Cheese – opt for high-quality feta that isn’t too dry; it adds a lovely salty zest.
• Red Onion – slice thinly to provide sharpness and crunch for a delightful texture.
• Fresh Parsley – for a burst of color and freshness; swap it with cilantro if you like a twist.
• Fresh Mint – adds a refreshing hint; use dried mint if needed but cut the amount in half.
For the Dressing
• Olive Oil – extra virgin olive oil enhances the richness, so choose the best quality you can find.
• Lemon Juice – freshly squeezed lemon juice brightens the entire dish with a zesty kick.
• Garlic – fresh minced garlic adds depth; ensure it’s not too bitter by using freshly minced.
• Dried Oregano – balances the Mediterranean flavors; feel free to adjust to your taste.
• Salt and Pepper – season to your preference for a well-rounded flavor in your Chickpea Feta Avocado Salad.
Step‑by‑Step Instructions for Chickpea Feta Avocado Salad
Step 1: Prep Ingredients
Begin by draining and rinsing one can of chickpeas under cold water until no foam remains—this should take about 1 minute. While the chickpeas drain, dice one ripe avocado into bite-sized pieces, slice half a red onion thinly, and chop a handful of fresh parsley and mint. This colorful array will form the base of your Chickpea Feta Avocado Salad.
Step 2: Combine Ingredients
In a large mixing bowl, carefully combine the drained chickpeas, diced avocado, crumbled feta cheese, sliced red onion, chopped parsley, and mint. Use a spatula to gently fold the ingredients together, ensuring everything is evenly distributed without mashing the avocado. This step should only take about 2 minutes, but the vibrant colors of the salad will instantly catch your eye.
Step 3: Prepare Dressing
In a small bowl, whisk together 3 tablespoons of olive oil, the juice of one freshly squeezed lemon, 1 minced garlic clove, 1 teaspoon of dried oregano, and a pinch of salt and pepper. Whisk until the mixture is well-combined and emulsified—this should take about 30 seconds. The aroma of the garlic and lemon will brighten your kitchen, setting the stage for your Chickpea Feta Avocado Salad.
Step 4: Dress Salad
Pour the dressing over your salad mixture in the large bowl. Gently toss the ingredients together using your spatula, taking care not to mash the creamy avocado pieces. Aim for an even coating of the dressing throughout the salad. This step will take around 1 minute, and you’ll notice the freshness of the ingredients shine through once they are dressed.
Step 5: Serve
For optimal freshness, serve your Chickpea Feta Avocado Salad immediately. If you prefer a chilled salad, cover the bowl with plastic wrap and let it chill in the refrigerator for 10 minutes before serving. This bright and nutritious salad will make a stunning centerpiece on your table, inviting everyone to dig in!
Expert Tips for Chickpea Feta Avocado Salad
• Prevent Browning: Toss diced avocado with lemon juice immediately after cutting to minimize oxidation and keep it looking fresh.
• Customize Your Salad: Feel free to include additional veggies like diced bell peppers or sliced cucumbers for extra crunch and flavor variation in your Chickpea Feta Avocado Salad.
• Avoid Overmixing: Gently combine the salad to preserve the avocado’s texture; overmixing can lead to a mushy consistency that detracts from the dish.
• Quality Ingredients Matter: Select high-quality feta and fresh herbs for the best flavor; they make a significant difference in the overall taste of your salad.
• Storage Tips: If you plan to store leftovers, keep the avocado in dressing until ready to serve to prevent browning and maintain the salad’s vibrant color.
What to Serve with Chickpea Feta Avocado Salad
Elevate your meal by pairing this vibrant salad with complementary sides that enhance its refreshing flavors.
- Grilled Chicken: Tender and juicy grilled chicken adds a satisfying protein boost while balancing the salad’s creaminess.
- Quinoa Pilaf: Fluffy quinoa cooked with herbs can introduce a nutty texture, making every bite hearty and fulfilling.
- Crusty Bread: Serve with warm, crusty bread for a delightful textural contrast—perfect for scooping up salad goodness.
- Hummus Platter: A spread of creamy hummus with crunchy raw veggies creates a flavorful starter that hints at Mediterranean goodness.
- Cucumber and Tomato Salsa: A zesty salsa brings an additional burst of freshness and a contrasting crunch that complements the salad.
- Lemonade or Iced Tea: Cool, refreshing drinks like lemonade or iced tea enhance the Mediterranean feel of your meal, making it more vibrant.
- Chocolate Mousse Cups: End the meal on a sweet note with light chocolate mousse; its rich creaminess will satisfy your dessert cravings without overwhelming.
How to Store and Freeze Chickpea Feta Avocado Salad
Fridge: Store any leftover Chickpea Feta Avocado Salad in an airtight container in the refrigerator for up to 2 days. To keep the avocado fresh, add extra lemon juice or keep it in dressing until ready to serve.
Freezer: It’s best not to freeze this salad, as the texture of the avocado and feta may change. However, you can freeze individual portions of chickpeas to use in future salads.
Reheating: Since this salad is typically served cold, there’s no need to reheat it. Simply enjoy it straight from the fridge or allow it to reach room temperature before serving.
Room Temperature: If bringing the salad to a potluck, keep it out for no longer than 2 hours to ensure freshness and safety.
Chickpea Feta Avocado Salad Variations
Feel free to get creative with your Chickpea Feta Avocado Salad—there are so many delightful ways to customize it to your taste!
-
Dairy-Free: Substitute feta with a dairy-free cheese option like almond feta to keep the flavor while making it suitable for those avoiding dairy.
-
Hearty Grains: Mix in cooked quinoa or brown rice for added texture and nutrition, making this salad even more filling and satisfying.
-
Crunchy Add-Ins: Toss in some toasted walnuts or sunflower seeds for a satisfying crunch and nutty flavor that complements the creaminess of the avocado.
-
Spicy Kick: Add a handful of chopped jalapeños or a sprinkle of red pepper flakes for those who love a bit of heat in their meals.
-
Flavor Boost: Try incorporating sun-dried tomatoes or roasted red peppers to inject an extra layer of Mediterranean flavor that will elevate your salad.
-
Zesty Twist: Use lime juice in place of lemon juice for a different zing that pairs beautifully with the other ingredients.
-
Additional Veggies: Fold in some diced cucumbers or bell peppers for extra color and hydration, making your salad not only more vibrant but also more refreshing.
If you’re looking for more creative side dishes, be sure to check out my delicious Cranberry Orange Salad or the vibrant Sweet Potato Feta dish that pairs wonderfully with this Chickpea Salad!
Make Ahead Options
This Chickpea Feta Avocado Salad is a fantastic choice for meal prep, allowing you to enjoy delicious, healthy meals throughout the week! You can prepare the chickpeas, diced onions, parsley, and mint up to 3 days in advance and store them in an airtight container in the refrigerator. To prevent the avocado from browning, wait until you’re ready to serve to add it, tossing it with a bit of lemon juice for extra protection. When you’re set to enjoy your salad, simply combine all components and dress them with the prepared dressing. This way, your salad remains vibrantly fresh, offering you a nourish-packed dish that’s just as delightful when made ahead!

Chickpea Feta Avocado Salad Recipe FAQs
How do I choose the right avocado?
Absolutely! For the best Chickpea Feta Avocado Salad, look for avocados that are ripe but still firm to the touch, indicating they are at their peak ripeness. You want avocados that yield slightly when pressed but are not overly soft or mushy. Avoid any with dark spots all over, which may indicate overripeness or spoilage.
How long can I store leftovers?
Very! You can store any leftover Chickpea Feta Avocado Salad in an airtight container in the refrigerator for up to 2 days. To keep the avocado from browning, I recommend adding an extra splash of lemon juice or keeping it in the dressing until you’re ready to serve.
Can I freeze this salad?
While freezing the entire salad isn’t recommended due to changes in texture, you can freeze cooked chickpeas for later use. To do this, simply drain and rinse them, then spread them out on a baking sheet and freeze until solid—about 2-3 hours. Once frozen, transfer the chickpeas to an airtight container or freezer bag; they can be stored in the freezer for up to 3 months.
What if my avocado becomes too mushy?
If you find that your avocado is getting too mushy during preparation, gently fold the ingredients together to minimize further mashing. If it’s already too soft, I often recommend turning your salad into a delicious dip! Just mash the avocado and mix it with the other ingredients for a creamy avocado spread that’s perfect with pita chips.
Are there any dietary considerations for this recipe?
Definitely! This Chickpea Feta Avocado Salad is gluten-free and suitable for a variety of diets. However, if you’re concerned about dairy, you may substitute feta with a plant-based cheese. Always check for any individual allergies, especially with ingredients like garlic or dairy, to ensure it’s safe for everyone at your table.
Chickpea Feta Avocado Salad: Refreshing, Quick & Healthy Treat
Ingredients
Equipment
Method
- Begin by draining and rinsing one can of chickpeas under cold water until no foam remains, about 1 minute. While the chickpeas drain, dice one ripe avocado, slice half a red onion thinly, and chop a handful of fresh parsley and mint.
- In a large mixing bowl, carefully combine the drained chickpeas, diced avocado, crumbled feta cheese, sliced red onion, chopped parsley, and mint. Gently fold the ingredients together.
- In a small bowl, whisk together 3 tablespoons of olive oil, the juice of one freshly squeezed lemon, 1 minced garlic clove, 1 teaspoon of dried oregano, and a pinch of salt and pepper.
- Pour the dressing over your salad mixture in the large bowl. Gently toss the ingredients together.
- Serve your Chickpea Feta Avocado Salad immediately or let it chill in the refrigerator for 10 minutes before serving.
Leave a Reply