
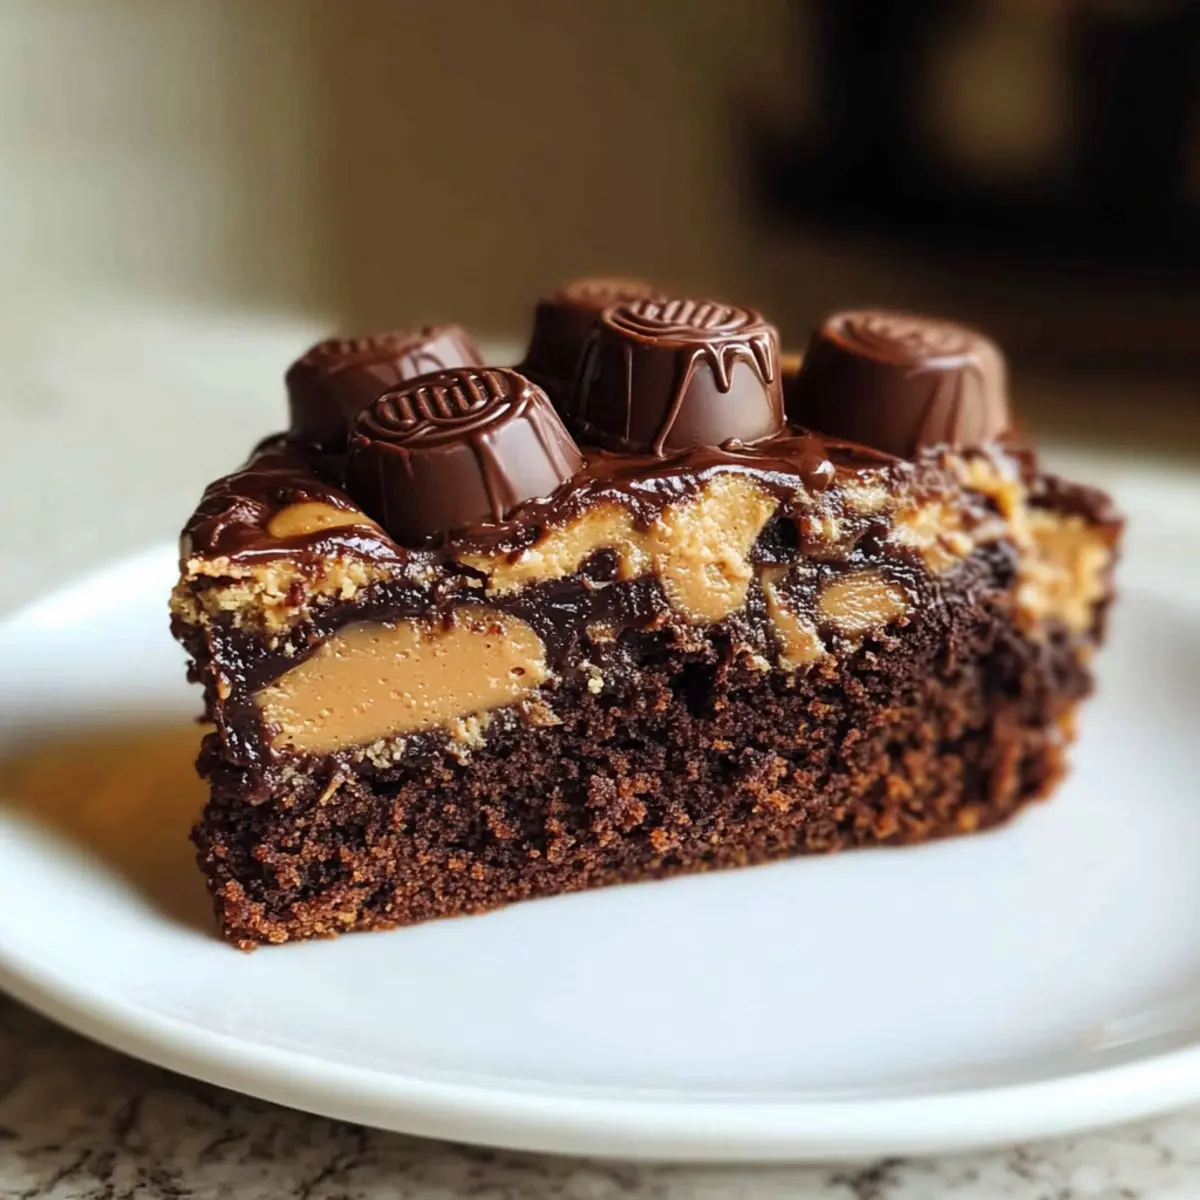
There’s nothing quite like that moment when you pull a freshly baked cake from the oven, and the rich aroma fills your kitchen, beckoning everyone in. Today, I’m excited to share the Ultimate Reese’s Peanut Butter Earthquake Cake—a delightful collision of chocolate and peanut butter that creates a dessert you won’t soon forget. This recipe combines an easy-to-follow method with a heavenly gooey center, perfect for satisfying your cravings without a lot of fuss. Not only is it a crowd-pleaser that’s sure to impress, but it’s also a fabulous way to indulge in homemade comfort food! Are you ready to create a slice of heaven that will leave your family clamoring for seconds? Let’s dive right in!
Why Is This Cake a Showstopper?
Simplicity at its core: Utilizing chocolate cake mix makes this recipe accessible, even for novice bakers.
Decadent flavor profiles: The combination of chocolate and creamy peanut butter creates an indulgent experience that tantalizes the taste buds.
Crowd-pleaser guaranteed: Perfect for gatherings, this dessert will have everyone asking for the recipe, making it ideal for birthdays or celebrations.
Versatile variations: Feel free to mix it up with crushed Oreos or marshmallow fluff to keep surprises coming!
Perfectly gooey center: The cake’s unique texture from melted Reese’s cups offers a delightful contrast with each bite. To elevate it further, serve it warm with a scoop of vanilla ice cream for an extra indulgent treat!
Peanut Butter Earthquake Cake Ingredients
• Here’s everything you need to create this delightful dessert.
For the Batter
- Chocolate Cake Mix – The foundation of the cake; simplifies preparation.
- Water – Hydrates the batter; essential for mixing dry ingredients.
- Vegetable Oil – Adds moisture and richness; can be substituted with melted butter.
- Eggs – Binds the ingredients and improves leavening; can use aquafaba as a vegan substitute.
For the Peanut Butter Swirl
- Peanut Butter – The star flavor component; provides creaminess and richness. Consider using sunflower seed butter for a nut-free option.
- Powdered Sugar – Sweetens the peanut butter swirl; optional if you prefer less sweetness.
- Melted Butter – Adds depth to the peanut butter layer; can be replaced with coconut oil.
For the Toppings
- Reese’s Cups (chopped) – Essential for that delightful chocolate-peanut flavor explosion; swap with chocolate caramel candies for a different twist.
- Chocolate Chips – Boosts the chocolate flavor; use dark, milk, or even white chocolate varieties for extra richness.
Step‑by‑Step Instructions for Peanut Butter Earthquake Cake
Step 1: Preheat and Prepare
First, preheat your oven to 350°F (175°C) and generously grease a 9×13-inch baking dish. This ensures your peanut butter earthquake cake will easily release once baked. As the oven warms, gather your ingredients so they’re within reach, making the assembly smoother and more enjoyable.
Step 2: Mix the Batter
In a large mixing bowl, combine the chocolate cake mix, water, vegetable oil, and eggs. Use a hand mixer on medium speed for about 2 minutes, until the batter is smooth and well-blended. The mixture should be glossy and lump-free. Once ready, pour this delightful chocolate batter into your prepared baking dish.
Step 3: Prepare the Peanut Butter Swirl
In a separate medium bowl, mix together the peanut butter, powdered sugar, and melted butter until smooth and creamy. This rich peanut butter mixture is key to creating the delightful swirls in your peanut butter earthquake cake. Once combined, drop spoonfuls of this mixture over the chocolate batter, ensuring even distribution for maximum flavor.
Step 4: Create the Swirl
Using a butter knife, gently swirl through the chocolate batter and peanut butter mix, creating a lovely marbled effect. Be careful to not over-mix; you want to maintain distinct layers for that striking presentation of the peanut butter earthquake cake. This playful mixing process will set the stage for a fantastic texture.
Step 5: Add the Toppings
Sprinkle the chopped Reese’s Cups and chocolate chips evenly over the top of the cake batter. This step is crucial as it introduces melty pockets of chocolate goodness. Press them down slightly into the batter to ensure they melt beautifully while baking, enriching the flavor profile of your peanut butter earthquake cake.
Step 6: Bake the Cake
Place your baking dish in the preheated oven and bake for 35-40 minutes. The edges should start to set while the center remains slightly jiggly; this indicates that the peanut butter earthquake cake is perfectly baked. Keep an eye on it, as ovens can vary in temperature; a toothpick test can help determine doneness as needed.
Step 7: Cool Before Slicing
Once baked, remove the peanut butter earthquake cake from the oven and allow it to cool in the dish for about 2 hours. Cooling is crucial for achieving that ideal texture and making slicing easier. After cooling, slice your cake into squares to reveal those gorgeous layers of chocolate and peanut butter goodness.
What to Serve with Ultimate Reese’s Peanut Butter Earthquake Cake
Imagine the delightful sights and smells as you finish slicing this decadent dessert and gather your loved ones for a memorable meal.
- Vanilla Ice Cream: The creamy coolness balances the rich cake beautifully, making for a classic dessert experience.
- Chocolate Sauce: Drizzling warm chocolate sauce over the cake adds a luscious depth that enhances every chocolate lover’s dream.
- Fresh Berries: A burst of tartness from raspberries or strawberries cuts through the sweetness, creating a well-rounded flavor profile.
- Whipped Cream: Light and airy, it provides a lovely contrast to the cake’s dense texture, enhancing both presentation and taste.
- Coffee: Brewed coffee adds a warm, comforting element, perfectly complementing the chocolate and peanut butter combination.
- Nutty Spread: A drizzle of almond butter or a nutty spread like cashew butter can amplify the nutty flavors and add richness.
- Milk or Plant-Based Milk: A tall glass of milk brings nostalgia, making each bite feel like childhood, while enhancing the overall indulgence of the dessert.
- Chocolate Milkshake: For a fun twist, blending milk, chocolate syrup, and ice cream creates a rich shake that pairs perfectly with every slice.
- Peanut Butter Cups: Serve more Reese’s on the side for those who can’t get enough peanut butter goodness! Each bite brings an extra indulgence that feels just right.
How to Store and Freeze Peanut Butter Earthquake Cake
Room Temperature: Keep leftover pieces wrapped tightly in foil for up to 3 days to maintain freshness, ensuring they’re ideally suited for satisfying late-night cravings.
Fridge: For longer storage, place the wrapped cake in the fridge; it will stay fresh for up to a week, though the texture may soften slightly.
Freezer: Wrap individual slices in plastic wrap and then foil to freeze for up to 2-3 months; this preserves the flavor and texture for later enjoyment.
Reheating: To enjoy your peanut butter earthquake cake again, simply thaw slices in the fridge overnight, then warm them briefly in the microwave to revive that gooey goodness!
Peanut Butter Earthquake Cake Tweaks
Let’s make this delicious cake even more personalized—your taste buds will thank you!
- Nut-Free: Substitute peanut butter with sunflower seed butter to make this dessert friendly for those with nut allergies. The flavor will still be rich and creamy!
- Dairy-Free: Use a dairy-free chocolate cake mix and coconut oil instead of butter for a luscious result that satisfies without the dairy.
- Sugar-Free: Consider using a sugar substitute for the powdered sugar and cake mix to create a lower-sugar version while retaining the sweet delight.
- Spicy Kick: Add a pinch of cayenne pepper to the batter to introduce an unexpected, delightful warmth that pairs beautifully with the chocolate and peanut butter.
- Cookies & Cream Twist: Mix in crushed Oreos into the batter for a cookies-and-cream delight that will leave your family buzzing with happiness, a fun variation to spice things up!
- Extra Gooey: Folding in marshmallow fluff before baking adds delightful, stretchy pockets of gooey goodness that take this cake to a new level of indulgence.
- Fruity Surprise: Toss in some fresh raspberries or strawberries for a fruity contrast that cuts through the richness, adding a refreshing twist to every slice.
- Scoop and Serve: Drizzle with a decadent homemade chocolate ganache (Cake Eggnog Buttercream) for an added touch of indulgence, transforming your cake into an even bigger showstopper!
Make Ahead Options
These Peanut Butter Earthquake Cake preparations are perfect for busy home cooks who want to save time without sacrificing flavor! You can prepare the chocolate cake batter and the peanut butter swirl up to 24 hours in advance. Just store them separately in airtight containers in the refrigerator. When you’re ready to bake, pour the batter into your prepared dish, drop in your peanut butter mixture, and swirl to combine. Then, add the Reese’s Cups and chocolate chips before baking. This method will ensure your cake maintains its rich, delectable taste while allowing you to enjoy fresh-baked goodness with minimal last-minute effort!
Expert Tips for Peanut Butter Earthquake Cake
-
Measure Accurately: Ensure that you accurately measure the chopped Reese’s Cups after cutting them, which helps maintain an even distribution of flavor throughout the cake.
-
Baking Time Vigilance: Keep an eye on baking time; check for doneness with a toothpick about 5 minutes before the minimum baking duration to avoid overcooking.
-
Cooling is Key: Let the peanut butter earthquake cake cool completely before slicing. This step is crucial for achieving clean, beautiful cuts—use a hot, dry knife for the best results.
-
Homemade Batter Check: If you opt for homemade cake batter instead of a mix, make sure the batter is thick enough to adequately support the peanut butter layer for the best texture.
-
Add Variety: Don’t hesitate to experiment with different mix-ins or toppings, such as crushed Oreos or marshmallow fluff, to create unique flavors and keep your peanut butter earthquake cake exciting!
Peanut Butter Earthquake Cake Recipe FAQs
What should I look for when selecting peanut butter?
Absolutely! When selecting peanut butter for your Peanut Butter Earthquake Cake, look for a creamy variety with minimal added ingredients. Ideally, choose a brand that only contains peanuts and salt for the best flavor and texture. If you’re looking for a nut-free option, sunflower seed butter is an excellent alternative.
How do I store leftover cake?
You can keep leftover Peanut Butter Earthquake Cake tightly wrapped in foil at room temperature for up to 3 days. If you’d like to keep it fresher for longer, store it in the refrigerator for up to a week. Just remember, the texture may soften slightly when chilled.
Can I freeze the cake?
Very! To freeze your Peanut Butter Earthquake Cake, wrap each slice individually in plastic wrap, followed by foil to prevent freezer burn. This method allows the cake to stay fresh for up to 2-3 months. When you’re ready to indulge again, simply thaw in the fridge overnight and reheat in the microwave for that gooey, melted chocolate sensation!
What should I do if my cake doesn’t rise properly?
If your Peanut Butter Earthquake Cake doesn’t rise as expected, it could be due to a few reasons. One common issue could be stale ingredients. Ensure your baking powder is fresh—test it by adding a teaspoon to warm water; if it bubbles, it’s good to go! Additionally, make sure you’re mixing the batter just until smooth and not overmixing, which can lead to a denser cake.
Is this cake suitable for anyone with allergies?
The Peanut Butter Earthquake Cake contains common allergens like eggs and peanuts. If you’re making this for someone with allergies, consider substituting eggs with aquafaba or a commercial egg replacer. For a nut-free option, you can use sunflower seed butter and ensure the cake mix doesn’t have any nut-related ingredients. Always double-check labels for safety!
How do I know when the cake is done baking?
To check if your Peanut Butter Earthquake Cake is done, insert a toothpick into the center about 5 minutes before the recommended baking time ends. It should come out with a few moist crumbs—not wet batter. The edges should be set, and the center should still jiggle slightly, as it will continue to firm up as it cools. Enjoy your baking adventure!
Irresistible Peanut Butter Earthquake Cake to Wow Your Guests
Ingredients
Equipment
Method
- Preheat your oven to 350°F (175°C) and generously grease a 9x13-inch baking dish.
- In a large mixing bowl, combine the chocolate cake mix, water, vegetable oil, and eggs. Use a hand mixer on medium speed for about 2 minutes until smooth.
- In a separate medium bowl, mix together the peanut butter, powdered sugar, and melted butter until smooth and creamy.
- Using a butter knife, gently swirl through the chocolate batter and peanut butter mix to create a marbled effect.
- Sprinkle the chopped Reese's Cups and chocolate chips evenly over the top of the cake batter.
- Place your baking dish in the preheated oven and bake for 35-40 minutes until the edges are set and the center is slightly jiggly.
- Once baked, allow the cake to cool in the dish for about 2 hours before slicing.
Leave a Reply