
As I rummaged through my pantry one afternoon, I stumbled upon the perfect combination of ingredients that promised to transform my snack game: a jar of creamy peanut butter, some oats, and a touch of honey. That’s when I realized, it was time to whip up a batch of No-Bake Peanut Butter Energy Bites! These delightful little snacks are not only a cinch to prepare—taking just 5 minutes—but they also pack a nutritious punch that’ll satisfy your sweetness cravings without the guilt. Perfect for a mid-afternoon lift or a quick post-workout treat, these energy bites are ideal for busy lifestyles and will please both kids and adults alike. Curious how to make these tasty bites? Let’s get started!
Why are No-Bake Energy Bites a Must-Try?
Quick and Easy: With only 5 minutes of prep time, these bites are perfect for those busy days when you need a healthy snack in a hurry.
Nutritious Ingredients: Packed with wholesome oats and peanut butter, each bite serves up a delightful blend of healthy fats, fiber, and protein.
Customizable Treats: Add your favorite mix-ins like chia seeds or chopped dried cranberries to create your own unique flavor combinations, just like in our Sweet Potato Butter recipe!
Kid-Friendly: These snacks are a hit with both kids and adults, making them an excellent choice for lunchboxes or after-school snacks.
Satisfying Texture: Enjoy a delightful chew with the rich, nutty flavor that makes these bites feel indulgent while being guilt-free!
No-Bake Peanut Butter Energy Bites Ingredients
• Here’s what you need to whip up these delightful snacks!
For the Base
• Peanut Butter – Provides richness and healthy fats; substitute with almond butter for a nut-free option.
• Oats – Acts as the foundational ingredient for structure; quick oats can be replaced with rolled oats.
• Honey – Adds natural sweetness and helps bind ingredients; maple syrup can be used as a vegan alternative.
• Chocolate Chips – For a touch of sweetness and indulgence; use dark chocolate chips for a healthier option.
Optional Add-ins
• Chia Seeds – For added fiber and nutrition to boost your energy.
• Ground Flaxseed – Offers omega-3 fatty acids and can be mixed in for added health benefits.
• Shredded Coconut – Adds delightful texture and flavor for a tropical twist.
• Chopped Dried Cranberries – Introduces a sweet-tart flavor and extra chewiness, perfect for these No-Bake Peanut Butter Energy Bites.
Step‑by‑Step Instructions for No-Bake Peanut Butter Energy Bites
Step 1: Combine Dry Ingredients
In a medium mixing bowl, add 1 cup of oats and ½ cup of chocolate chips. Stir well with a sturdy spoon to ensure the chocolate is evenly distributed. This step helps the peanut butter not to stick initially. You should see a nice blend of oats and chocolate chips, giving you a glimpse of the delicious No-Bake Peanut Butter Energy Bites to come.
Step 2: Mix in Wet Ingredients
Now, scoop in ½ cup of creamy peanut butter and pour in ¼ cup of honey. Using the same sturdy spoon, mix thoroughly until a cohesive, thick, and sticky dough forms. This should take about 1-2 minutes. Look for a smooth consistency where the oats and chocolate chips are fully coated in a delightful peanut butter glaze, indicative of a good binding.
Step 3: Scoop and Shape
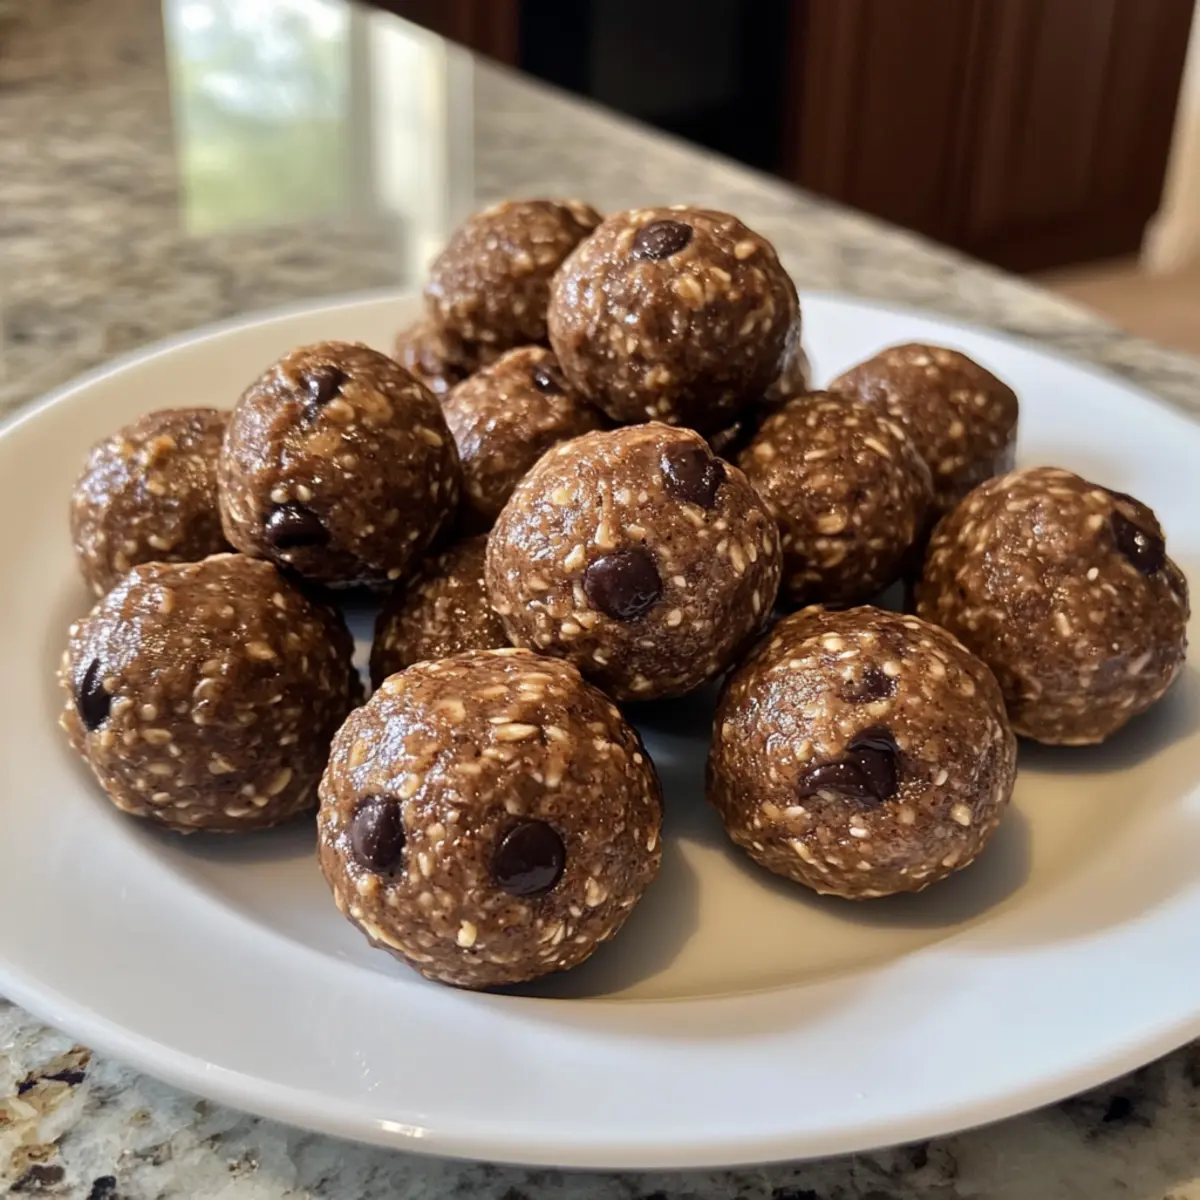
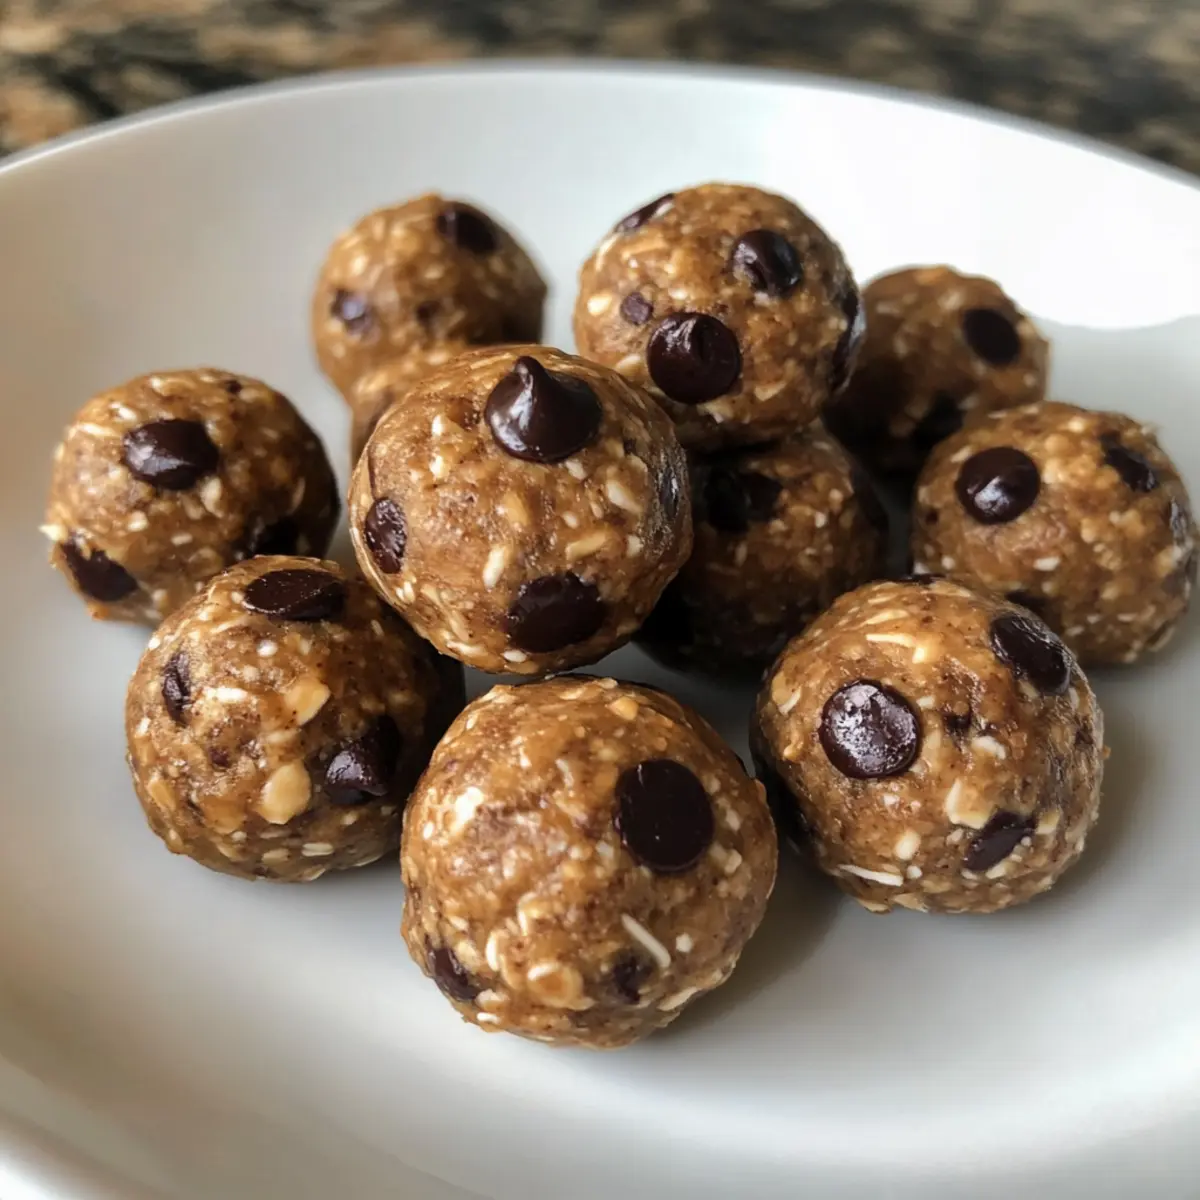
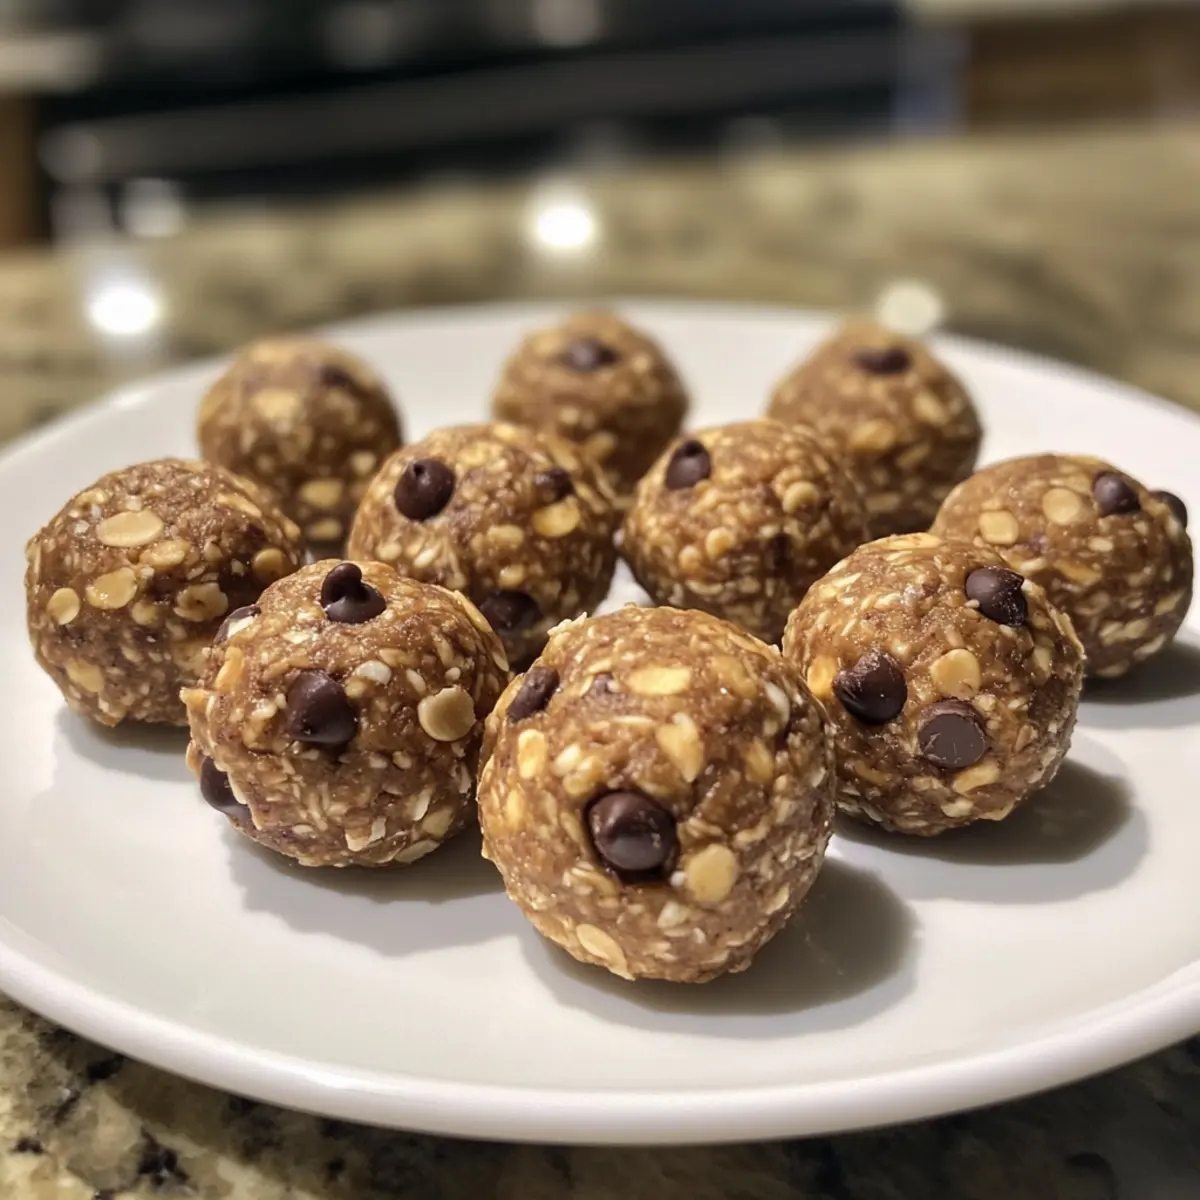
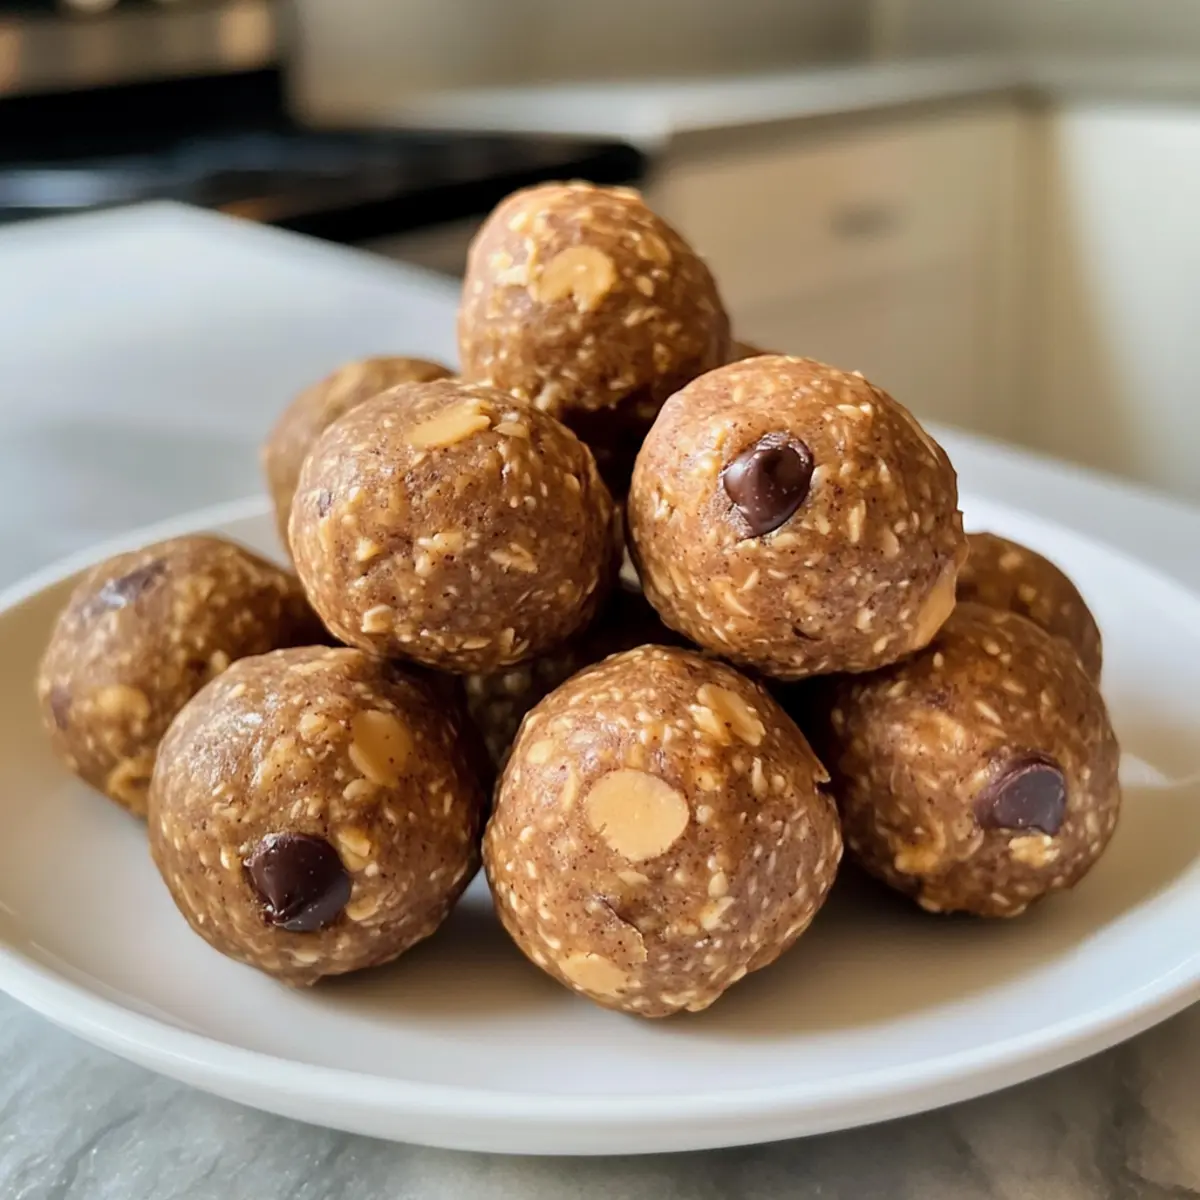
Using a 1-tablespoon scoop, portion out the peanut butter mixture and roll them into bite-sized balls with your hands. Aim for uniform shapes to make them easy to grab later—this recipe will yield about 12 energy bites. They should hold together nicely, appearing slightly shiny from the peanut butter, suggesting they’re ready to enjoy or refrigerate.
Step 4: Chill for Better Texture
For optimal texture, place the energy bites on a parchment-lined plate or tray and refrigerate for approximately 30 minutes. This will help them firm up a bit, improving their bite and making them easier to eat. You’ll notice them become more solid, ready to delight your taste buds with each nutritious No-Bake Peanut Butter Energy Bite.
Step 5: Store for Freshness
Once chilled, transfer your delicious energy bites to an airtight container or a zip-top bag. Store them in the refrigerator, where they will stay fresh for up to one week. These bites can also be frozen for longer shelf life, providing a wholesome and convenient snack for busy days ahead.
Expert Tips for No-Bake Peanut Butter Energy Bites
Thick Mixture: Ensure your mixture is thick. If it’s too dry, add 1-2 teaspoons of water or more oat to stretch it.
Chilling Helps: Refrigerating the bites is optional, but it firms them up for a better texture and taste.
Double It Up: This recipe doubles easily—just mix larger quantities and follow the same rolling method for a batch to savor!
Proper Storage: Keep your energy bites in an airtight container in the refrigerator for up to a week for the best freshness.
Flavor Variations: Feel free to experiment! Swap out chocolate chips or add your favorite nuts to customize your No-Bake Peanut Butter Energy Bites.
Make Ahead Options
These No-Bake Peanut Butter Energy Bites are perfect for busy home cooks looking to save time during the week! You can prepare the mixture up to 24 hours in advance by following the initial steps—mixing together the oats, chocolate chips, peanut butter, and honey—then forming them into balls right before serving. To maintain their quality, store them in an airtight container in the refrigerator. If you’re making a batch for later, consider freezing them for up to 3 months; just grab and thaw as needed! Once ready to enjoy, either eat them cold or let them sit at room temperature for a few minutes, and you’ll have deliciously satisfying snacks waiting for you!
How to Store and Freeze No-Bake Peanut Butter Energy Bites
Fridge: Keep your energy bites in an airtight container or a zip-top bag for freshness, and they will stay good for up to 1 week.
Freezer: For longer storage, freeze the energy bites in a single layer on a baking sheet, then transfer to a container. They last up to 3 months when stored properly.
Reheating: Enjoy them straight from the fridge or freezer. If frozen, let them sit at room temperature for a few minutes before indulging for the best texture.
Make-Ahead: These No-Bake Peanut Butter Energy Bites are perfect for meal prep—make a big batch at the start of the week and snack smart all week long!
No-Bake Peanut Butter Energy Bites Variations
Feel free to get creative with these energy bites and make them uniquely yours!
-
Nut-Free Swap:
Replace peanut butter with sunflower seed butter for a delightful nut-free version. The flavor remains rich and creamy! -
Vegan Delight:
Use maple syrup instead of honey for a completely vegan-friendly treat. It’s a sweet swap that retains all the deliciousness. -
Crunchy Texture:
Fold in some chopped nuts or crispy quinoa for added crunch. The little bursts of texture will elevate every bite! -
Flavor Boost:
Add a dash of cinnamon or a splash of vanilla extract to the mixture for an aromatic twist. These flavors can take your bites to a new level. -
Chocolate Lovers:
Swap chocolate chips for white chocolate or peanut butter chips. It’s a delicious way to indulge your sweet tooth! -
Tropical Twist:
Mix in shredded coconut for a refreshing tropical vibe. The coconut’s sweetness complements the peanut butter beautifully, enhancing the overall flavor. -
Fruity Addition:
Toss in chopped dried cranberries or raisins for a sweet-tart experience. The chewy bits add a lovely surprise in each bite. -
Kid-Friendly Shapes:
Use cookie cutters to shape the bites into fun forms for special occasions. A little creativity adds joy, making them more appealing for kids!
Combine these suggestions to make your energy bites even more enjoyable, just like in our Cake Eggnog Buttercream or Butternut Squash Custard. The possibilities are endless!
What to Serve with No-Bake Peanut Butter Energy Bites
Elevate your snacking experience with delightful pairings that complement these nourishing bites beautifully.
- Fresh Fruit Salad: A mix of juicy berries and citrus adds brightness, balancing sweetness while bringing freshness to your snack time.
- Greek Yogurt: Thick and tangy, Greek yogurt offers a creamy contrast that pairs perfectly with the chewy texture of the energy bites.
- Trail Mix: A handful of mixed nuts and dried fruits diversifies flavors and textures, creating an energizing balance alongside the peanut butter bites.
- Nut Butter Smoothie: Blend up a creamy smoothie with bananas and almond milk for a refreshing beverage that echoes the rich taste of peanut butter.
- Calming Herbal Tea: The warmth and gentle aromas of chamomile or mint tea provide a soothing accompaniment, great for an afternoon treat.
- Dark Chocolate Squares: Indulge your sweet tooth with a couple of dark chocolate pieces, complementing the bites with a hint of extra richness.
- Whole Grain Crackers: Serve crunchy whole grain crackers to add a satisfying bite and the perfect base for spreading extra peanut butter or toppings.
- Honeyed Ricotta Toast: Spread light ricotta on toasted bread, drizzle with honey, and serve alongside for a deliciously sweet and creamy pairing.
- Oatmeal Cup: A warm bowl of oatmeal topped with fruit mirrors the hearty oats in the energy bites and rounds out your healthy snack spread!
- Iced Coffee: Pair with a refreshing iced coffee for an energizing lift, perfect for those busy mornings or afternoons when you need a little boost.
No-Bake Peanut Butter Energy Bites Recipe FAQs
What kind of peanut butter should I use?
Absolutely! For the best flavor and texture, I recommend using creamy peanut butter. However, if you’re looking for a nut-free option, almond butter works beautifully as well. Just be sure to select one that is natural without added sugar or oils for the healthiest choice!
How should I store these energy bites?
To keep your No-Bake Peanut Butter Energy Bites fresh, store them in an airtight container or zip-top bag in the refrigerator for up to one week. If you prefer longer-lasting snacks, you can also freeze them; just be sure to place them in a single layer on a baking sheet before transferring them to a container to prevent sticking.
Can I freeze No-Bake Peanut Butter Energy Bites?
Yes, you can! For freezing, I suggest placing the energy bites on a baking sheet in a single layer and freezing for about 1-2 hours or until solid. After that, transfer them to an airtight container or zip-top bag. They’ll last in the freezer for up to 3 months. Whenever you’re ready for a snack, simply grab one and enjoy it straight from the freezer or let it sit at room temperature for a few minutes to soften slightly.
What if my mixture is too dry?
Very good question! If your mixture seems too dry, no worries! You can easily adjust it by adding 1-2 teaspoons of water or an extra tablespoon of honey or peanut butter to achieve the sticky consistency you desire. Keep mixing until everything comes together nicely.
Are these energy bites suitable for kids with nut allergies?
Definitely! You can make these No-Bake Peanut Butter Energy Bites allergy-friendly by substituting the peanut butter with sunflower seed butter or soy nut butter. Both options provide a similar texture and taste without the nuts, making them safe for those with nut allergies.
How long does it take to prepare these energy bites?
These delicious snacks take just 5 minutes to prepare! Plus, if you refrigerate them, that adds only about 30 minutes more for improved texture. So, you can whip these up quickly and have a healthy treat ready in no time!
No-Bake Peanut Butter Energy Bites for Quick, Healthy Snacking
Ingredients
Equipment
Method
- In a medium mixing bowl, add 1 cup of oats and ½ cup of chocolate chips. Stir well with a sturdy spoon to ensure the chocolate is evenly distributed.
- Now, scoop in ½ cup of creamy peanut butter and pour in ¼ cup of honey. Mix thoroughly until a cohesive, thick, and sticky dough forms.
- Using a 1-tablespoon scoop, portion out the peanut butter mixture and roll them into bite-sized balls with your hands.
- Place the energy bites on a parchment-lined plate or tray and refrigerate for approximately 30 minutes.
- Once chilled, transfer your energy bites to an airtight container or a zip-top bag. Store them in the refrigerator.
Leave a Reply