
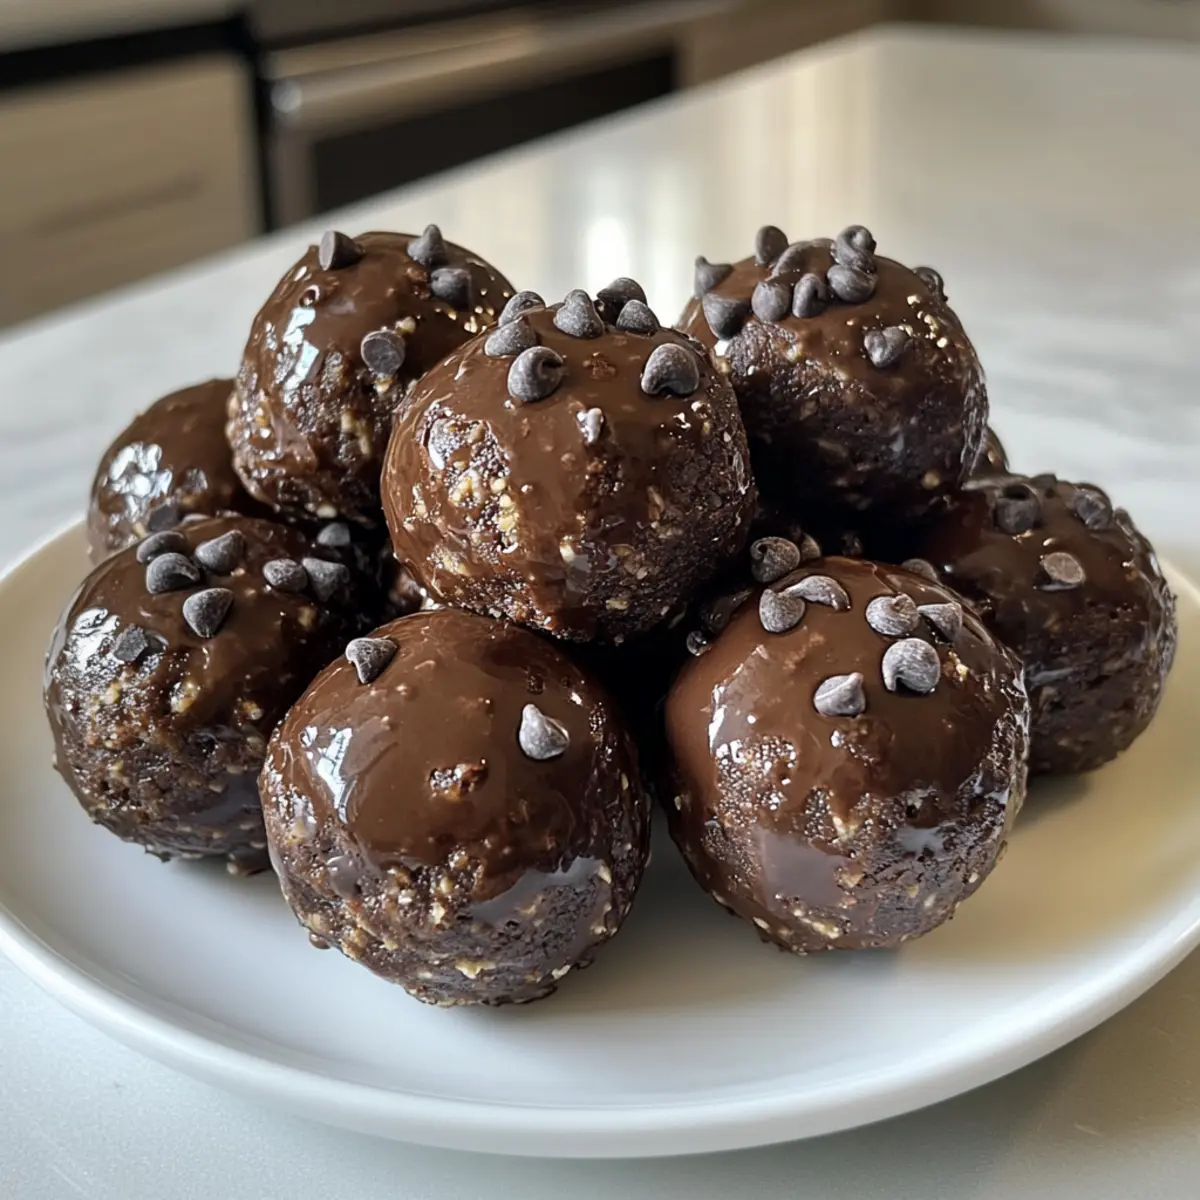
As I stared into my pantry one afternoon, I pondered how to satisfy my chocolate cravings while still staying on track with my health goals. That’s when I stumbled upon the magic of No-Bake Cottage Cheese Brownie Batter Protein Balls. This delightful recipe pairs creamy cottage cheese with rich cocoa and almond flour, transforming ordinary ingredients into a sensational snack that boasts 6 grams of protein per ball. Not only are they quick to whip up—perfect for those busy days—but they’re also freezer-friendly, making it easy to have a delicious treat at hand whenever you need a boost. Trust me, whether you’re looking for a post-workout snack or a sweet addition to your lunchbox, these protein balls will make your taste buds dance with joy! Are you ready to dive into the world of guilt-free indulgence?
Why Are These Protein Balls So Irresistible?
Health-Conscious Enjoyment: These No-Bake Cottage Cheese Brownie Batter Protein Balls are your delicious solution to guilt-free snacking.
Nutritious Ingredients: Packed with 6 grams of protein, they provide energy and satisfaction without the heaviness of traditional sweets.
Quick and Easy: With minimal prep time, this simple recipe is perfect for busy lifestyles.
Versatile Options: Feel free to customize with various substitutes or flavor variations, like adding almond butter or using agave syrup for sweetness.
Perfect for Any Occasion: Whether you need a pre-workout boost, a kid-friendly treat for lunchboxes, or something sweet for momentarily indulgence, these protein balls offer endless appeal.
No-Bake Cottage Cheese Brownie Batter Protein Balls Ingredients
For the Base
- Cottage Cheese – Adds protein and creaminess; Greek yogurt can be a great substitution, though it may change the texture slightly.
- Peanut Butter – Provides healthy fat and a delicious flavor; almond or sun butter works well for nut-free options.
- Maple Syrup – Sweetens the mixture naturally; consider using honey or agave syrup if you prefer a different sweetness.
- Vanilla Extract – Enhances the overall flavor; for a nutty hint, almond extract is a delightful substitute.
For the Chocolate Flavor
- Chocolate Protein Powder – Infuses protein and chocolate taste; feel free to switch to vanilla protein powder for a different flavor.
- Cocoa Powder – Provides that rich chocolate flavor; carob powder is a caffeine-free alternative if desired.
For Structure
- Almond Flour – Gives the protein balls their necessary structure; oat flour is a great gluten-free option if needed.
- Salt – Balances the sweetness; using sea salt can enhance the flavors, or omit it entirely if you prefer.
Optional Additions
- Chocolate Chips (for dipping) – Adds a chocolaty finish; dark chocolate can be used for a richer taste.
- Coconut Oil (for melting) – Helps to coat the balls in chocolate; butter or ghee are viable dairy options if preferred.
Step‑by‑Step Instructions for No-Bake Cottage Cheese Brownie Batter Protein Balls
Step 1: Blend the Base Ingredients
In a food processor, combine 1 cup of cottage cheese, 1/4 cup of peanut butter, 1/4 cup of maple syrup, and 1 teaspoon of vanilla extract. Blend these ingredients until you achieve a smooth, creamy texture, which should take about 30 seconds. Make sure there’s no cottage cheese clump remaining, as this will help ensure a delightful consistency in your No-Bake Cottage Cheese Brownie Batter Protein Balls.
Step 2: Mix in the Dry Ingredients
Next, add 1 scoop of chocolate protein powder, 1/4 cup of cocoa powder, 1/2 cup of almond flour, and a pinch of salt to the blended mixture. Pulse the food processor until a thick, cohesive dough forms, which typically takes about 20 seconds. The mixture should be slightly sticky yet moldable; this is the base for your protein balls.
Step 3: Adjust the Dough Consistency
Take a moment to check the texture of your dough. If it’s too dry and crumbly, add a tablespoon of water at a time until it holds together properly. Conversely, if it’s too wet, incorporate additional almond flour—just a tablespoon at a time—until it reaches the perfect consistency for rolling.
Step 4: Form the Protein Balls
Scoop out 1-1.5 tablespoons of the dough and roll it between your palms to form a ball. Place each rolled ball onto a parchment-lined plate, making sure they don’t touch each other to prevent sticking. Aim for about 12 protein balls total. Take time to enjoy the process, as each ball brings you closer to your deliciously rich treats!
Step 5: Chill to Firm Up
Once all the balls are rolled, place the plate in the freezer for about 15 minutes or refrigerate for 30 minutes. This chilling period will help the No-Bake Cottage Cheese Brownie Batter Protein Balls firm up nicely, ensuring they hold their shape when you take a bite.
Step 6: Prepare the Chocolate Dip
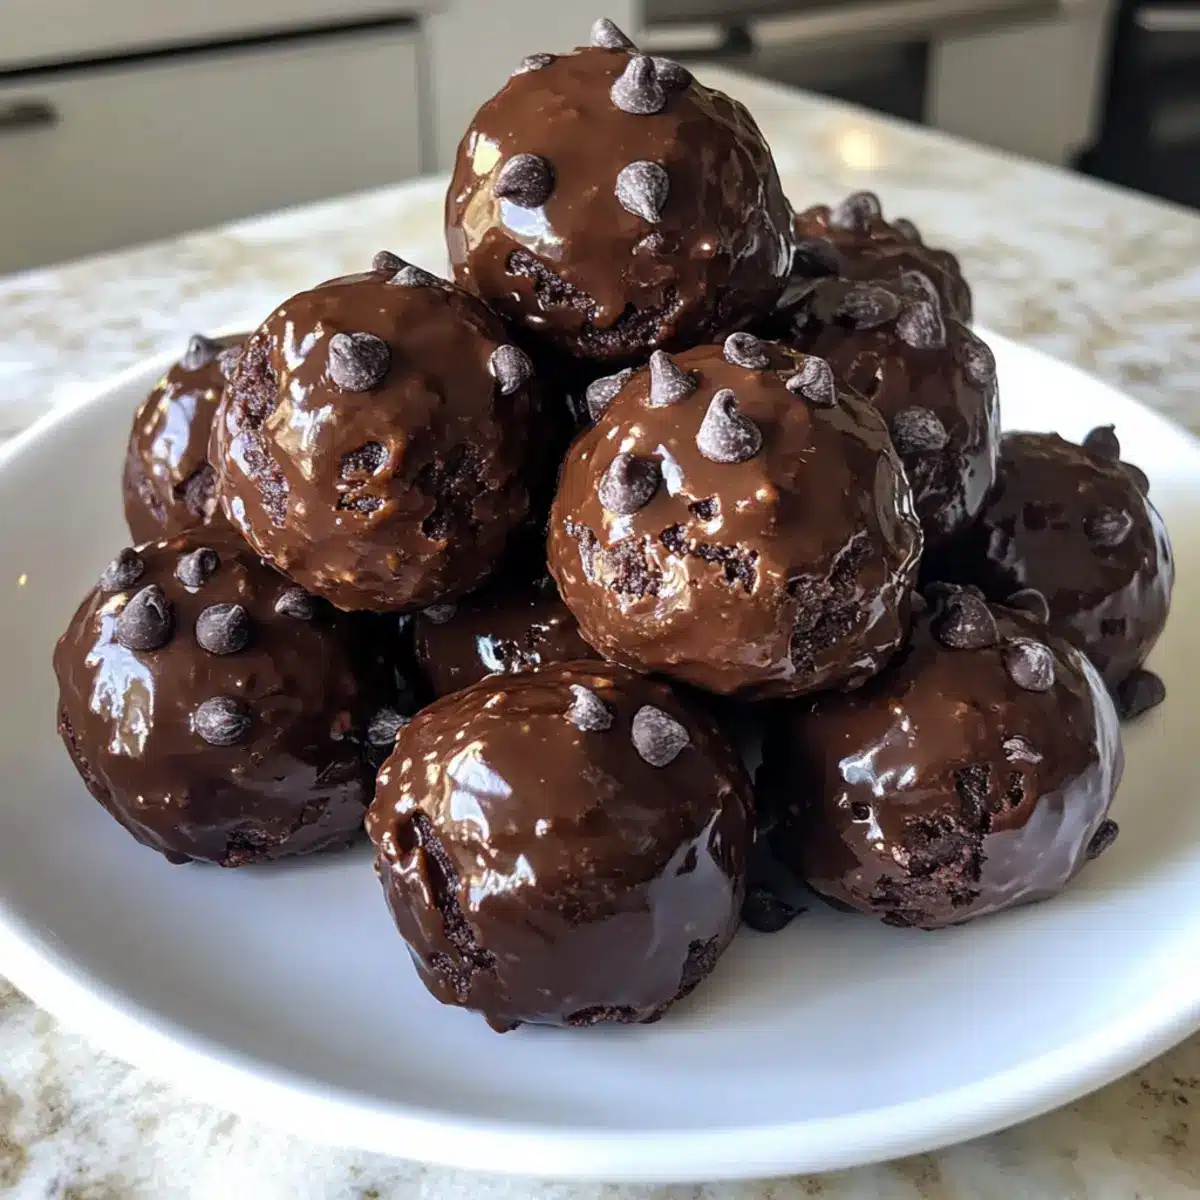
While your protein balls chill, melt 1/2 cup of chocolate chips with 1 tablespoon of coconut oil in a microwave-safe bowl. Heat in 30-second intervals, stirring in between until the mixture is completely smooth and glossy. This blend will ensure a lovely, shiny chocolate coating.
Step 7: Dip and Set the Balls
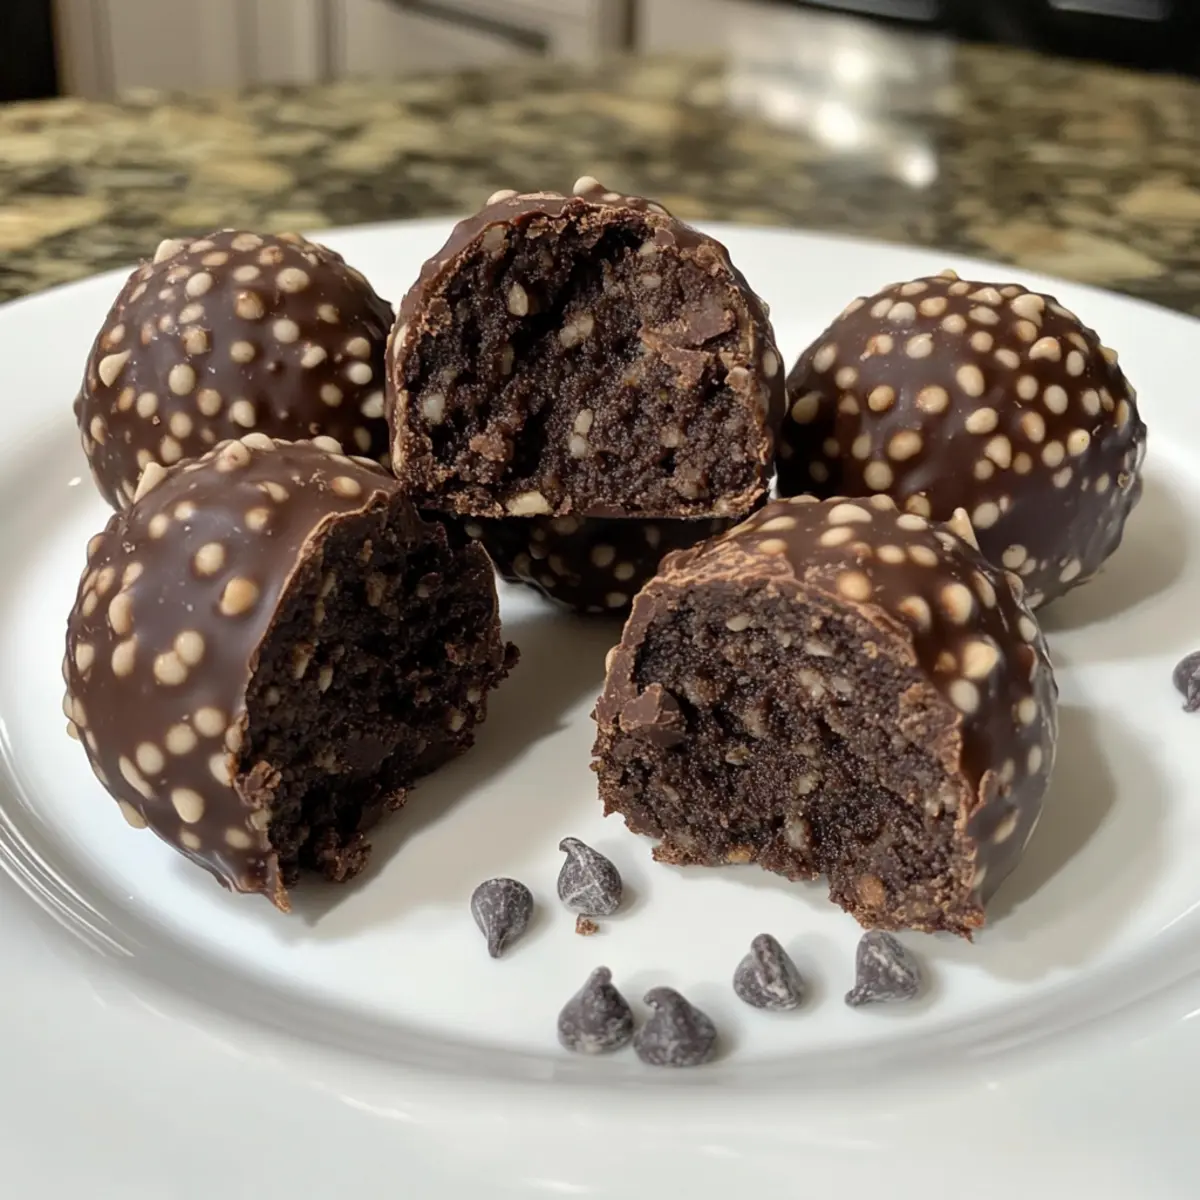
Carefully dip each chilled protein ball into the melted chocolate, allowing the excess to drip off. Place the coated balls back on the parchment-lined plate. Once all balls are dipped, pop them into the refrigerator for an additional 5 minutes to let the chocolate set completely, sealing in that rich flavor.
Step 8: Store Your Protein Balls
After the chocolate has firmed up, transfer your No-Bake Cottage Cheese Brownie Batter Protein Balls to an airtight container. They can be stored in the refrigerator for up to a week or frozen for up to three months, providing you with a delicious and healthy treat ready when you need a snack or energy boost!
Expert Tips for No-Bake Cottage Cheese Brownie Batter Protein Balls
-
Room Temperature Cheese: Make sure your cottage cheese is at room temperature for easier blending and a smoother texture in your protein balls.
-
Avoid Over-blending: Stop blending when the dough comes together to maintain a light and fudgy texture—over-processing leads to a dense end result.
-
Tweaking Consistency: If the dough is too dry, add a tablespoon of water. If it’s too wet, mix in almond flour gradually until it reaches the ideal rolling consistency.
-
Hands-on Helper: Roll the balls with slightly moist hands to avoid sticking, making the process easier and cleaner!
-
Storage Savvy: Store the No-Bake Cottage Cheese Brownie Batter Protein Balls in an airtight container, where they’ll last up to a week in the refrigerator or up to three months in the freezer for a convenient healthy treat.
No-Bake Cottage Cheese Brownie Batter Protein Balls Variations
Don’t be afraid to let your creativity shine—this recipe invites delightful tweaks!
-
Greek Yogurt: Swap out cottage cheese for Greek yogurt for a tangier taste and added creaminess. Perfect if you’re craving a silkier texture!
-
Nut-Free Delight: Use sunflower seed butter or tahini instead of peanut butter, making these protein balls suitable for nut-free diets. They’ll have a unique flavor twist that everyone will love.
-
Natural Sweeteners: Experiment with honey or agave syrup in place of maple syrup. You might find a taste that compliments your palate even better!
-
Flavor Burst: Add a teaspoon of almond extract to give these treats an aromatic and nutty flavor. It’s a little tweak that can transform your protein balls into a gourmet experience!
-
Cocoa Swap: Consider substituting cocoa powder with carob powder for a caffeine-free alternative, still keeping that delicious chocolatey essence.
-
Fruity Twist: Mix in dried fruit like chopped dates or cranberries for sweetness and extra chewiness. They add a burst of flavor with each bite!
-
Extra Crunch: Throw in some finely chopped nuts or seeds to the mixture for an added crunch. This gives each ball a textural boost that makes them even more satisfying!
-
Protein Punch: For a richer protein profile, add a scoop of plant-based protein powder along with the chocolate protein. You will be doubling down on the nourishment while enjoying the same great taste!
Feel free to explore these variations, like incorporating colorful sprinkles from your kid’s last birthday party, or adapting it for festive flavors akin to my Rudolph Cheese Ball for special occasions! The possibilities are endless, just like the joy of snacking on these delicious little balls!
What to Serve with No-Bake Cottage Cheese Brownie Batter Protein Balls
Elevate your snacking experience and create a delightful spread that complements rich, fudgy flavors with these perfectly paired options.
-
Fresh Berries: Their tartness beautifully contrasts the sweetness of the protein balls, adding a refreshing burst of flavor. Enjoying the smooth richness of the brownie bites alongside juicy strawberries or blueberries makes each bite feel extra special.
-
Greek Yogurt Parfait: Layer creamy Greek yogurt with your favorite fruits and granola for a balanced snack. The protein boost from yogurt pairs perfectly, enhancing your health goals while keeping it delicious and satisfying.
-
Crunchy Nut Mix: A handful of crunchy nuts, like almonds or walnuts, adds a satisfying textural contrast. This combination is not only tasty but also elevates your protein intake, making it an ideal pre- or post-workout snack.
-
Dark Chocolate Dipped Banana Slices: A sweet treat that perfectly resonates with the cocoa flavor of the protein balls. The creaminess of banana slices dipped in rich dark chocolate creates an indulgent experience that feels like dessert.
-
Sparkling Water with Citrus: Brighten your palate with a refreshing drink. Sparkling water infused with lemon or lime adds a zesty twist that cleanses the palate, making every bite of your protein balls taste even better.
-
Sweet Potato Chips: Their subtle sweetness and crunch make an enticing contrast to the chewy, fudgy protein balls. Pair these chips for a delightful mix of textures that keeps your snack time interesting and satisfying.
Storage Tips for No-Bake Cottage Cheese Brownie Batter Protein Balls
-
Room Temperature: Keep these protein balls at room temperature for no more than 2 hours; beyond that, they’ll need refrigeration to maintain their freshness.
-
Fridge: Store in an airtight container in the refrigerator for up to 7 days, ensuring they stay delicious and ready for snacking anytime you need a boost.
-
Freezer: For longer storage, freeze your No-Bake Cottage Cheese Brownie Batter Protein Balls for up to 3 months. Just remember to use an airtight container or freezer bag to prevent freezer burn.
-
Reheating: There’s no need to reheat these delightful treats; just grab them straight from the refrigerator or freezer and enjoy them cold for the best experience!
Make Ahead Options
These No-Bake Cottage Cheese Brownie Batter Protein Balls are perfect for meal prep enthusiasts! You can prepare the base (cottage cheese, peanut butter, maple syrup, and dry ingredients) up to 24 hours in advance by storing it in an airtight container in the refrigerator. When you’re ready to enjoy them, simply scoop and roll the dough into balls, then chill to firm up. Don’t forget, you can also melt the chocolate and coconut oil for dipping ahead of time and refrigerate it separately. This way, you’ll have quick access to these fudgy, protein-packed snacks whenever you need them, making healthy snacking a breeze in your busy week!

No-Bake Cottage Cheese Brownie Batter Protein Balls Recipe FAQs
What kind of cottage cheese should I use?
Absolutely! I recommend using small-curd cottage cheese for a smoother texture, but large-curd works as well. Make sure it’s fresh and at room temperature for easier blending.
How long can I store these protein balls in the fridge?
You can safely store the No-Bake Cottage Cheese Brownie Batter Protein Balls in an airtight container in the refrigerator for up to 7 days. Just be sure to keep them sealed to maintain their freshness!
Can I freeze the protein balls, and if so, how?
Very! To freeze your No-Bake Cottage Cheese Brownie Batter Protein Balls, simply place them in an airtight container or freezer bag, separating layers with parchment paper to prevent sticking. They will stay fresh for up to 3 months—perfect for quick snacks!
What should I do if my protein ball mixture is too dry?
If your mixture feels a bit crumbly, don’t worry! Just add a tablespoon of water at a time while mixing until you achieve a thick, moldable dough. This way, you’ll get the perfect consistency to roll those yummy balls!
Are these protein balls suitable for those with nut allergies?
Definitely! If nuts are a concern, you can easily substitute peanut butter with sun butter or soy nut butter. These alternatives still offer a delicious flavor while keeping it nut-free. Plus, you can swap out the chocolate chips for carob chips for a caffeine-free chocolaty touch!
Can I use a different type of sweetener besides maple syrup?
Of course! If you’re looking for a different sweetness, honey or agave syrup can be great substitutes for maple syrup in this recipe. Just remember to adjust the quantity if needed, as these sweeteners may vary in sweetness levels.
Indulge Guilt-Free: No-Bake Cottage Cheese Brown Protein Balls
Ingredients
Equipment
Method
- Blend the Base Ingredients in a food processor until smooth, about 30 seconds.
- Mix in the Dry Ingredients and pulse until a thick dough forms, about 20 seconds.
- Adjust the Dough Consistency if needed by adding water or almond flour until perfect.
- Form the Protein Balls by scooping 1-1.5 tablespoons of dough and rolling into balls.
- Chill to Firm Up in the freezer for 15 minutes or refrigerate for 30 minutes.
- Prepare the Chocolate Dip by melting chocolate chips with coconut oil in intervals until smooth.
- Dip and Set the Balls in the melted chocolate, then refrigerate for 5 minutes.
- Store Your Protein Balls in an airtight container for up to a week in the fridge or three months in the freezer.
Leave a Reply