
One warm afternoon, as I rummaged through the pantry searching for a sweet remedy, I stumbled upon a jar of peanut butter and a pack of Oreo cookies. My heart raced with excitement—what if I combined these favorites into a dreamy No-Bake Chocolate Peanut Butter Pie? This recipe is a celebration of everything we love about desserts—rich, creamy, and effortlessly easy to whip up! Not only does it save you from turning on the oven, but it’s also a guaranteed crowd-pleaser that will impress friends at any gathering. As you layer the silky peanut butter cheesecake over a crunchy crust, you’ll find it’s the perfect fix for your sweet tooth without the hassle of baking. Curious about creating this irresistible treat? Let’s dive in together!
Why is this pie so irresistible?
Indulgent Flavor: Creamy peanut butter meets rich chocolate in a perfect harmony, making every bite a heavenly experience.
Effortless Preparation: Thanks to its no-bake nature, there’s no need to fuss over ovens or baking times—just mix, chill, and enjoy!
Customizable: With options like crunchy peanut butter or alternative crusts, this pie adapts to your preferences while maintaining its delicious charm.
Crowd Favorite: Its rich, creamy texture and decadent layers will win over any gathering, making it a sure hit at parties or family dinners.
Quick Chill Time: While it takes just a little time to set, the flavor depth keeps guests coming back for more, ensuring that this pie will become a staple of your dessert repertoire. If you love desserts that are easy yet impressive, you might also enjoy our Mini Chocolate Lava for a fun twist!
No-Bake Chocolate Peanut Butter Pie Ingredients
For the Crust
- Oreo cookies – Base for the crust; no need to remove cream filling as it adds moisture.
- Brown sugar – Sweetness and moisture for the crust; can substitute with white sugar if necessary.
- Unsalted butter – Binds the crust ingredients; melt before mixing.
For the Cheesecake Layer
- Cream cheese – Forms the cheesecake layer; use full-fat for optimal creaminess.
- Heavy cream – Adds richness to the cheesecake; can be replaced with whipped topping for a lighter version.
- Salt – Enhances flavor; use fine sea salt for even distribution.
- Milk powder – Provides creaminess and stability; can be omitted if necessary.
- Powdered sugar – Sweetens the filling; adjust quantity based on your sweetness preference.
- Vanilla extract – Flavor enhancer; opt for pure vanilla for the best results.
- Peanut butter – Main flavor component of the cheesecake; natural peanut butter works well.
For the Ganache
- Dark chocolate – Base for the ganache; using high-quality chocolate elevates the flavor.
- Heavy cream – Combines with dark chocolate to create a silky ganache; use fresh for the best texture.
For the Topping
- Caster sugar – Sweetens the whipped cream; adjust according to taste or omit.
- Salted peanuts – Decorative and adds crunch; optional substitute with unsalted if preferred.
- Peanut butter chips – Decorative topping; can be exchanged for chocolate chips.
- Mini peanut butter cups – Decorative delight; you can use any chocolate candies instead.
This No-Bake Chocolate Peanut Butter Pie will undoubtedly satisfy your sweet cravings while being simple to prepare. Gather your ingredients, and let’s bring this rich dessert to life!
Step‑by‑Step Instructions for No-Bake Chocolate Peanut Butter Pie
Step 1: Make the Crust
Start by crushing around 24 Oreo cookies into fine crumbs using a food processor or by placing them in a ziplock bag and rolling over them with a rolling pin. Combine the crumbs with ¼ cup of brown sugar and ½ cup of melted unsalted butter until fully mixed. Press this mixture firmly into the bottom and up the sides of a tart dish. Chill the crust in the refrigerator for 30 minutes to set.
Step 2: Prepare the Cheesecake Layer
In a large mixing bowl, beat 1 cup of softened cream cheese using an electric mixer until creamy and smooth, about 2 minutes. Gradually add in 1 cup of heavy cream, ½ teaspoon of salt, and 1 teaspoon of vanilla extract, mixing until well combined. Slowly incorporate ½ cup of powdered sugar, 2 tablespoons of milk powder, and 1 cup of peanut butter. Mix until thick and smooth, and then spoon this luscious peanut butter cheesecake filling into your chilled crust.
Step 3: Make the Ganache
In a microwave-safe bowl, combine 8 ounces of dark chocolate (chopped) with ½ cup of heavy cream. Heat in the microwave at 30-second intervals, stirring after each session, until the chocolate is fully melted and combines into a silky ganache. This should take about 1-2 minutes. Once smooth, carefully pour the ganache over the cheesecake layer, ensuring an even coating. Return the pie to the fridge for another 30 minutes to set.
Step 4: Whip the Cream
While your No-Bake Chocolate Peanut Butter Pie chills, prepare the whipped cream. In a chilled mixing bowl, whip 1 cup of heavy cream with 2 tablespoons of caster sugar and another teaspoon of vanilla extract until stiff peaks form. This process usually takes about 3-5 minutes using a hand mixer. Keep the whipped cream in the refrigerator until you’re ready to assemble the pie.
Step 5: Assemble and Decorate
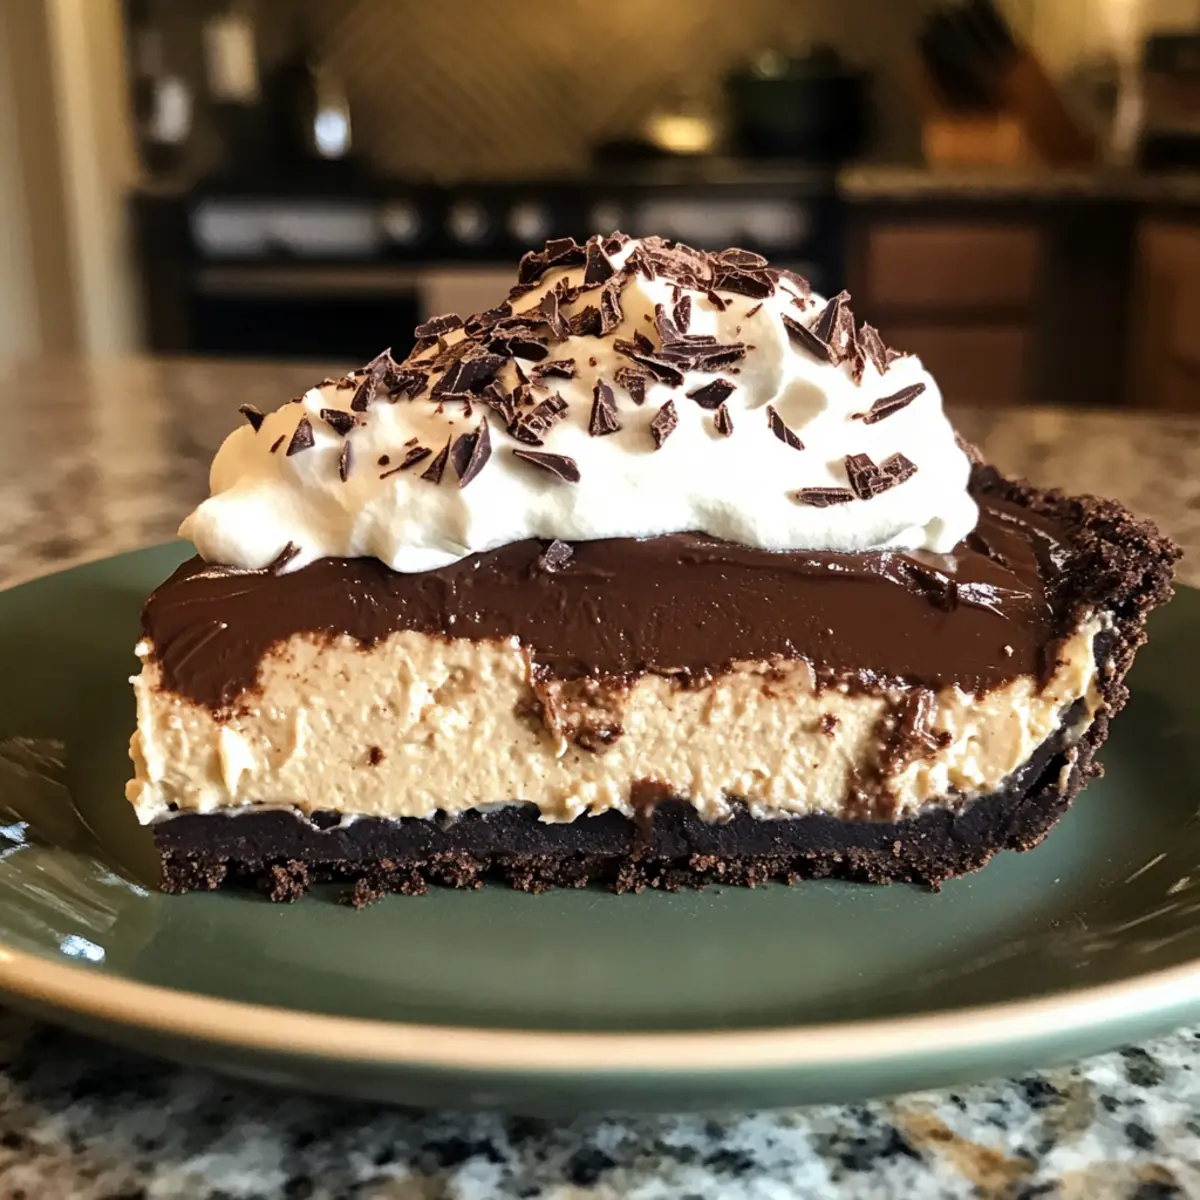
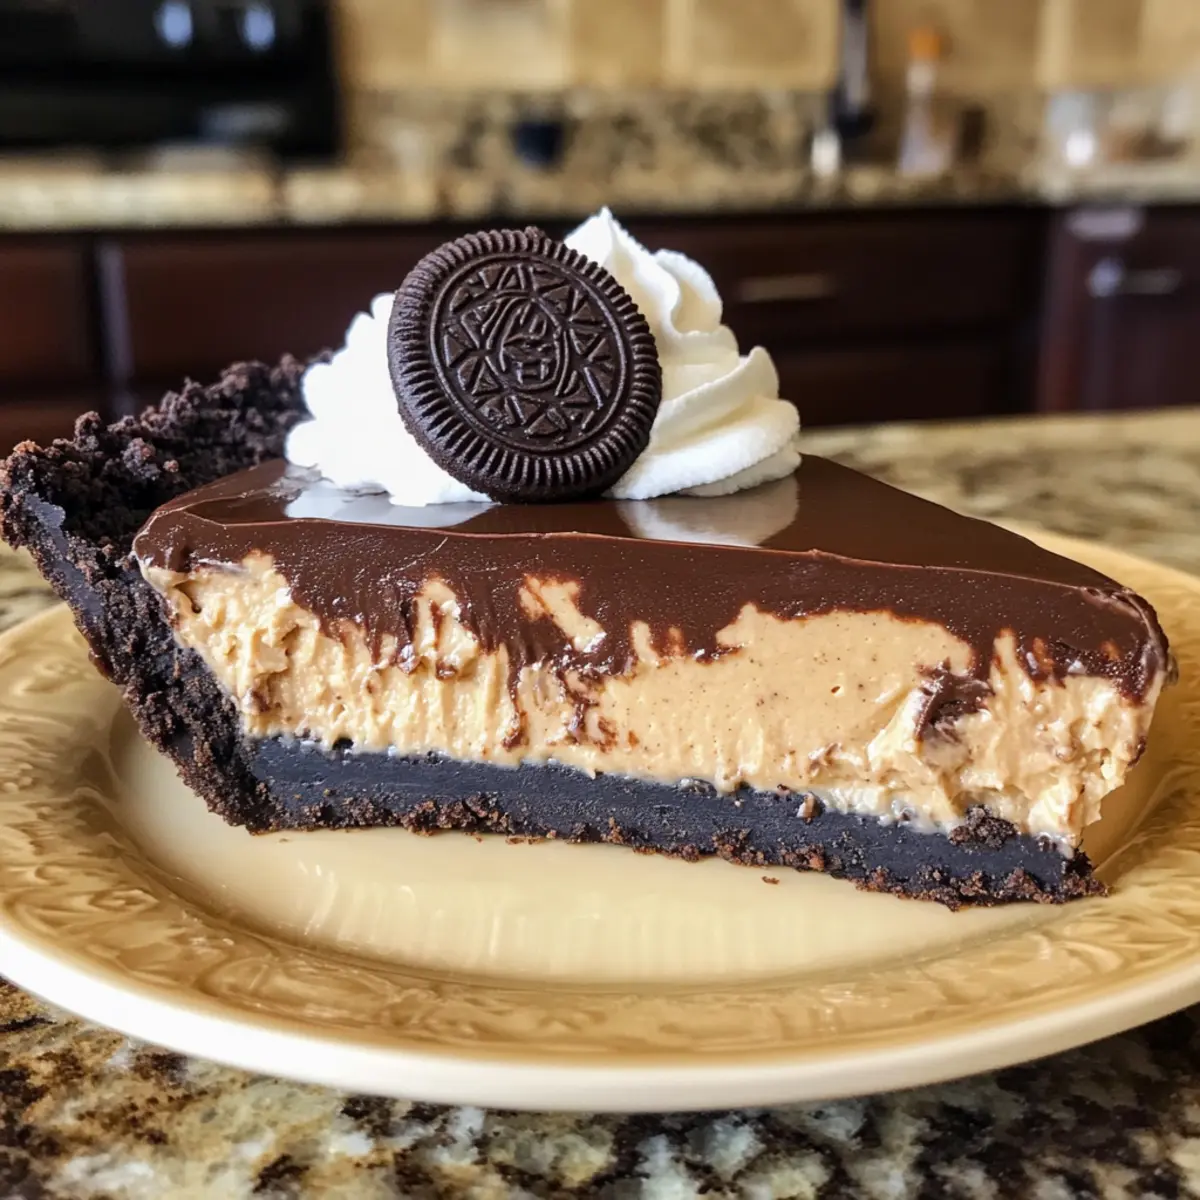
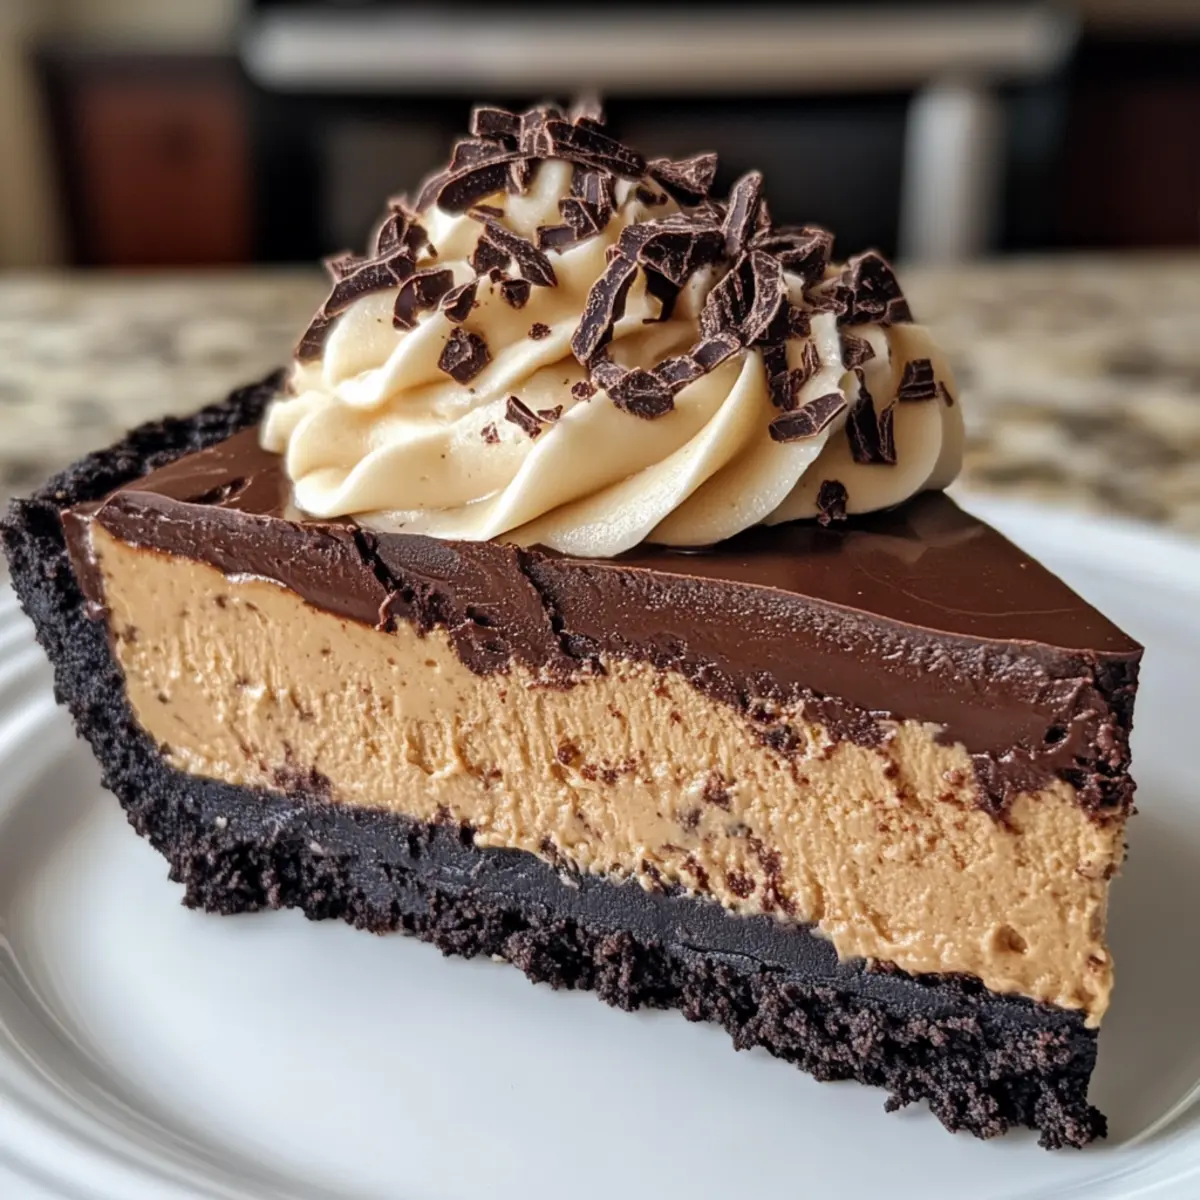
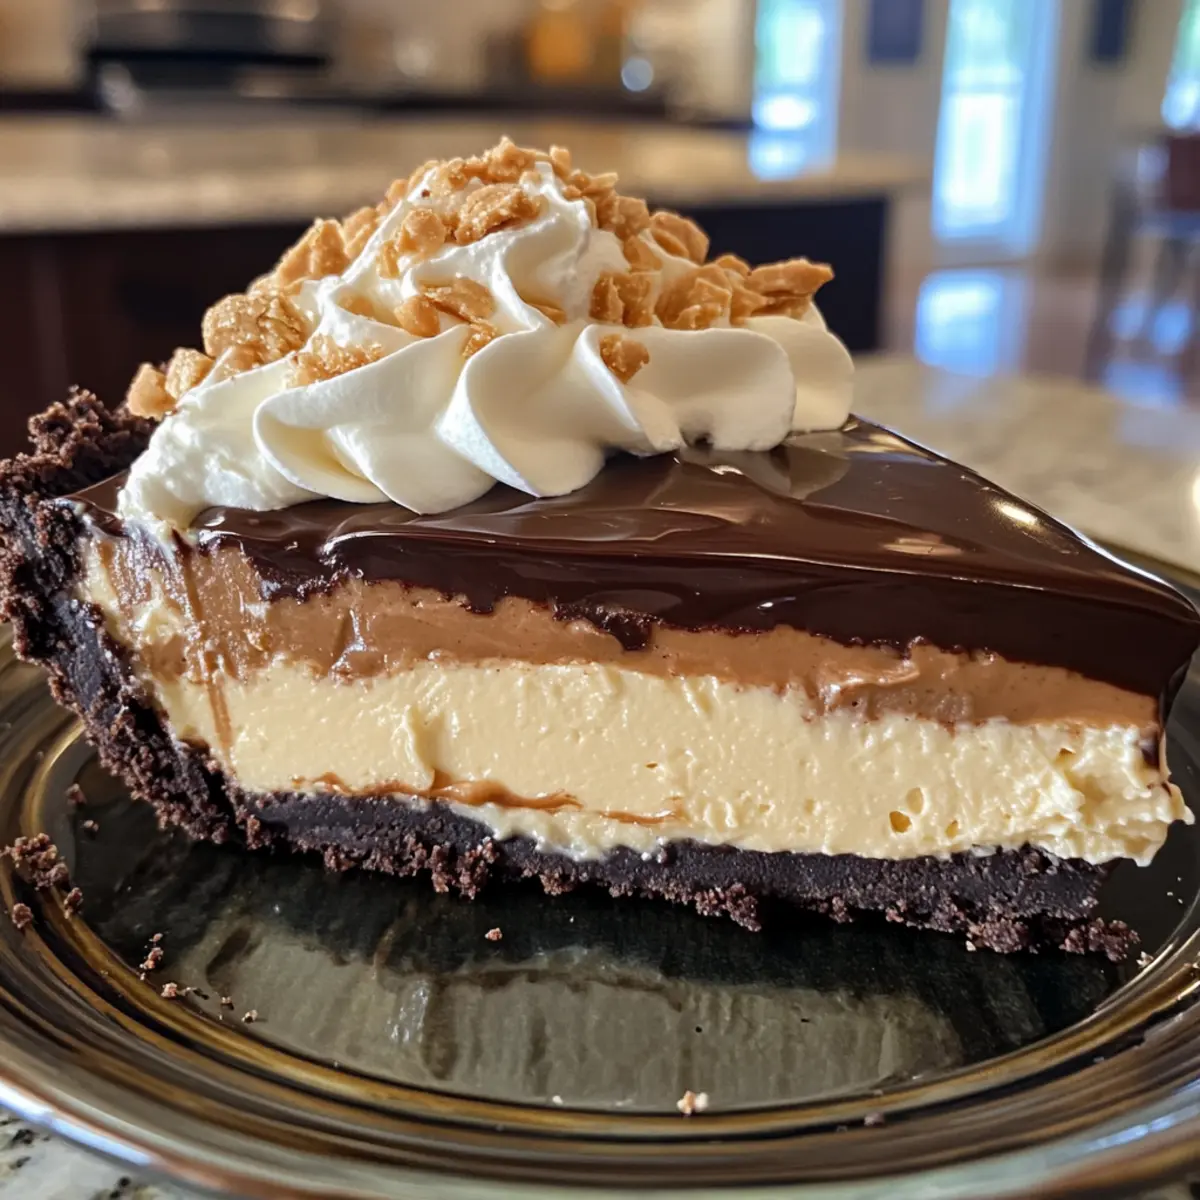
Once the ganache is set, take the pie out of the fridge and gently spread the whipped cream over the top, creating a smooth, fluffy layer. For an added crunch, sprinkle with roughly chopped salted peanuts and drizzle melted peanut butter chips or chocolate over the whipped cream. Finish with decorative mini peanut butter cups for a delightful touch.
Step 6: Serve
Slice your beautiful No-Bake Chocolate Peanut Butter Pie into pieces and serve chilled. Each layer showcases a blend of creamy cheesecake, rich ganache, and a crunchy crust that will be a hit at any gathering. Enjoy all the delicious layers with family and friends!
How to Store and Freeze No-Bake Chocolate Peanut Butter Pie
Fridge: Store the pie in an airtight container in the refrigerator for up to 3 days. This preserves its creamy texture and flavor.
Freezer: If you want to keep it longer, wrap the pie tightly in plastic wrap and then in aluminum foil. It can be frozen for up to 2 months.
Thawing: To enjoy, transfer the pie to the fridge and let it thaw overnight before serving. This way, the texture remains delightful.
Reheating: There’s no need to reheat this No-Bake Chocolate Peanut Butter Pie; simply slice and serve chilled for the best experience!
What to Serve with No-Bake Chocolate Peanut Butter Pie
Pairing this delightful dessert with complementary flavors and textures will elevate your meal experience. Each option below enhances the indulgent layers of chocolate and peanut butter, creating a feast that’s not just delicious but truly memorable.
-
Fresh Berries: Juicy strawberries or raspberries provide a tart contrast that balances the richness of the pie. Their vibrant color also adds a beautiful touch to your dessert presentation.
-
Coffee: A smooth cup of coffee is a classic pairing that enriches the flavors of chocolate and peanut butter, enhancing your overall enjoyment of this delightful treat.
-
Vanilla Ice Cream: Creamy vanilla ice cream creates a luscious contrast, while its cold temperature is a refreshing addition to the rich pie. Each spoonful is a blissful combination.
-
Chocolate Drizzle: A simple drizzle of melted dark chocolate on your serving plate enhances both presentation and flavor. It adds an elegant touch that fellow dessert lovers will adore.
-
Whipped Cream: For an extra touch of indulgence, top individual slices with freshly whipped cream. This light, airy element complements the dense cheesecake layer beautifully.
-
Mint Leaves: A few fresh mint leaves not only brighten up the plate visually but also add a refreshing herbal note that cuts through the richness of the pie.
-
Nutty Granola: A handful of crunchy granola sprinkled on top brings an exciting texture to each bite, enhancing your pie experience. Its nutty flavors pair harmoniously with the peanut richness.
-
Sparkling Water: For a light and refreshing beverage, serve sparkling water with a slice of lemon. It cleanses the palate between rich bites of pie, making the meal feel lighter.
Make Ahead Options
These No-Bake Chocolate Peanut Butter Pie components are perfect for meal prep, saving you time on busy days! You can prepare both the crust and cheesecake layer up to 24 hours in advance. Simply make the crust by mixing the crushed Oreo cookies, brown sugar, and melted butter, then press it into your tart dish and chill. For the cheesecake layer, mix the ingredients and fill the crust, covering tightly with plastic wrap to prevent air exposure. When it’s time to enjoy, just add the chocolate ganache and whipped cream topping right before serving—this way, everything remains fresh and just as delicious. Storing the assembled pie in the refrigerator, it will stay tasty for up to 3 days, making it a stress-free dessert option!
Expert Tips for No-Bake Chocolate Peanut Butter Pie
-
Chill Properly: Ensure each layer is adequately chilled before adding the next. This prevents mixing and maintains distinct layers.
-
Cream Cheese Consistency: Soften cream cheese thoroughly for a smooth cheesecake layer. This avoids lumps, giving your No-Bake Chocolate Peanut Butter Pie a creamy texture.
-
Whipping Cream: Beat heavy cream until stiff peaks form; this provides a stable topping that won’t deflate, keeping the pie looking plush.
-
Crust Pressure: When pressing the crust into the dish, apply firm pressure to avoid a crumbly base. A flat-bottomed glass can help compact it evenly.
-
Layering Technique: Pour the ganache gently to avoid disturbing the cheesecake layer beneath. Spreading slowly ensures a clean, attractive finish.
-
Decorative Touch: For a stunning presentation, pipe the whipped cream on top using a star tip, creating an elegant swirl that elevates your No-Bake Chocolate Peanut Butter Pie.
No-Bake Chocolate Peanut Butter Pie Variations
Feel free to mix things up and create your dream version of this delightful pie, as the possibilities are endless!
- Crunchy Texture: Swap smooth peanut butter for crunchy peanut butter for an added texture that brings delightful bites of peanut throughout.
- Alternative Crust: Try a chocolate graham cracker crust instead of Oreos for a deliciously unique flavor twist.
- Decadent Topping: Add a drizzle of caramel sauce on top for added sweetness and a beautiful presentation that will tantalize your taste buds.
- Different Chocolates: Use milk chocolate in place of dark chocolate for a sweeter ganache that’s perfect for those with a sweeter tooth.
Imagine the irresistible taste of creamy milk chocolate enveloping your cheesecake—pure bliss! - Vegetarian-Friendly: Opt for vegan cream cheese and coconut cream in place of heavy cream to make this pie suitable for plant-based diets without sacrificing flavor.
- Nut Butter Flavors: Substitute peanut butter with almond butter or sunflower seed butter for a nutty flavor that’s equally scrumptious!
- Flavorful Extras: Boost the flavor by adding chocolate shavings or a sprinkle of sea salt on top before serving for that chef’s touch.
- Serving Suggestions: Pair slices of this luscious pie with a cup of coffee or a scoop of vanilla ice cream for a truly decadent dessert experience. You may enjoy our Sweet Potato Butter alongside it!
Each twist allows you to create a delightful new experience, ensuring that no two pies are ever the same!
No-Bake Chocolate Peanut Butter Pie Recipe FAQs
How do I select the best peanut butter for this recipe?
Absolutely! For the richest flavor, I recommend using natural peanut butter that contains only peanuts and salt; it tends to have a great creamy texture. If you prefer a stronger peanutty flavor and a bit of crunch, you could opt for crunchy peanut butter instead.
What’s the best way to store leftovers?
To keep your No-Bake Chocolate Peanut Butter Pie fresh, store it in an airtight container in the refrigerator for up to 3 days. This helps maintain the creamy texture and rich flavors, so you can enjoy those delicious layers over a few days.
Can I freeze my No-Bake Chocolate Peanut Butter Pie?
Very! To freeze, wrap the pie tightly in plastic wrap, then cover it with aluminum foil to protect it from freezer burn. It can be kept in the freezer for up to 2 months. When you’re ready to indulge, just transfer it to the fridge and let it thaw overnight before serving.
Why did my ganache not come out smooth?
If your ganache isn’t smooth, it may have been overheated or not stirred enough. For a smooth result, melt the chocolate and cream together carefully in the microwave, heating in short intervals of 30 seconds while stirring until fully combined. If it appears grainy, adding a splash of warm heavy cream can help restore its silky texture.
Are there any diet considerations for this pie?
This delightful No-Bake Chocolate Peanut Butter Pie is rich and indulgent, but if you’re concerned about allergies, it contains dairy and peanuts, making it unsuitable for those with lactose intolerance or nut allergies. For a lighter alternative, consider using whipped topping instead of heavy cream and low-fat cream cheese for a healthier twist.
How can I enhance flavor or presentation?
I often make variations with toppings like chocolate shavings, caramel drizzle, or fresh fruit for a burst of flavor and added visual appeal. Piping the whipped cream on top with a star tip not only looks elegant but also gives guests a delightful surprise with each slice!
Irresistible No-Bake Chocolate Peanut Butter Pie Bliss
Ingredients
Equipment
Method
- Crush around 24 Oreo cookies into fine crumbs and combine with 1/4 cup of brown sugar and 1/2 cup of melted unsalted butter. Press into a tart dish and chill for 30 minutes to set.
- In a large bowl, beat 1 cup of softened cream cheese until creamy. Gradually add in 1 cup of heavy cream, 1/2 teaspoon of salt, and 1 teaspoon of vanilla extract. Mix well, then incorporate 1/2 cup of powdered sugar, 2 tablespoons of milk powder, and 1 cup of peanut butter. Spoon the filling into the chilled crust.
- Combine 8 ounces of chopped dark chocolate with 1/2 cup of heavy cream in a microwave-safe bowl. Heat in 30-second intervals until melted and smooth. Pour over the cheesecake layer and chill for 30 minutes to set.
- Whip 1 cup of heavy cream with 2 tablespoons of caster sugar and 1 teaspoon of vanilla extract until stiff peaks form. Keep chilled until ready.
- Spread the whipped cream over the ganache, sprinkle with chopped salted peanuts, and drizzle melted peanut butter chips or chocolate over the top. Finish with mini peanut butter cups.
- Slice the pie into pieces and serve chilled, showcasing the layers of creamy cheesecake, rich ganache, and crunchy crust.
Leave a Reply