
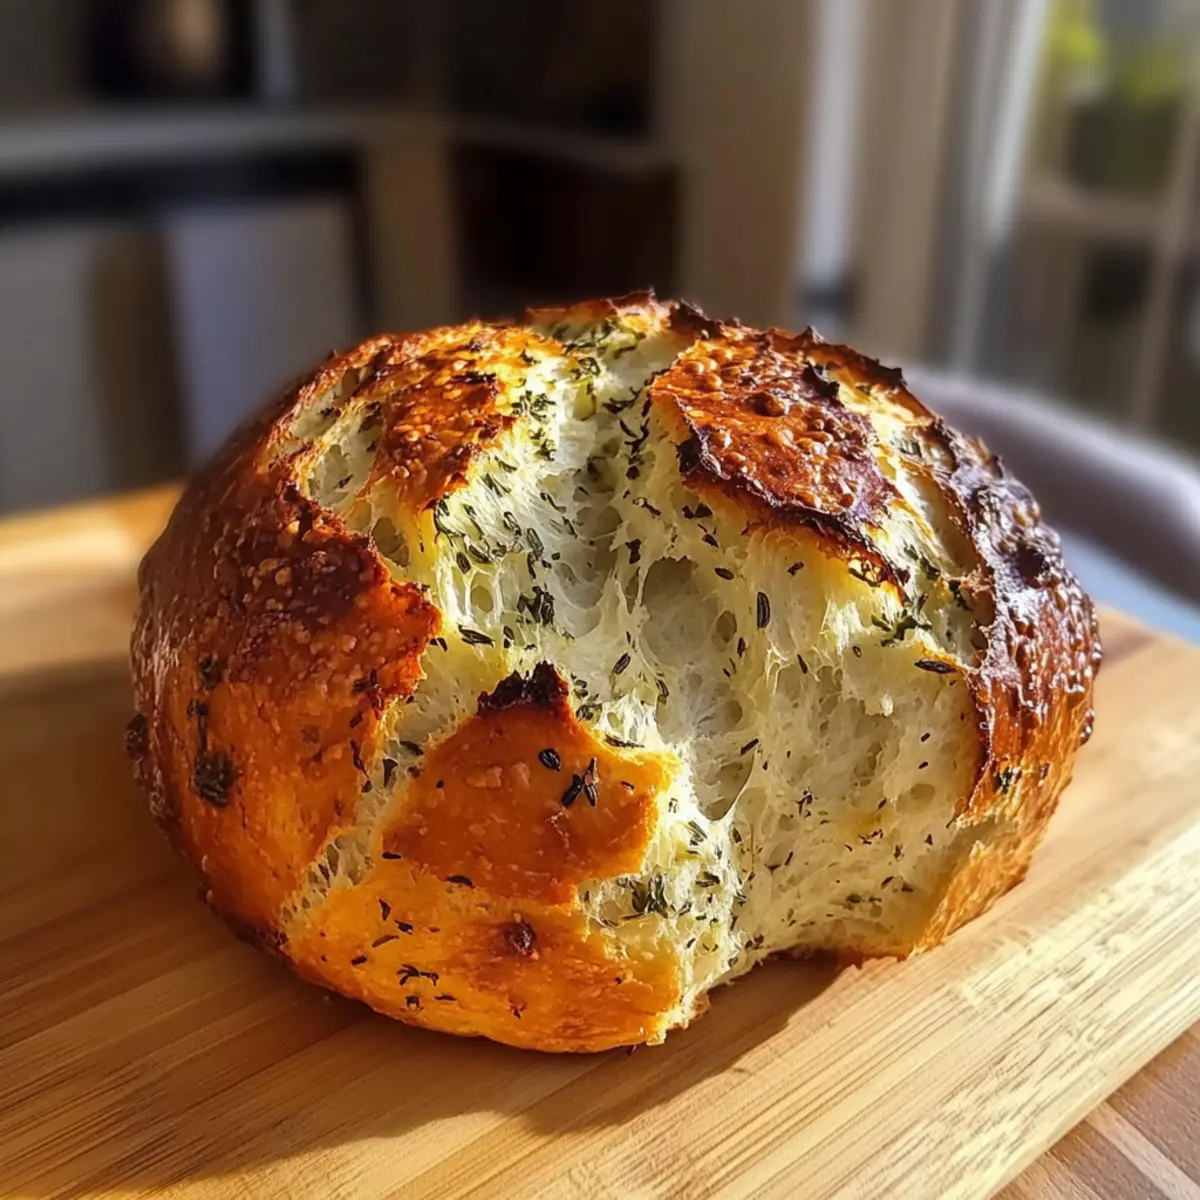
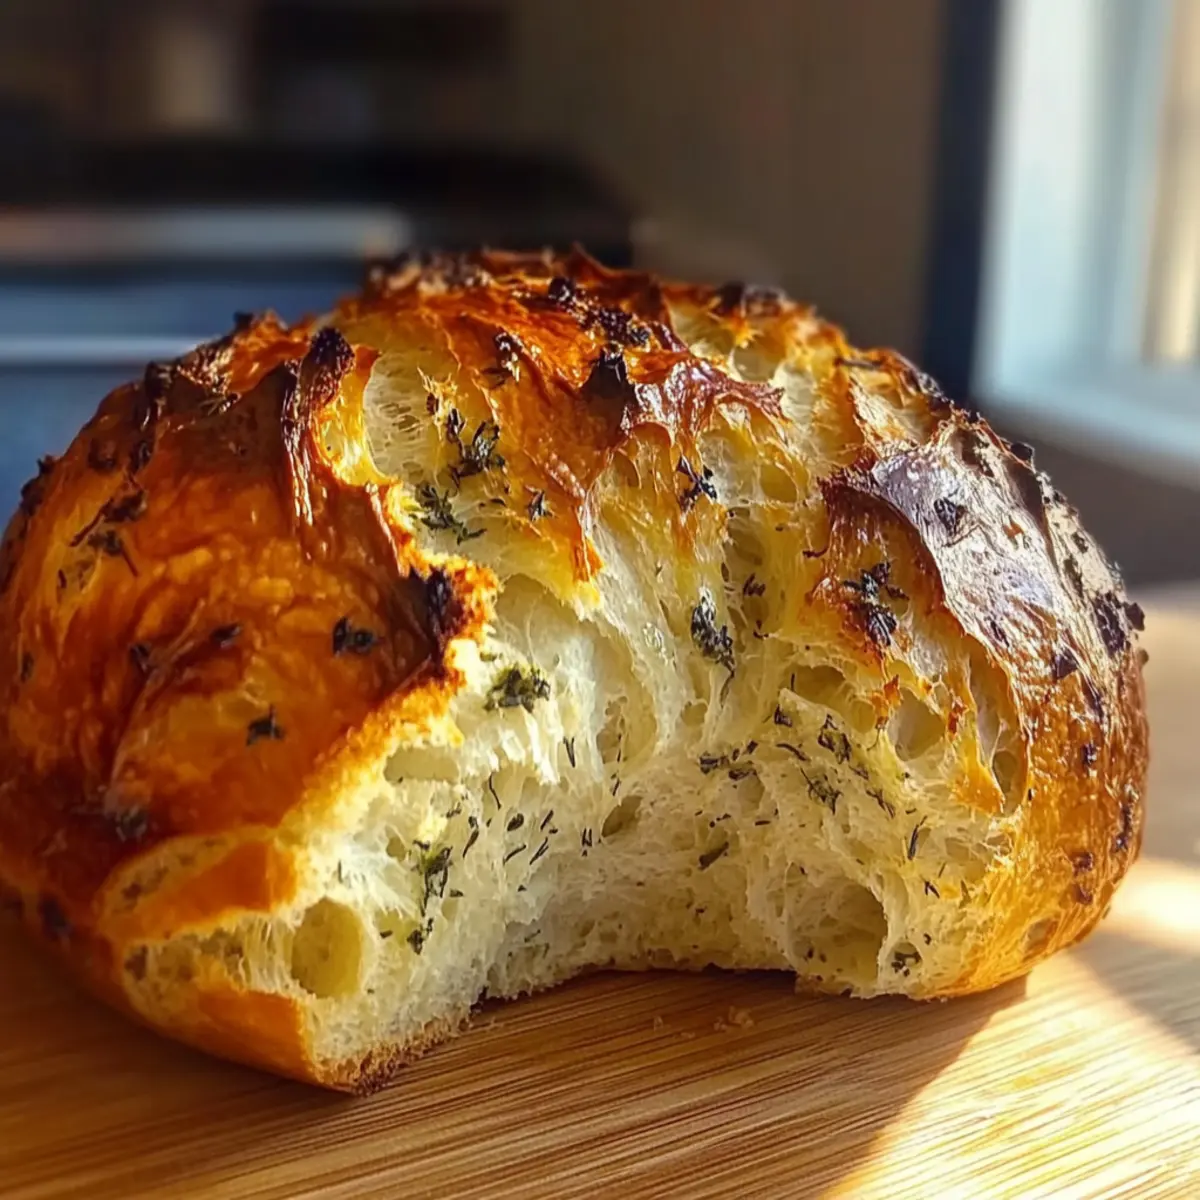
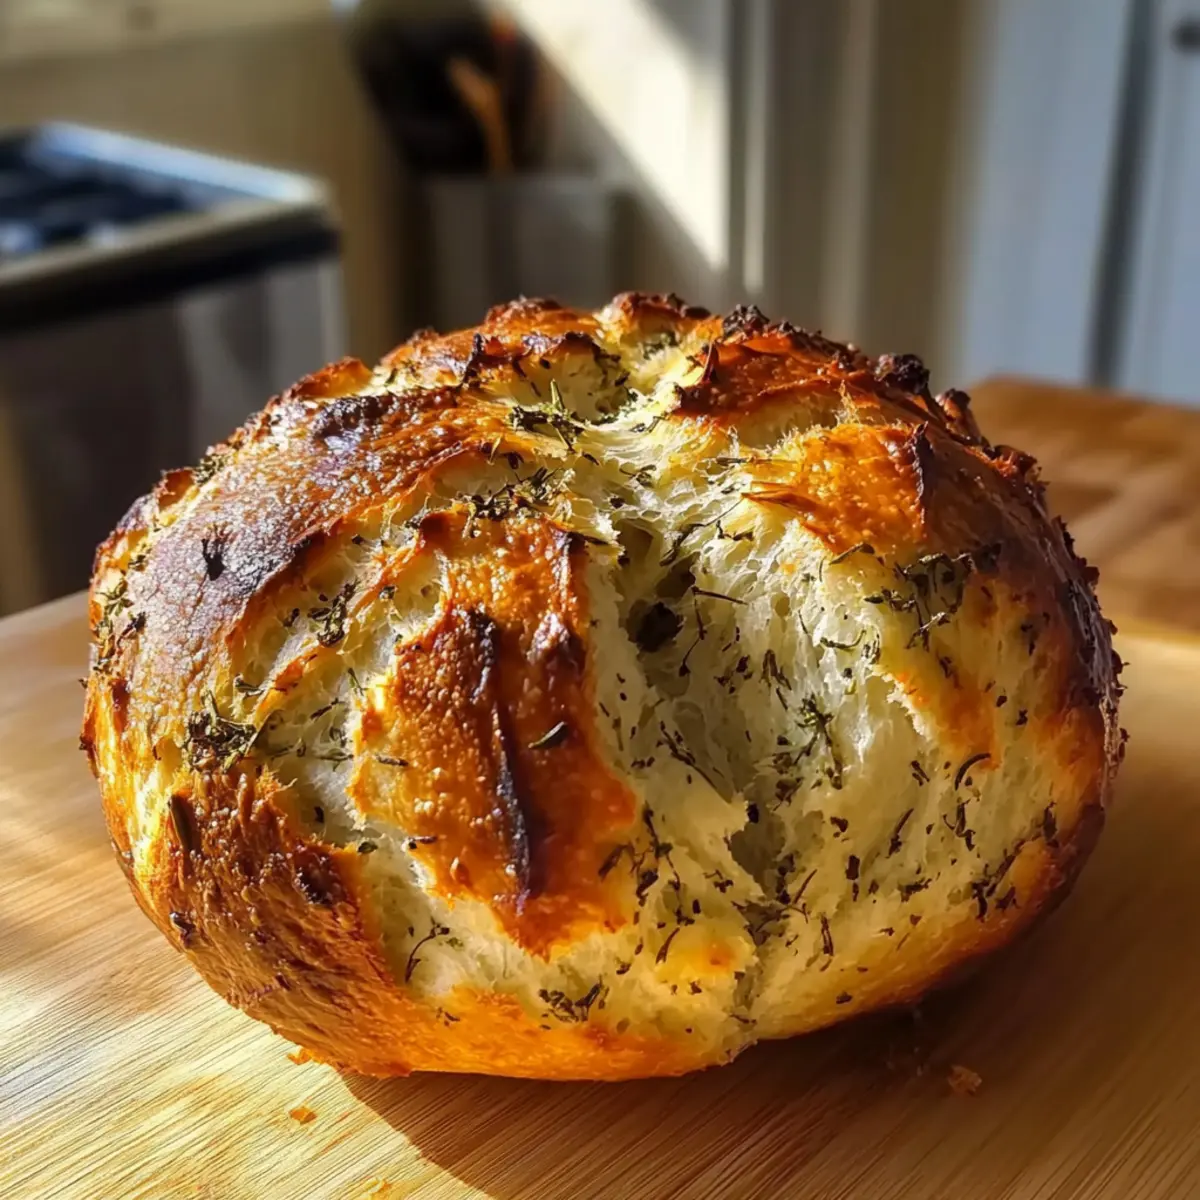
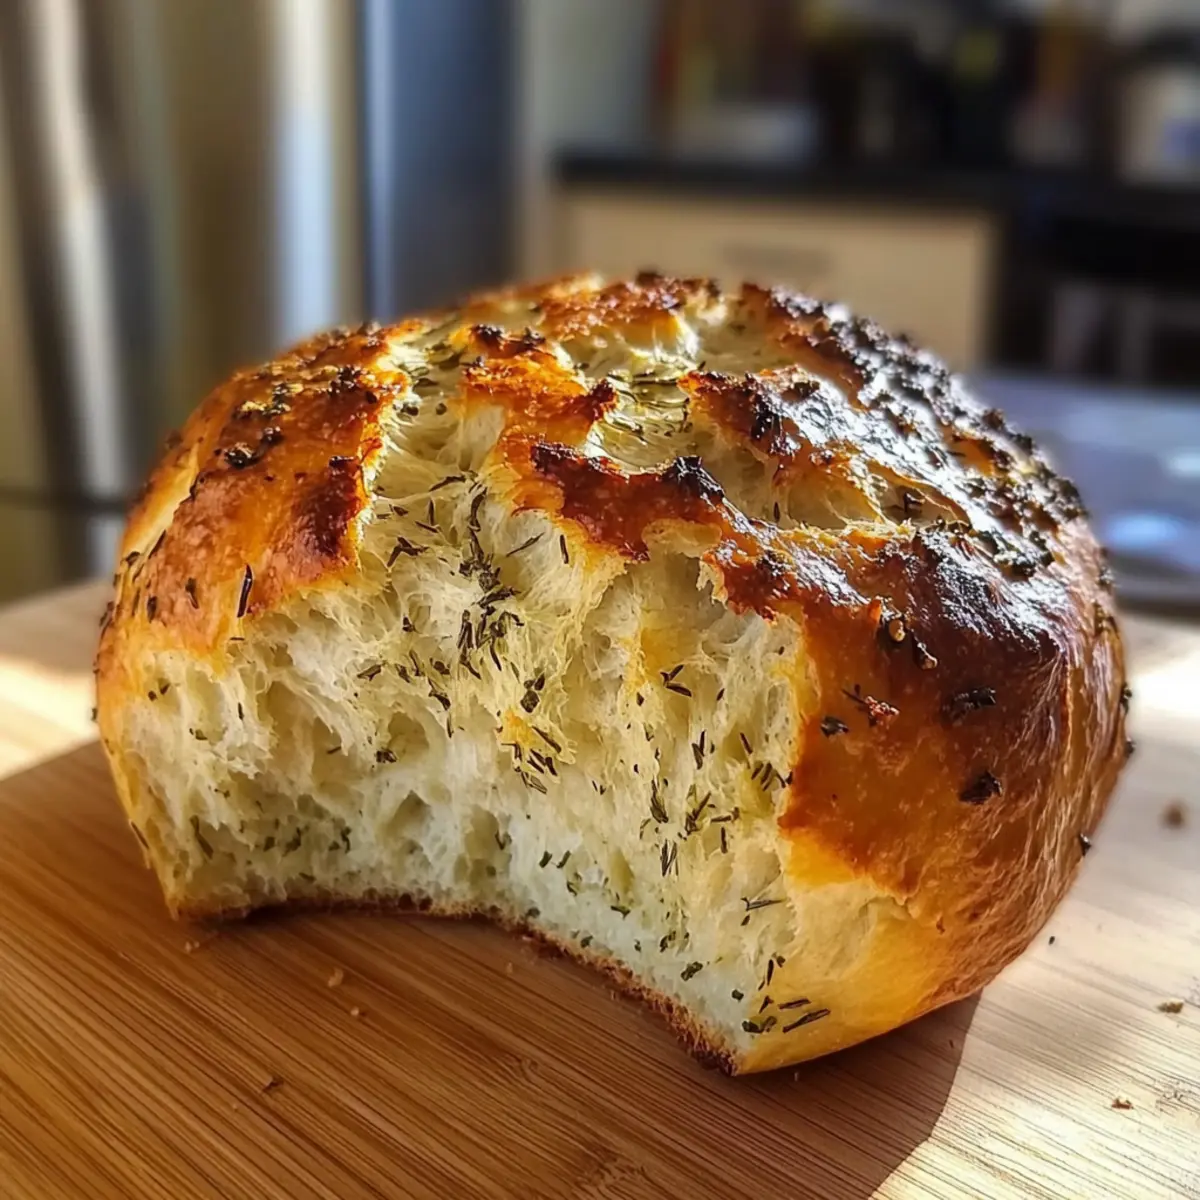
As the warm, inviting scent of Garlic Herb Dutch Oven Bread fills the air, I can’t help but feel transported to a cozy café nestled in a charming village. This easy, no-knead recipe transforms simple pantry staples into a crusty masterpiece that’s perfect for both family dinners and weekend brunches. With minimal effort and a bit of patience, you’ll find yourself crafting a delightful bread that’s not only a crowd-pleaser but also utterly satisfying to make. Plus, it’s the ultimate vegetarian option, allowing for endless customization with your favorite add-ins like cheese or sun-dried tomatoes. Are you ready to fill your kitchen with the aroma of freshly baked goodness? Let’s dive into the magic of homemade bread together!
Why is this bread a must-try?
Irresistible Aroma: The heavenly scent of baking garlic pairs perfectly with warm herbs, elevating your kitchen experience.
Easy Preparation: With a simple no-knead method, this recipe is perfect for beginners and busy homebakers alike.
Versatile Additions: Customize your bread by adding your favorite ingredients like cheese or sun-dried tomatoes, creating a unique twist every time.
Perfect for Any Meal: This crusty delight is ideal for serving with soups, stews, or simply enjoying with butter.
Satisfying Results: The unique texture—a chewy crust and soft interior—makes every bite utterly satisfying. With just a little patience during the rising time, you’ll unveil a bakery-worthy loaf right in your own home!
Garlic Herb Dutch Oven Bread Ingredients
• Here’s everything you need to create this delightful bread that will quickly become a family favorite!
For the Dough
- All-Purpose Flour – Provides structure; substitute whole wheat flour for added fiber if desired.
- Salt – Enhances flavor; sea salt or kosher salt can be used as alternatives.
- Instant Yeast – Acts as a leavening agent for quick rising; if using active dry yeast, remember to activate it in warm water first.
- Warm Water – Hydrates the flour and activates the yeast; use water between 100°F to 110°F (38°C to 43°C) for best results.
For Flavoring
- Garlic – Adds that delicious garlicky flavor; feel free to increase the amount for a stronger taste.
- Fresh Herbs (e.g., Rosemary, Thyme) – Contributes aromatic fragrance and taste; dried herbs are a good substitute if fresh ones aren’t available.
- Olive Oil – Prevents sticking and helps achieve a golden crust; melted butter can give a richer flavor if preferred.
Get ready to embark on a wonderful journey of homemade bread with this Garlic Herb Dutch Oven Bread recipe!
Step‑by‑Step Instructions for Garlic Herb Dutch Oven Bread
Step 1: Combine Dry Ingredients
In a large mixing bowl, whisk together the all-purpose flour, salt, and instant yeast until evenly blended. This foundational step for your Garlic Herb Dutch Oven Bread ensures that the yeast and salt are well distributed, promoting even rising. Make sure to take a moment to appreciate the texture and aroma of the flour mixture before moving on.
Step 2: Add Wet Ingredients
Pour in the warm water, followed by the minced garlic and finely chopped fresh herbs of your choice. Use a wooden spoon to stir the mixture until it forms a shaggy dough, which may be sticky and clumpy. This process should take no more than a couple of minutes, and the delightful smell will start to fill your kitchen!
Step 3: Let the Dough Rise
Cover the bowl with plastic wrap, sealing in the warmth, and let the dough rise at room temperature for 12 to 18 hours. This long fermentation period is crucial for flavor development, turning your Garlic Herb Dutch Oven Bread into a savory delight. Look for the dough to double in size and become bubbly on the surface when it’s ready.
Step 4: Preheat Your Dutch Oven
About 30 minutes before you’re ready to bake, preheat your oven to 450°F (230°C). Place your empty Dutch oven, including its lid, inside the oven while it heats. This step is essential because it creates a steamy environment, which will help achieve that perfectly crusty exterior on your bread.
Step 5: Prepare the Baking Vessel
Once the oven has reached temperature, carefully remove the hot Dutch oven using oven mitts. Drizzle in some olive oil, swirling it around to coat the bottom and sides. This will prevent sticking and contribute to a golden, crispy crust on your Garlic Herb Dutch Oven Bread, enhancing its overall flavor.
Step 6: Shape the Dough
In a lightly floured area, gently transfer your risen dough and shape it into a round ball, being careful not to overwork it. A rough shape is perfectly fine as you want to retain as much air as possible. This shaping will allow your bread to rise beautifully in the Dutch oven, creating a delightful texture.
Step 7: Bake Covered
Place the shaped dough into the preheated Dutch oven, then cover it with the lid. Bake in the oven for 30 minutes. During this time, the steam trapped inside will help the bread rise and create that sought-after crusty exterior, so resist the urge to peek!
Step 8: Bake Uncovered
After 30 minutes of covered baking, carefully remove the lid and bake for an additional 15 to 20 minutes. You’re looking for a beautifully golden-brown crust that signals your Garlic Herb Dutch Oven Bread is almost ready. The loaf should emit a warm, inviting aroma that fills your kitchen with joy.
Step 9: Cool and Slice
Once the bread is golden brown, carefully transfer it to a wire rack to cool completely. Allowing it to cool is essential for achieving the right texture; if sliced too soon, the interior may become soggy. Once cooled, enjoy your freshly baked Garlic Herb Dutch Oven Bread sliced and ready to serve.
What to Serve with Garlic Herb Dutch Oven Bread
Embrace the delightful experience of creating a full meal that perfectly complements the heartwarming Garlic Herb Dutch Oven Bread, transforming your dining table into a culinary celebration.
-
Creamy Tomato Soup: The rich, velvety texture of tomato soup pairs wonderfully with the bread’s crustiness, offering a comforting balance. Dip a slice for a heartwarming treat on chilly evenings.
-
Herbed Olive Oil Dip: A simple blend of extra virgin olive oil and fragrant herbs elevates the enjoyment, allowing for a delightful appetizer that’s as vibrant as it is tasty. Just drizzle, dip, and savor!
-
Mixed Green Salad: Fresh greens tossed with tangy vinaigrette add a bright contrast to the warm bread, enhancing your meal with crispness and a burst of flavor. Don’t forget to sprinkle some nuts for added texture!
-
Garlic Butter Shrimp: This dish mirrors the garlic notes in the bread while adding richness and protein, making for a well-rounded dinner that feels truly indulgent. Each bite is a symphony of flavors that dance on your palate.
-
Bruschetta Topping: Top the Garlic Herb Dutch Oven Bread with a vibrant mix of diced tomatoes, basil, and balsamic vinegar. This refreshing accompaniment creates a delightful contrast, perfect for sharing as an appetizer or vibrant side.
-
Chocolate Fondue: For a unique dessert twist, serve cubes of the crusty bread alongside warm melted chocolate. The combination of sweetness and savory gives a delightful end to your meal.
-
Sparkling Mineral Water: A refreshing drink that cleanses the palate and complements the bread beautifully, adding a bubbly touch to your dining experience. Enjoy it chilled for an elevated meal.
Make Ahead Options
These Garlic Herb Dutch Oven Bread are perfect for busy home cooks looking to save time and enjoy homemade goodness! You can prepare the dough up to 24 hours in advance by mixing the dry ingredients and combining them with the wet ingredients, then let it rise covered at room temperature. For better flavor development, allow the dough to rest for the full time. If you prefer, you can also shape the dough and refrigerate it for up to 3 days before baking—just be sure to let it come to room temperature before placing it in the hot Dutch oven. When ready to bake, simply follow the regular instructions, and you’ll have a delicious, crusty bread that tastes just as fresh as if you baked it on the same day!
Storage Tips for Garlic Herb Dutch Oven Bread
Room Temperature: Store leftover bread in a paper bag at room temperature for up to 3 days to maintain its lovely crust. Avoid plastic bags to prevent sogginess.
Fridge: While refrigeration is not recommended as it can dry out the bread, if you must store it in the fridge, wrap it tightly in aluminum foil or plastic wrap and consume within 5 days.
Freezer: For longer storage, slice the Garlic Herb Dutch Oven Bread and freeze pieces in an airtight freezer bag for up to 3 months. Thaw at room temperature or pop slices in a toaster for a warm delight.
Reheating: To refresh the bread, preheat your oven to 375°F (190°C) and reheat the whole loaf or slices for 5-10 minutes until warmed through. This will revive its crusty exterior and soft interior.
Expert Tips for Garlic Herb Dutch Oven Bread
-
Patience is Key: Allowing the dough to rise for 12-18 hours is vital for developing rich flavors. Avoid rushing this step for the best results.
-
Use the Right Temperature: Ensure your warm water is between 100°F to 110°F (38°C to 43°C) to activate instant yeast properly; too hot or cold can hinder rising.
-
Avoid Overworking Dough: When shaping your Garlic Herb Dutch Oven Bread, handle it gently to retain air, leading to a light and airy texture.
-
Cool Before Slicing: Let the bread cool completely on a wire rack before slicing to prevent a soggy crumb and to achieve that perfect crust.
-
Experiment with Flavors: Don’t hesitate to add personal touches, such as sun-dried tomatoes or different herbs, to create unique versions of this bread.
Garlic Herb Dutch Oven Bread Variations
Feel free to get creative with your Garlic Herb Dutch Oven Bread and explore these delightful variations that enhance flavor and texture!
-
Cheesy Delight: Add shredded cheese like mozzarella or cheddar directly into the dough for a gooey twist. This cheesy addition elevates the bread and creates a wonderful melty center, perfect for pairing with soups or enjoyed on its own.
-
Herb Swap: Use dried herbs instead of fresh ones for a simple alternative. Consider flavoring with Italian seasoning or even some garlic powder for additional depth. Experimenting with different herbs can lead to unique flavor profiles each time you bake!
-
Mediterranean Flair: Mix in sun-dried tomatoes and olives to turn traditional bread into a Mediterranean masterpiece. The sweet-tartness of sun-dried tomatoes combined with the briny olives offers a burst of flavor that pairs beautifully with cheeses and spreads.
-
Nutty Texture: Add a handful of seeds or nuts like sunflower seeds or walnuts to the dough for a delightful crunch. The added texture contrasts beautifully with the soft internal crumb, making each bite interesting and satisfying.
-
Sweet Twist: For a sweeter variation, consider adding dried fruits like cranberries or raisins to the dough. This unexpected twist transforms the bread, making it a delightful breakfast treat paired with cream cheese.
-
Spicy Kick: Incorporate a pinch of red pepper flakes or diced jalapeños into the dough for an added kick of heat. This fiery touch uplifts the classic garlic flavor, making it an exciting option for adventurous eaters.
-
Garlic Lovers: Double the amount of minced garlic for a more intense garlic flavor. This option is perfect for those who can’t resist that bold taste, making each slice an aromatic delight.
-
Topping Variations: After baking, brush the warm bread with herb-infused butter for a luscious finish. This additional step introduces even more herbaceous notes, adding an irresistible richness to enjoy with your meal.
Don’t forget, this bread pairs wonderfully with sides like Garlic Roast Potatoes or a refreshing salad to create a complete meal that speaks of home-cooked goodness!
Garlic Herb Dutch Oven Bread Recipe FAQs
How do I select ripe garlic for the recipe?
When choosing garlic for your Garlic Herb Dutch Oven Bread, look for firm, plump heads with unblemished skin. Avoid any bulbs with dark spots or sprouting, as these may indicate the garlic is past its prime. Fresh garlic will provide the best flavor and aroma.
What is the best way to store leftover bread?
To maintain the crustiness of your Garlic Herb Dutch Oven Bread, store it in a paper bag at room temperature for up to 3 days. If you need to keep it longer, slice the bread and freeze it in an airtight freezer bag for up to 3 months. Thaw at room temperature or reheat it in the oven for a few minutes before serving.
Can I freeze this bread and how should I do it?
Absolutely! To freeze your Garlic Herb Dutch Oven Bread, slice it first, then place the pieces in an airtight freezer bag. Make sure to label the bag with the current date. It can be frozen for up to 3 months. When you’re ready to enjoy it, simply thaw the slices at room temperature or pop them directly into the toaster for a quick and delicious snack.
What should I do if my dough doesn’t rise?
Very! If your dough doesn’t rise, it could be due to the yeast being inactive or the water temperature being off. Ensure your warm water is between 100°F to 110°F (38°C to 43°C). If you’re using active dry yeast, remember to proof it in warm water for 5-10 minutes before adding it to the mixture. If your dough still doesn’t rise after 12-18 hours, you may need to check the freshness of your yeast and try again with new yeast.
Is this recipe suitable for people with dietary restrictions?
This Garlic Herb Dutch Oven Bread is vegetarian-friendly and can easily accommodate dietary restrictions. If you have gluten sensitivity, consider using a gluten-free all-purpose flour blend. For allergies, be cautious with added ingredients like cheese or herbs. If you’re sharing with pets, it’s wise to remember that ingredients like garlic can be harmful to dogs, so keep the bread away from your furry friends.
Garlic Herb Dutch Oven Bread: Effortless Flavor for Homebakers
Ingredients
Equipment
Method
- Combine Dry Ingredients: In a large mixing bowl, whisk together the all-purpose flour, salt, and instant yeast until evenly blended.
- Add Wet Ingredients: Pour in the warm water, followed by the minced garlic and finely chopped fresh herbs. Stir the mixture until it forms a shaggy dough.
- Let the Dough Rise: Cover the bowl with plastic wrap and let the dough rise at room temperature for 12 to 18 hours.
- Preheat Your Dutch Oven: About 30 minutes before baking, preheat your oven to 450°F (230°C) with the Dutch oven inside.
- Prepare the Baking Vessel: Carefully remove the hot Dutch oven, drizzle in olive oil, and coat the bottom and sides.
- Shape the Dough: Transfer your risen dough to a lightly floured area and shape it into a round ball.
- Bake Covered: Place the shaped dough into the preheated Dutch oven, cover it with the lid, and bake for 30 minutes.
- Bake Uncovered: Remove the lid and bake for an additional 15 to 20 minutes until golden brown.
- Cool and Slice: Transfer the bread to a wire rack to cool completely before slicing.
Leave a Reply