
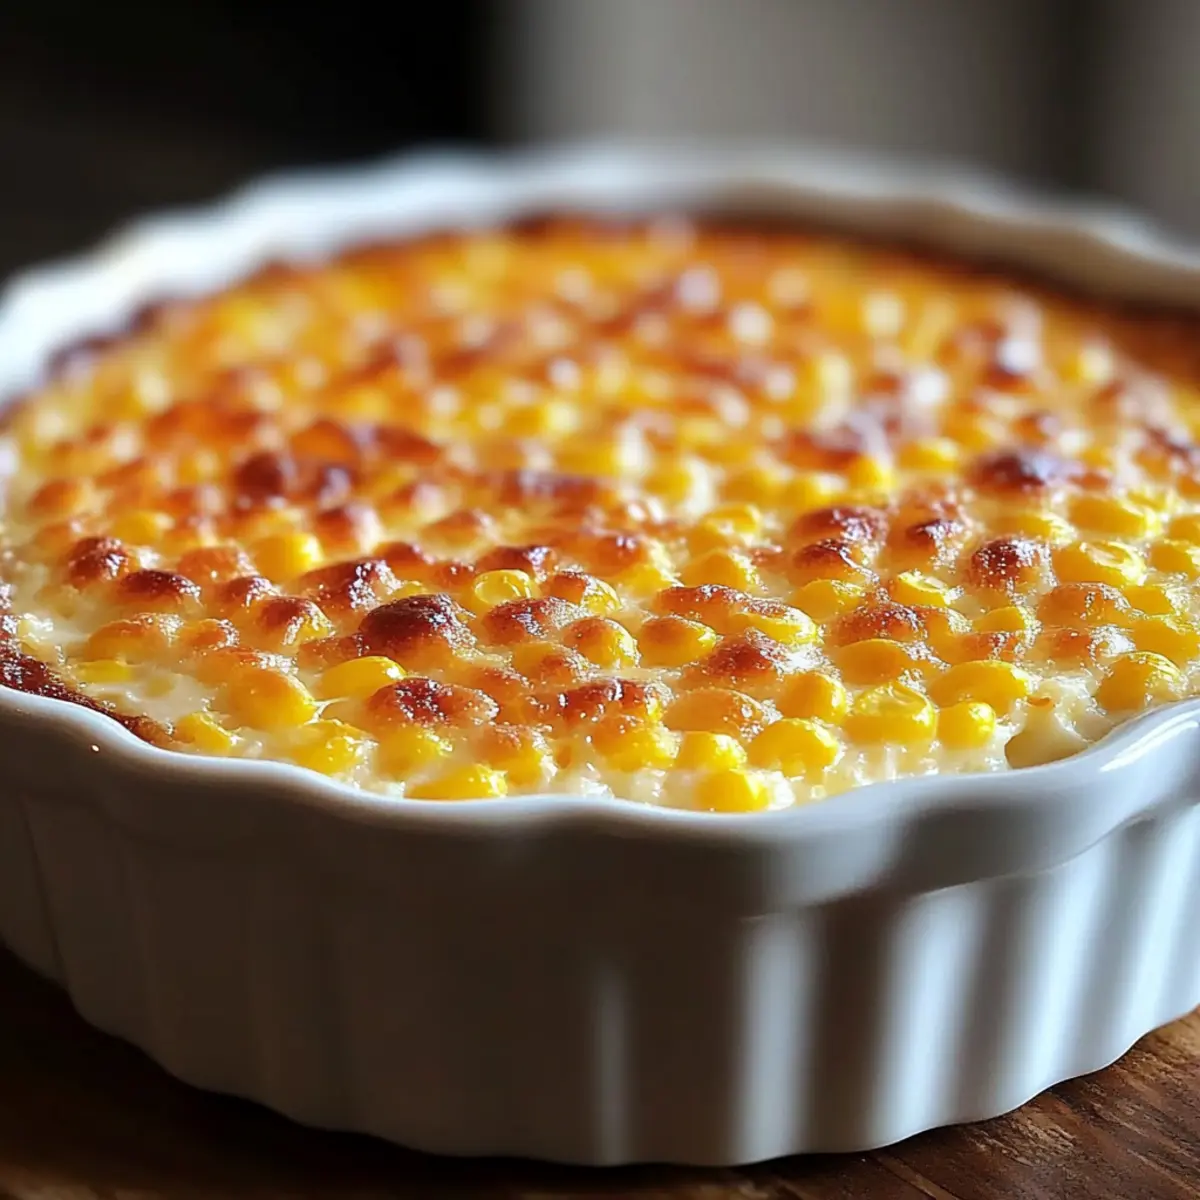
As I walked into my grandmother’s kitchen, the aroma of sweet corn wafted through the air, wrapping me in a warm embrace. There’s something undeniably special about Grandmother’s Corn Pudding, a dish that captures the essence of comfort food. This creamy, custard-like delight is naturally gluten-free and effortlessly brings family together, making it the perfect side for any gathering. Not only is it quick to prepare, but it’s also a versatile recipe that can easily be jazzed up with a cheesy twist or zesty spices. Imagine serving this glorious pudding alongside roasted chicken or grilled pork, creating a delicious harmony on your dinner table. Are you ready to relive those heartwarming moments with your own family? Let’s dive into this nostalgic recipe that will surely leave your loved ones asking for seconds!
Why is Corn Pudding So Beloved?
Comforting, this recipe brings back nostalgic memories of family gatherings and wholesome meals at Grandma’s table. Creamy texture offers a delightful experience that perfectly balances sweetness with savory notes. Versatile options abound; whether you prefer it cheesy or spiced, this pudding can cater to any palate. Quick to prepare, you can whip it up in no time, making it an ideal choice for busy weeknights or special occasions. Beyond that, it pairs wonderfully with proteins like roasted chicken or grilled pork, elevating any meal. If you love comforting dishes that evoke warmth and love, you’re going to adore this corn pudding! Check out Cheddar Sweet Corn for a cheesy twist!
Corn Pudding Ingredients
For the Pudding
- Eggs – Provide structure and richness to the pudding. No substitutions needed.
- Melted Butter – Adds flavor and moisture; can substitute with margarine for a dairy-free option.
- Sugar – Sweetens the dish; substitute with honey or reduce to 1 tablespoon for a less sweet version.
- Milk – Contributes creaminess; can substitute with almond milk for a dairy-free option.
- Cornstarch – Acts as a thickening agent for that creamy texture; no substitutions necessary for the recipe’s structure.
- Whole-Kernel Corn (drained) – Provides texture and sweetness, and fresh or frozen corn can be used instead.
- Cream-Style Corn – Adds moisture and sweetness; fresh corn pureed can serve as an alternative.
Step‑by‑Step Instructions for Grandmother’s Corn Pudding
Step 1: Preheat the Oven
Begin by preheating your oven to 400°F (200°C). While the oven warms up, generously grease a 2-quart casserole dish with butter or cooking spray to prevent sticking. This will ensure your creamy corn pudding comes out easily and maintains its lovely shape after baking.
Step 2: Whisk the Eggs
In a large mixing bowl, crack and whisk the eggs until well combined and slightly frothy, which should take about 1-2 minutes. This step is crucial for incorporating air into the mixture, helping create that delightful custard-like texture in your corn pudding.
Step 3: Combine Ingredients
Add the melted butter, sugar, milk, and cornstarch to the whisked eggs. Use a whisk to blend everything together until you achieve a smooth and creamy consistency, taking care to dissolve any lumps of cornstarch. This mixture will be the base of your comforting corn pudding.
Step 4: Fold in the Corn
Next, gently stir in both the whole-kernel corn and cream-style corn until they are fully integrated into the mixture. You should see the vibrant yellow corn scattered throughout the batter, ready to contribute its sweetness and texture to your comforting dish.
Step 5: Pour into Casserole Dish
Pour the corn mixture into the prepared casserole dish, spreading it evenly with a spatula. Take a moment to admire the bright colors before placing it in the oven, where the magic will happen to transform this mixture into a heartwarming corn pudding.
Step 6: Bake to Perfection
Bake the corn pudding for about 1 hour, or until the top turns a beautiful golden brown. To ensure it’s fully cooked, insert a toothpick in the center; if it comes out clean, your pudding is ready to delight everyone’s taste buds.
Step 7: Let it Rest
Once baked to perfection, remove the corn pudding from the oven and allow it to rest for 5-10 minutes. This resting period helps the pudding set further, making it easier to cut into squares and serve. Enjoy the warm aroma wafting through your kitchen!
Corn Pudding Variations & Substitutions
Feel free to get creative with your corn pudding and make it your own with these delicious twists and swaps!
-
Dairy-Free: Replace melted butter with margarine and use almond milk instead of regular milk for a creamy treat without dairy.
-
Cheesy Delight: Stir in ½ to 1 cup of shredded cheddar cheese before baking for a rich, savory addition that your family will love. It adds that comforting, gooey texture that makes each bite irresistible.
-
Spicy Kick: Enhance your pudding with a hint of heat by adding ½ teaspoon of cayenne pepper or your favorite hot sauce. The warmth perfectly complements the sweetness of the corn.
-
Savory Bacon: Crumbled bacon is a fantastic addition! Sprinkle in some sautéed bacon bits for a smoky flavor that pairs wonderfully with the sweet corn.
-
Vegetable Boost: Incorporate chopped green onions or bell peppers into your pudding for an extra layer of flavor and texture. They add vibrant color and a fresh crunch.
-
Make it Sweet: For a dessert twist, add 1 teaspoon of vanilla extract and a touch of cinnamon. This gives it a lovely aromatic sweetness that pairs beautifully with a side of Spice Vanilla Pudding.
-
Corn Variety: Use fresh or frozen corn in place of whole-kernel corn for a different texture. Each option brings its own fresh burst of flavor that can enhance your dish.
-
Herb Infusion: Try adding fresh herbs like thyme or parsley for a fragrant touch. Their earthy notes can elevate the essence of this comforting dish even further.
By exploring these variations, you can create a corn pudding that reflects your unique taste, making each serving a beloved family tradition. And if you need more inspiration, consider pairing your corn pudding with a classic Southern Thanksgiving Dinner! Check out our menu ideas here.
What to Serve with Grandmother’s Corn Pudding?
Imagine a table adorned with flavors that beautifully complement the creamy essence of this comforting dish.
- Roasted Chicken: Tender and juicy, the savory notes of roasted chicken enhance the sweetness of corn pudding, balancing each bite perfectly.
- Grilled Pork: The smoky flavors from the grill pair harmoniously with the pudding’s texture, creating a delightful contrast that excites the palate.
- Sautéed Green Beans: Fresh green beans add a crisp, vibrant bite, introducing a pop of color and nutrition to your meal.
- Garden Salad: Crisp greens and tangy vinaigrette refresh the palate while the creamy corn pudding remains the star of the show.
- Honey-Glazed Carrots: Their natural sweetness resonates with the corn pudding, making every forkful a celebration of flavors.
- Cheddar Biscuits: Fluffy and buttery, they add a comforting element that echoes the warmth of family meals around the table.
- Cranberry Sauce: Its tartness provides a delightful contrast, enhancing the sweetness of the corn pudding while adding a holiday feel to your dinner.
- Sweet Tea: A refreshing beverage that perfectly washes down the richness of the meal, turning your gathering into a charming Southern affair.
Proper Storage for Corn Pudding
Fridge: Store leftover corn pudding in an airtight container for up to 4 days. This will keep the flavors fresh and the pudding moist for your next meal.
Freezer: If you’d like to save some for later, corn pudding can be frozen for up to 3 months. Wrap it tightly in plastic wrap and then foil to prevent freezer burn.
Reheating: When ready to enjoy, thaw in the fridge overnight and reheat in the oven at 350°F (175°C) for about 20-25 minutes or until heated through. This way, your corn pudding will regain its creamy texture!
Make-Ahead Tip: You can prepare the mixture a day in advance and store it in the fridge. Just pour it into the casserole dish and bake when you’re ready. Enjoy that delightful home-cooked aroma filling your kitchen!
Make Ahead Options
These delightful Corn Pudding dishes are perfect for busy home cooks looking to save time without sacrificing flavor! You can prepare the entire mixture up to 24 hours in advance; simply combine the egg, melted butter, sugar, milk, cornstarch, and both types of corn, then refrigerate in an airtight container. This pre-assembly allows the flavors to meld beautifully. When you’re ready to serve, just pour the mixture into your greased casserole dish and bake at 400°F (200°C) for about 1 hour. Let it rest for 5-10 minutes before cutting into squares for serving. With these make ahead tips, you’ll have warm, comforting Corn Pudding ready with minimal effort on busy weeknights!
Expert Tips for Corn Pudding
-
Perfectly Whisked Eggs: Ensure your eggs are whisked well until frothy to help create that light, fluffy texture in the corn pudding.
-
Monitor Baking Time: Baking times can vary based on your oven and the type of corn used, so check for doneness by inserting a toothpick.
-
Add Diversity: Don’t hesitate to customize your corn pudding! Cheese or spices can elevate the flavor, making it a unique dish every time.
-
Let It Set: Allow the corn pudding to rest for 5-10 minutes before serving to enhance its custard-like texture, making it easier to slice.
-
Storage Savvy: Leftovers can be kept in the fridge for up to 4 days or frozen for up to 3 months, so don’t shy away from making extra!
Grandmother’s Corn Pudding Recipe FAQs
What kind of corn is best for this recipe?
Absolutely! Whole-kernel corn and cream-style corn are both essential for the texture and flavor of Grandmother’s Corn Pudding. You can use fresh, frozen, or even canned corn. Just be sure to drain canned corn well to avoid excess moisture.
How should I store leftover corn pudding?
For sure! Leftover corn pudding can be stored in an airtight container in the fridge for up to 4 days. Ensure it’s sealed well to maintain its creamy texture and freshness, and make sure to enjoy it within that time for the best taste!
Can I freeze corn pudding for later use?
Definitely! To freeze, wrap the fully cooled corn pudding tightly in plastic wrap, followed by a layer of foil, which will prevent freezer burn. It can be stored in the freezer for up to 3 months. When you’re ready to enjoy it, thaw it in the fridge overnight and reheat in the oven at 350°F (175°C) for about 20-25 minutes.
What if the pudding doesn’t set properly?
Very! If your corn pudding isn’t setting, it might be due to using fresh corn or a higher moisture content. If this happens, simply place it back in the oven and bake for an additional 5-10 minutes, checking it regularly until a toothpick inserted into the center comes out clean. Also, check to ensure you’ve whisked the ingredients thoroughly at each step for a well-combined mixture.
Is this recipe gluten-free?
Absolutely! This recipe is naturally gluten-free due to the use of cornstarch instead of flour. If you are catering to specific dietary needs, feel free to substitute any dairy ingredients with non-dairy alternatives, such as almond milk or margarine, to keep it gluten-free and dairy-free!
Can I customize this corn pudding recipe?
The more the merrier! You can absolutely add your own twist to Grandmother’s Corn Pudding. Consider experimenting with shredded cheese, spicy jalapeños, or herbs like chives to tailor the flavor to your liking. The essence of this recipe lies in its versatility, so let your creativity shine!
Creamy Corn Pudding That'll Bring Comfort to Your Table
Ingredients
Equipment
Method
- Preheat the oven to 400°F (200°C) and grease a 2-quart casserole dish.
- In a mixing bowl, whisk the eggs until well combined and slightly frothy.
- Add melted butter, sugar, milk, and cornstarch to the whisked eggs and blend until smooth.
- Fold in both whole-kernel corn and cream-style corn until integrated.
- Pour the corn mixture into the prepared casserole dish and spread evenly.
- Bake for about 1 hour, or until the top is golden brown; check doneness with a toothpick.
- Remove from oven and let it rest for 5-10 minutes before slicing and serving.
Leave a Reply