
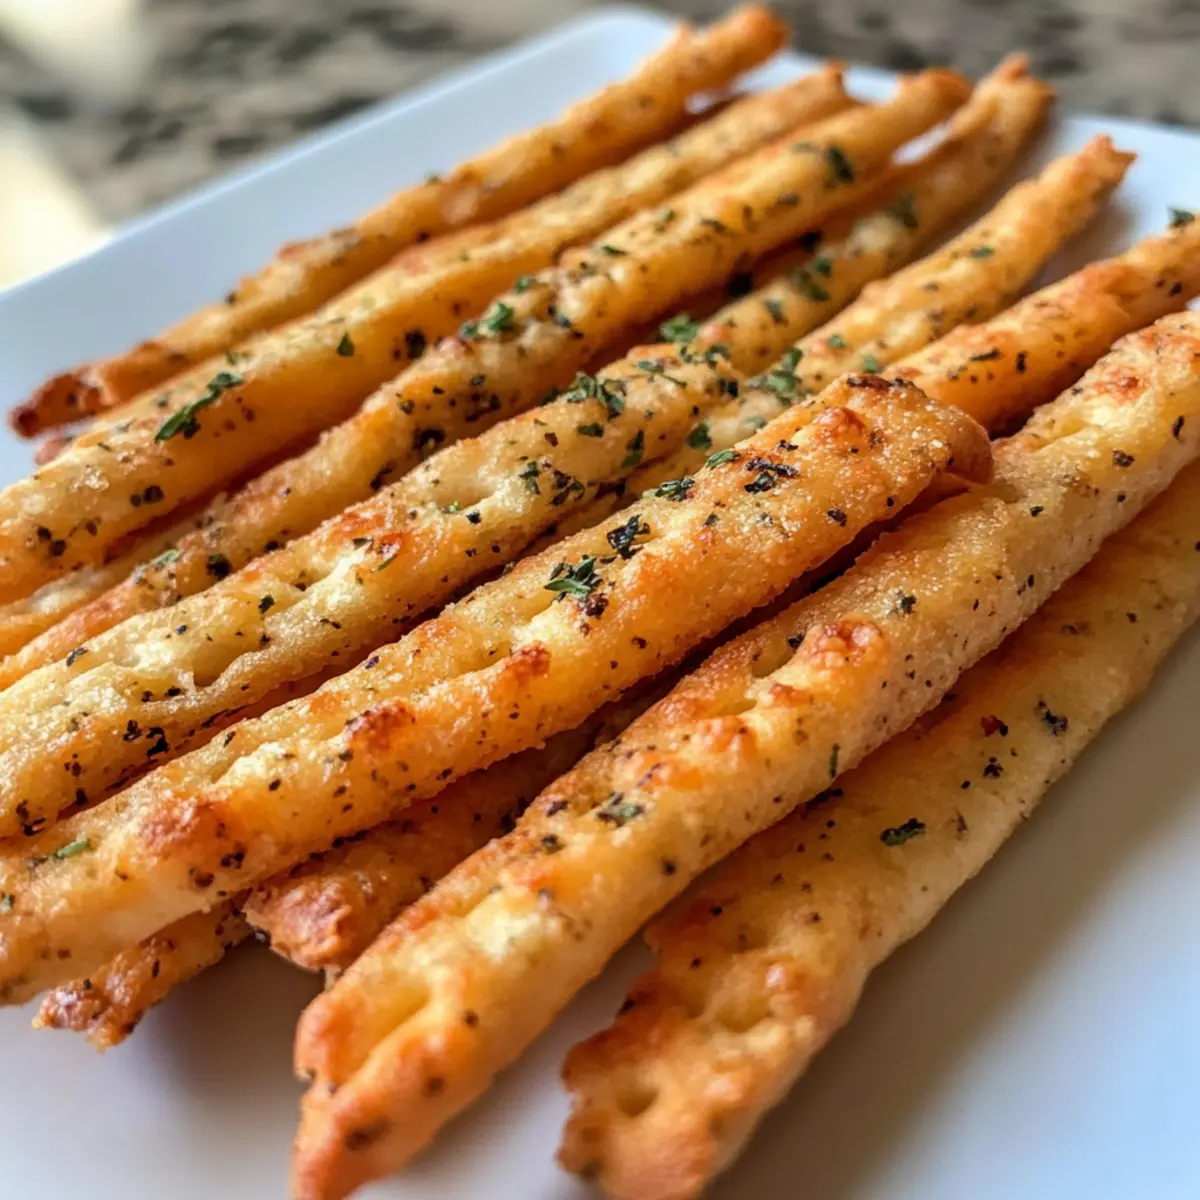
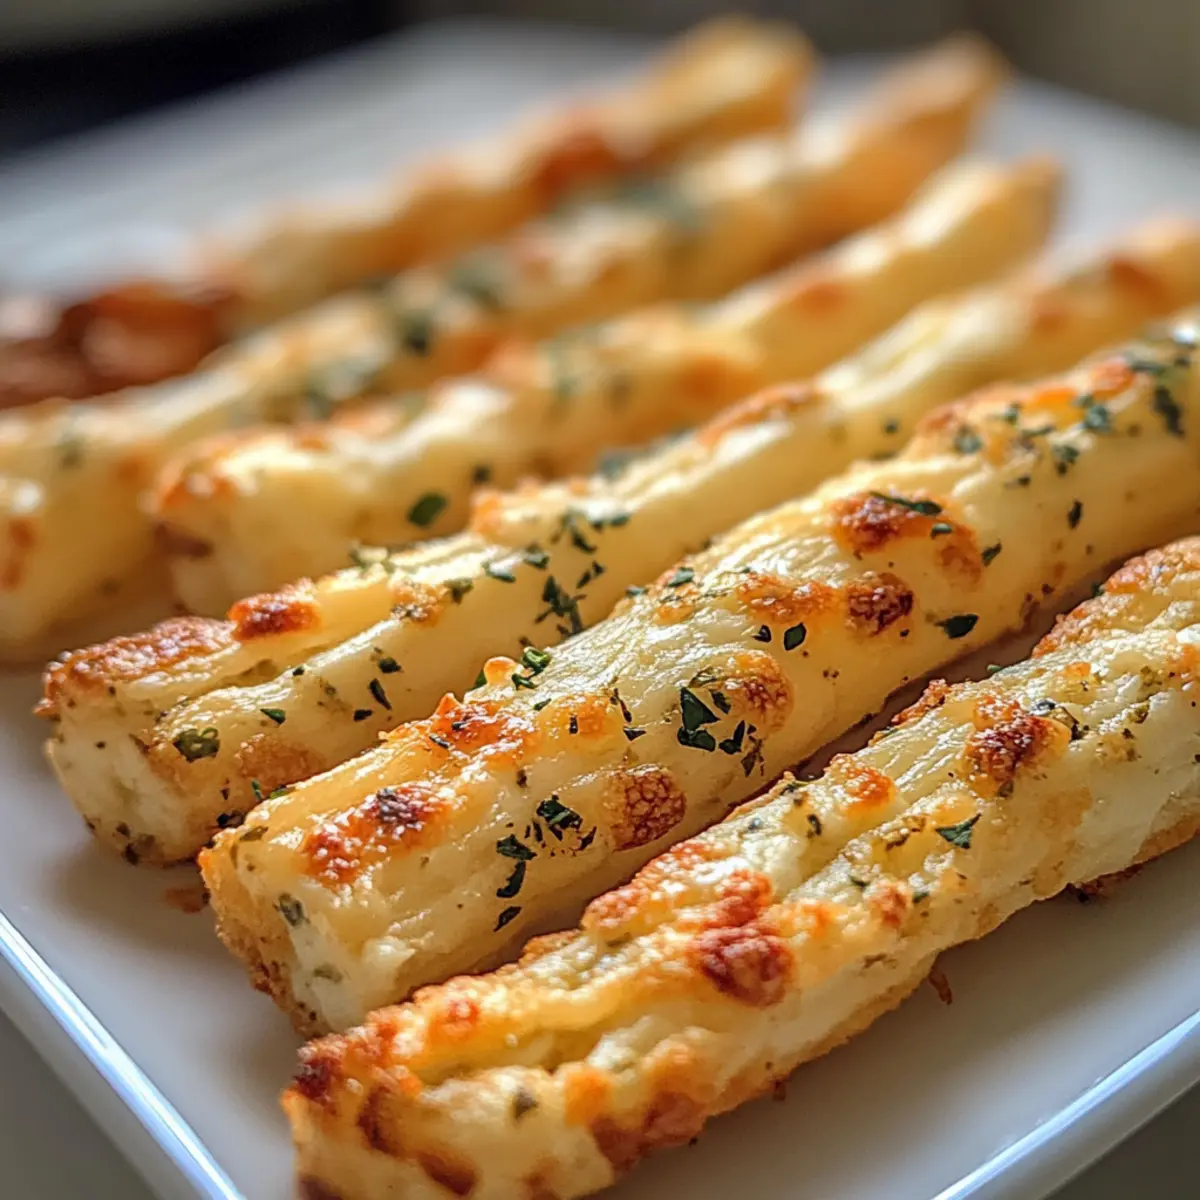
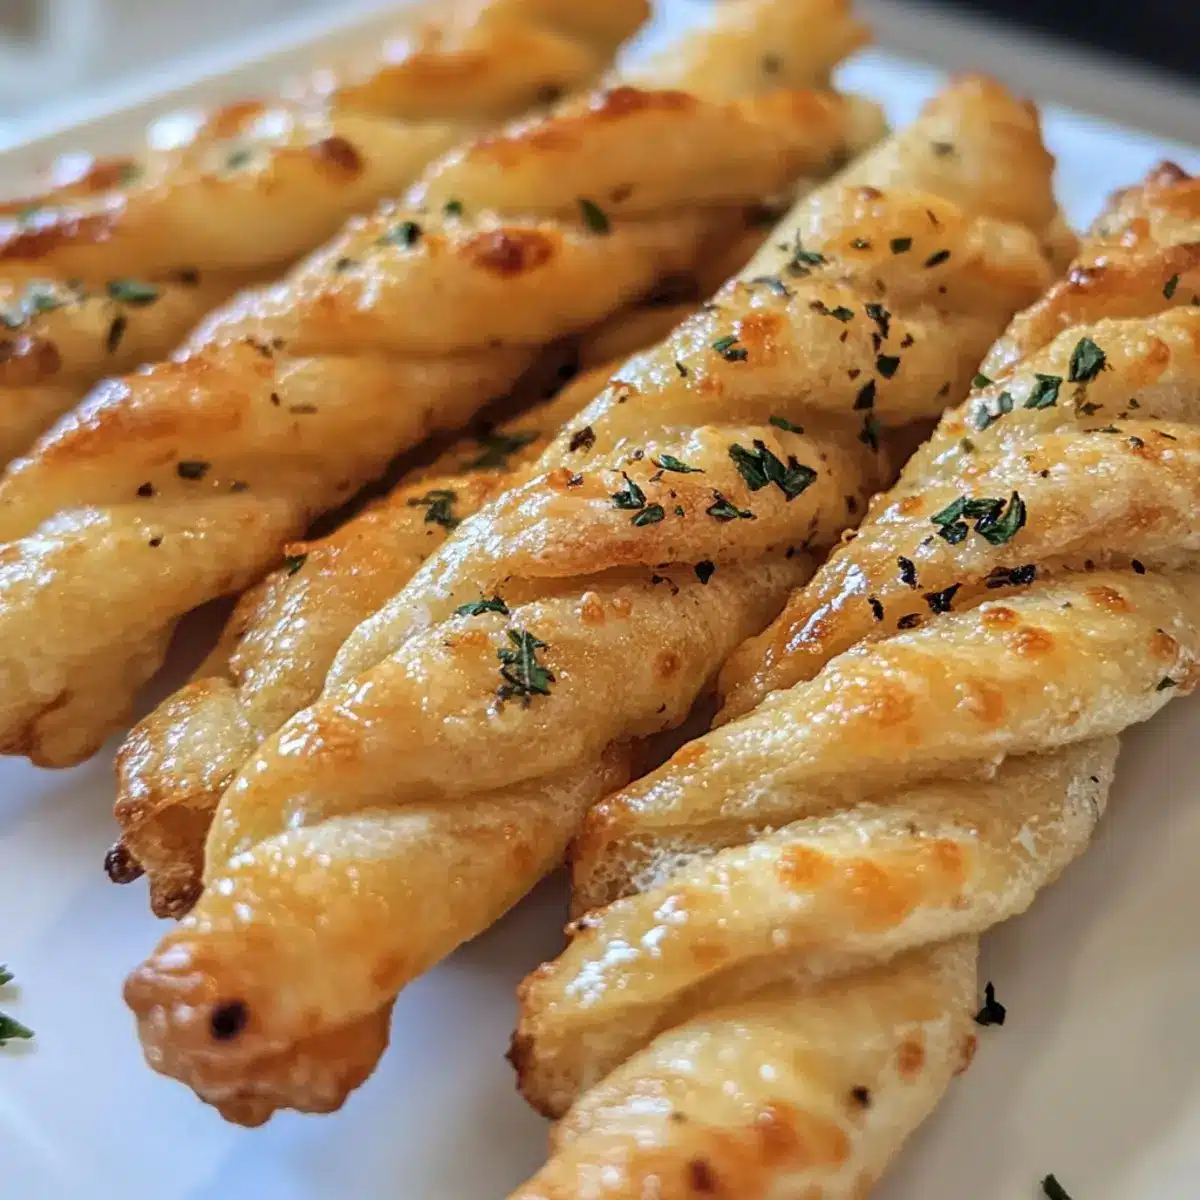
Every time I bring out a batch of these Crispy Herb & Cheese Straws, I’m reminded of cozy gatherings and the joy of sharing delicious snacks. These easy-to-make treats combine grated extra-sharp cheddar cheese with the fragrant notes of fresh herbs, creating a delightful contrast of flavors and textures. Perfect for those who want a quick party starter or a savory snack to accompany their favorite soup, these straws are truly a crowd-pleaser. What’s even better? They come together in under 30 minutes, making them a go-to recipe for impromptu get-togethers. Are you ready to whip up something irresistible that even your pickiest guests will adore? Let’s dive in!
Why are cheese straws so enjoyable?
Crispy Texture: Each bite delivers a delightful crunch that’s simply irresistible.
Savory Goodness: The combination of extra-sharp cheddar and fresh herbs creates a flavor explosion that elevates any snack time.
Quick to Make: With just 30 minutes needed, these cheese straws are perfect for those last-minute gatherings or movie nights.
Versatile Pairing: Ideal as a standalone snack, they also pair beautifully with soups like Cheddar Sweet Corn or cozy dips.
Crowd Favorite: Whether at a party or a casual dinner, these straws are bound to impress your guests and keep them coming back for more!
Cheddar & Herb Cheese Straws Ingredients
• To create the best Cheddar & Herb Cheese Straws, gather these tasty essentials:
For the Dough
- Grated extra-sharp cheddar cheese – Adds rich, savory flavor; for a milder taste, substitute with a blend of mozzarella and cheddar.
- All-purpose flour – Provides structure and helps create crispness; gluten-free flour can be used as an alternative.
- Kosher salt – Enhances the flavor of the cheese; remember to adjust based on the saltiness of the cheese used.
- Crushed red pepper flakes – Introduces a subtle heat; omit for a milder flavor or swap with black pepper for different spice nuances.
- Fresh herbs (rosemary and/or thyme) – Enhances aroma and taste, adding freshness; dried herbs can be used if necessary, but fresh is preferred for maximum flavor.
- Cold unsalted butter – Creates a flaky texture; ensure it’s cold for the best dough consistency. Vegan butter can be used for a dairy-free option.
- Heavy cream – Moistens and binds the dough; substitute with a non-dairy cream for a lactose-free version.
Optional Seasoning Enhancements
- Smoked paprika or garlic powder – For added depth of flavor, mix in these spices to create personalized twists on the original recipe.
- Additional fresh herbs (parsley or chives) – Experiment with flavor by incorporating other herbs to customize your cheese straws further!
Step‑by‑Step Instructions for Cheddar & Herb Cheese Straws
Step 1: Preheat the Oven
Begin by preheating your oven to 400°F (205°C). This ensures that when you bake your Cheddar & Herb Cheese Straws, they will become perfectly golden and crispy. While the oven heats, line two baking sheets with parchment paper, creating a non-stick surface that will help your cheese straws release easily once baked.
Step 2: Prepare the Cheese Mixture
In a food processor, combine the grated extra-sharp cheddar cheese, all-purpose flour, kosher salt, crushed red pepper flakes, and fresh herbs. Pulse the mixture until it reaches a coarse, meal-like texture, typically about 10 seconds. This step is crucial for incorporating all the flavors, so keep an eye on the consistency as you process to ensure even mixing.
Step 3: Add the Butter and Cream
Next, add cold unsalted butter in chunks into the food processor. Pulse the mixture again until it resembles coarse crumbs, which should take about 15 seconds. Gradually pour in the heavy cream, pulsing until the dough starts to clump together. Pay attention to the texture; it should be slightly sticky but cohesive, perfect for rolling out later.
Step 4: Shape the Dough
Lightly flour a clean work surface and turn the dough out onto it. Gently shape the dough into a rectangle that is about 1-inch high. Divide the rectangle into two equal halves, making it easier to work with. Use your hands to shape and compact the dough without overworking it to maintain its flaky texture.
Step 5: Roll Out the Dough
Take one half of the dough and roll it out into a rectangle measuring approximately 8×10 inches and about ⅛-inch thick. Use flour as needed to prevent sticking while rolling. Once rolled, trim the edges with a knife to create clean lines. This ensures your Cheddar & Herb Cheese Straws will have a uniform shape for even baking.
Step 6: Cut into Strips
Using a sharp knife or a pizza cutter, slice the rolled dough into ¼-inch wide strips. Arrange the strips on one of the lined baking sheets, making sure to leave space between them for expansion. This step is vital for ensuring each straw has room to crisp up beautifully while baking in the oven.
Step 7: Bake the Cheese Straws
Place the baking sheets in the preheated oven and bake the cheese straws for 10-12 minutes, or until they turn golden brown and crispy. Keep an eye on them as they bake, as oven temperatures can vary. They will puff slightly and become fragrant, signaling that they’re almost ready to come out.
Step 8: Cool and Serve
Once baked, remove the cheese straws from the oven and allow them to cool on the baking sheets for a few minutes. This helps them firm up further. Then, transfer them to a wire rack to cool completely. Serve your Cheddar & Herb Cheese Straws on a decorative plate, or store them in a jar for later enjoyment.
What to Serve with Crispy Herb & Cheese Straws
These scrumptious cheese straws are perfect for creating a memorable meal or snack experience.
- Creamy Tomato Soup: The rich, velvety texture of tomato soup perfectly balances the crunchy cheese straws, making each bite satisfying and delightful.
- Fresh Garden Salad: A light, refreshing salad with lemon vinaigrette offers a bright contrast to the savory cheese straws, enhancing your palate.
- Zesty Hummus Dip: Pair with a spicy hummus for a fantastic flavor explosion, where the crunch beautifully complements the smoothness of the dip.
- Garlic Aioli: This creamy, garlicky dipping sauce adds a burst of flavor, inviting you to enjoy each straw lingeringly as you savor the unique combination.
- Charcuterie Board: Include your cheese straws with meats, cheeses, and olives for an impressive appetizer spread that invites sharing and conversation.
- Sparkling Wine: A glass of crisp, sparkling wine elevates the whole experience, its bubbly nature providing a euphoria that dances with each crunchy bite.
- Dark Chocolate Truffles: Finish your meal on a sweet note with truffles offering a rich morsel that complements the savory flavors of the snacks.
- Apple Cider: A warm cup of spiced apple cider brings comforting fall flavors, harmonizing beautifully with the herbs and cheese in the straws.
- Cheese Plate: A selection of artisan cheeses creates an exciting flavor journey that pairs perfectly with the richness of cheddar & herb cheese straws.
- Spicy Salsa: The heat from a salsa adds a fiery kick to your cheese straws, making each dip a fiery experience that bolts flavor into the atmosphere.
Expert Tips for Cheddar & Herb Cheese Straws
-
Chill Your Ingredients: Always use cold butter and cream. This ensures a flaky texture; warm ingredients can lead to tough, chewy straws.
-
Uniform Thickness: Roll the dough to an even thickness of about ⅛-inch. This helps the Cheddar & Herb Cheese Straws bake evenly, preventing half being too crispy while others remain soft.
-
Space It Out: Leave sufficient space between strips on the baking sheet. This allows hot air to circulate, achieving the perfect crispiness without any clumping.
-
Keep an Eye on Them: Ovens can vary, so check your cheese straws a minute or two early. Remove when they are golden brown to avoid overbaking.
-
Re-bake for Crispiness: If your straws lose their crunch after cooling, re-bake them at 400°F for 2-3 minutes on a wire rack to refresh that delightful crunch.
Cheddar & Herb Cheese Straws Variations
Get creative with these cheese straws and make them uniquely yours!
- Gouda Twist: Swap cheddar for gouda cheese for a creamy, slightly sweet flavor that’ll surprise your guests.
- Spicy Kick: Add a pinch of cayenne pepper or a few diced jalapeños to the mix for an exciting level of heat. This twist elevates your straws into a bold snack, perfect for those who crave a little spice.
- Nutty Flavor: Incorporate a tablespoon of finely chopped walnuts or pecans for an unexpected crunch that complements the cheese beautifully.
- Herb Medley: Experiment with fresh herbs like dill and parsley for a garden-fresh taste. The bright, aromatic flavors mingle wonderfully with the cheese straws.
- Garlic Lovers: Toss in garlic powder or roasted garlic into the dough for an irresistible savory punch that complements the cheesiness beautifully.
- Plant-Based: Use vegan cheese and vegan butter for a dairy-free version of these delightful straws, ensuring everyone can enjoy them at any gathering.
- Savory Sesame: Sprinkle sesame seeds on top before baking for an added flavor boost and appealing texture contrast, giving your cheese straws a lovely nutty aroma.
- Cheesy Pesto: Mix in a couple of tablespoons of pesto into the dough for an herby, cheesy flavor explosion that puts a spin on the classic. Your taste buds will thank you!
For a cozy pairing, enjoy these straws with a warm bowl of Cheddar Sweet Corn soup or prepare a tasty dip to complement them, like the rich Rudolph Cheese Ball. Dive into your creativity—these variations are just the starting point for your delicious snack adventure!
Make Ahead Options
These Cheddar & Herb Cheese Straws are perfect for meal prep enthusiasts! You can prepare the dough up to 24 hours ahead of time. Simply follow the recipe instructions through to shaping the dough, then wrap it tightly in plastic wrap and refrigerate it. When you’re ready to bake, remove the dough from the fridge, roll it out, cut into strips, and bake as directed. To maintain quality, ensure the dough stays covered to prevent drying out, and be mindful that the refrigerator can sometimes alter the dough’s texture slightly, so you may need to re-flour your work surface before rolling. With this easy make-ahead option, you’ll have delicious snacks ready in no time for any impromptu gathering!
How to Store and Freeze Cheddar & Herb Cheese Straws
Room Temperature: Store Cheddar & Herb Cheese Straws in an airtight container at room temperature for up to 3 days to maintain their crispness.
Fridge: If you prefer, these delightful straws can be refrigerated in a covered container for up to 5 days. Allow them to come to room temperature before enjoying again.
Freezer: For longer storage, freeze the straws in a single layer on a baking sheet until firm, then transfer to a freezer-safe bag or container. They can be stored for up to 3 months.
Reheating: To refresh frozen or refrigerated Cheddar & Herb Cheese Straws, preheat the oven to 400°F (205°C) and bake on a wire rack for 3-5 minutes until crispy.
Cheddar & Herb Cheese Straws Recipe FAQs
How do I choose the right cheese for cheese straws?
Absolutely! For the best flavor, I recommend using extra-sharp cheddar cheese, as it adds a rich and savory taste. If you prefer a milder option, you can easily substitute with a blend of mozzarella and cheddar. Look for cheese that’s freshly grated for optimal melting and flavor. If buying pre-packaged shredded cheese, check for moisture content to avoid a soggy texture.
How should I store leftover cheese straws?
You can store your Cheddar & Herb Cheese Straws in an airtight container at room temperature for up to 3 days. I usually let them cool completely before sealing them in to keep them crisp. If you want to keep them longer, consider refrigerating them in a covered container for up to 5 days, though beware they’ll lose some crunch.
Can I freeze cheese straws, and how do I do it?
Yes, you can absolutely freeze Cheddar & Herb Cheese Straws! First, lay them flat on a baking sheet in a single layer and freeze until firm, which usually takes about 1-2 hours. Then, transfer them to a freezer-safe bag or container, ensuring to remove as much air as possible. They’ll stay fresh for up to 3 months. When ready to eat, just reheat in a preheated oven at 400°F (205°C) for 3-5 minutes until crispy again.
What if my cheese straws aren’t crispy after baking?
Very! If your straws aren’t as crispy as you’d like after baking, don’t fret! Simply place them on a wire rack in a preheated oven at 400°F (205°C) for an additional 2-3 minutes. This will help restore their crunchiness. Just keep an eye on them to ensure they don’t over-bake; they should turn golden but not dark brown.
Are there any dietary considerations I should be aware of with this recipe?
Of course! If you’re catering to dietary restrictions, you have a few great options. To make these cheese straws dairy-free, substitute the cold unsalted butter with vegan butter and use a non-dairy cream. Additionally, if you or your guests are gluten-sensitive, swap out the all-purpose flour for a quality gluten-free flour blend. Just be mindful that the texture may vary slightly.
Can pets eat cheese straws?
It’s best to keep these cheese straws away from pets, especially dogs and cats. While small amounts of plain cheese are generally safe, the added salt and spices, particularly red pepper flakes, aren’t suitable for them. Always choose pet-friendly treats instead to keep your furry friends healthy and happy!

Irresistibly Crunchy Cheddar & Herb Cheese Straws Recipe
Ingredients
Equipment
Method
- Preheat your oven to 400°F (205°C) and line two baking sheets with parchment paper.
- In a food processor, combine the grated cheddar, flour, salt, red pepper flakes, and herbs. Pulse until coarse.
- Add cold butter chunks and pulse until it resembles coarse crumbs. Pour in cream until dough starts to clump.
- Turn the dough onto a floured surface, shape into a rectangle about 1-inch high, and divide into two halves.
- Roll one half into a rectangle about 8x10 inches and ⅛-inch thick. Trim edges for uniform shape.
- Slice the rolled dough into ¼-inch wide strips and arrange them on one lined baking sheet.
- Bake for 10-12 minutes until golden brown and crispy, monitoring closely to avoid overbaking.
- Allow to cool on baking sheets for a few minutes before transferring to a wire rack to cool completely.
Leave a Reply