
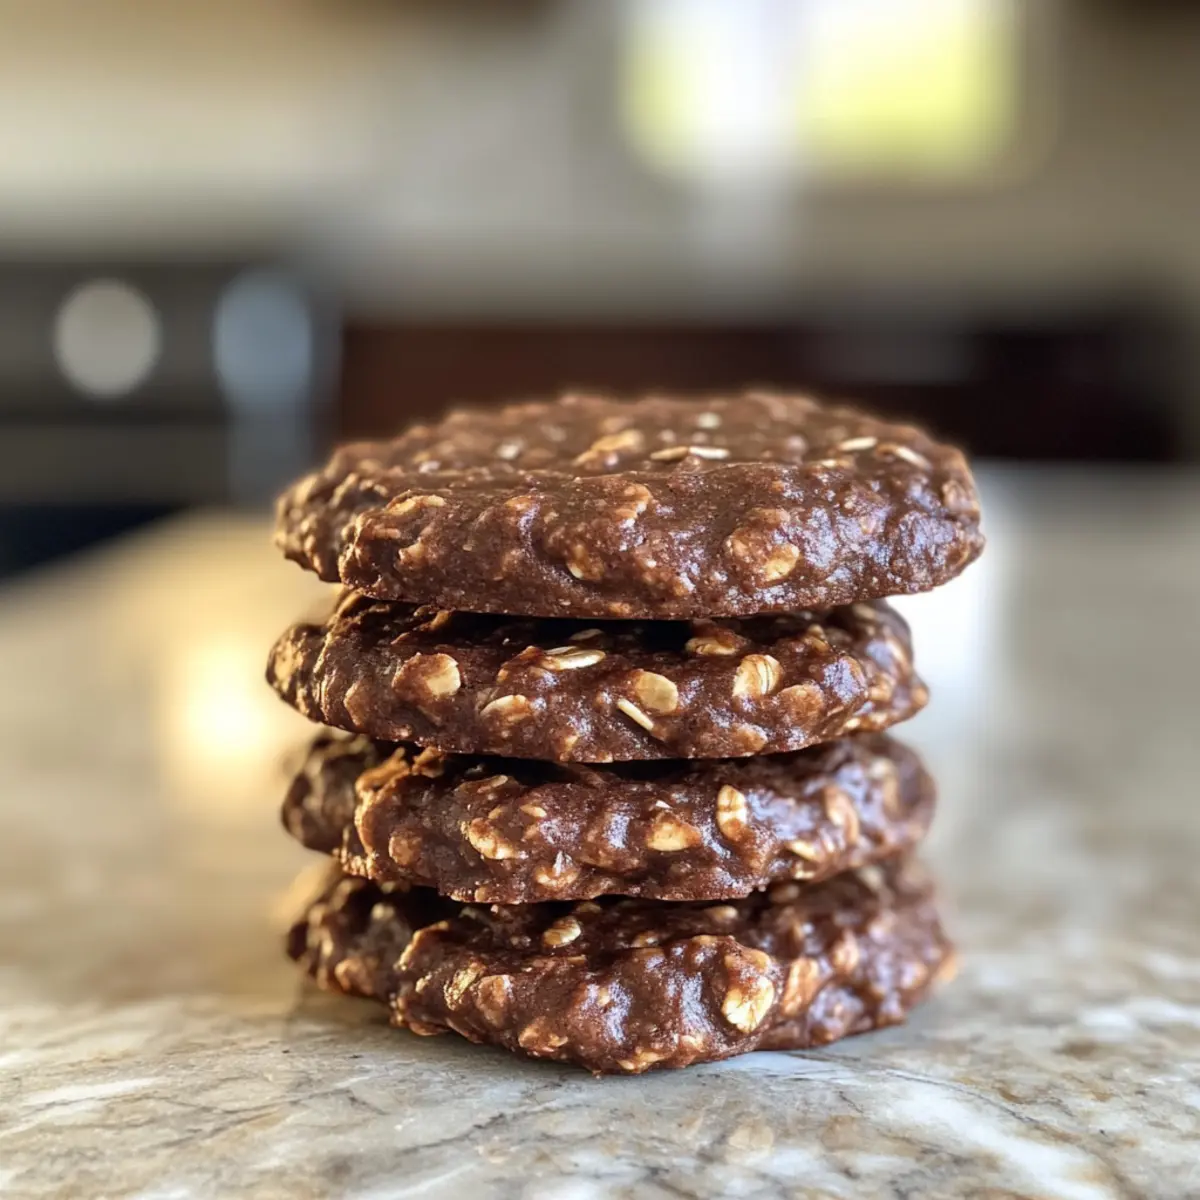
In the hustle of everyday life, who hasn’t found themselves in a mini crisis over what to whip up for a quick snack? Enter these 4-Ingredient No-Bake Chocolate Oat Cookies—a blissful, guilt-free indulgence that transforms simple pantry staples into a delicious treat without breaking a sweat. These flavor-packed cookies are not only easy to make, but they also cater to a variety of dietary needs, from gluten-free to vegan options. Plus, they’re a wonderful way to satisfy that chocolate craving while keeping things healthy. With just a few minutes of prep and no oven required, you’ll have a delicious batch ready to munch on in no time. Curious about how to make these little delights? Let’s dive into the recipe!

Why Are These Cookies a Must-Try?
Simplicity at its core: With only four ingredients, you can whip up these cookies in just minutes, making them a no-brainer for any home chef.
Healthier Choice: Enjoy the decadent chocolate flavor without guilt—these chewy delights are packed with wholesome oats and nutritious nut butter.
Versatility shines through: Whether you need vegan or gluten-free options, this recipe can easily be tailored to fit dietary preferences, just like our Mini Chicken Pot recipe.
No Baking Required: Perfect for those days when you want cookies but don’t want to turn on the oven—just mix, shape, and chill!
Crowd-Pleasing: These cookies will disappear quickly, making them an ideal treat for gatherings or a quick snack. Plan to save some for later by storing them just like our Chicken Bacon Ranch fries!
Chocolate Oat Cookie Ingredients
For the Cookies
• Oats – Quick or rolled oats provide the chewy base for these cookies.
• Nut Butter – Choose your favorite nut butter like peanut or almond to bind everything together.
• Cocoa Powder – Unsweetened cocoa gives these cookies their deep, rich chocolate flavor.
• Sweetener – Use honey for a non-vegan option or maple syrup for a plant-based alternative.
Optional Add-Ins
• Chopped Nuts – Add walnuts or pecans for an extra crunch and flavor!
• Dark Chocolate Chips – Fold in dark chocolate chips for an indulgent twist, elevating your cookies to ultimate satisfaction.
• Dried Fruit – Consider raisins or cranberries for a fruity burst in each bite.
With these Chocolate Oat Cookie Ingredients in hand, you’re on your way to creating a delightful treat that satisfies your chocolate cravings while staying on the healthy side!
Step‑by‑Step Instructions for 4-Ingredient No-Bake Chocolate Oat Cookies
Step 1: Mix Dry Ingredients
In a large mixing bowl, combine 1 cup of oats and ¼ cup of unsweetened cocoa powder. Stir together until the mixture is completely blended, ensuring that there are no clumps. This dry mix will serve as the base for your flavor-packed chocolate oat cookies, giving them that delightful chewy texture.
Step 2: Add Wet Ingredients
Next, add ½ cup of your favorite nut butter and ¼ cup of honey or maple syrup to the bowl. Use a sturdy spatula to mix everything together vigorously until a sticky, cohesive mixture forms. This step is crucial for binding the ingredients, so make sure it’s well-combined to achieve the right consistency for your no-bake cookies.
Step 3: Shape Cookies
Once your mixture is ready, take a tablespoon or cookie scoop and portion out the dough onto a parchment-lined tray. Shape each scoop into a round cookie shape, ensuring they’re evenly spaced. You should see the rich chocolate color peeking through as they take form. This is where the magic begins, as you prepare your flavor-packed chocolate oat cookies for chilling.
Step 4: Chill
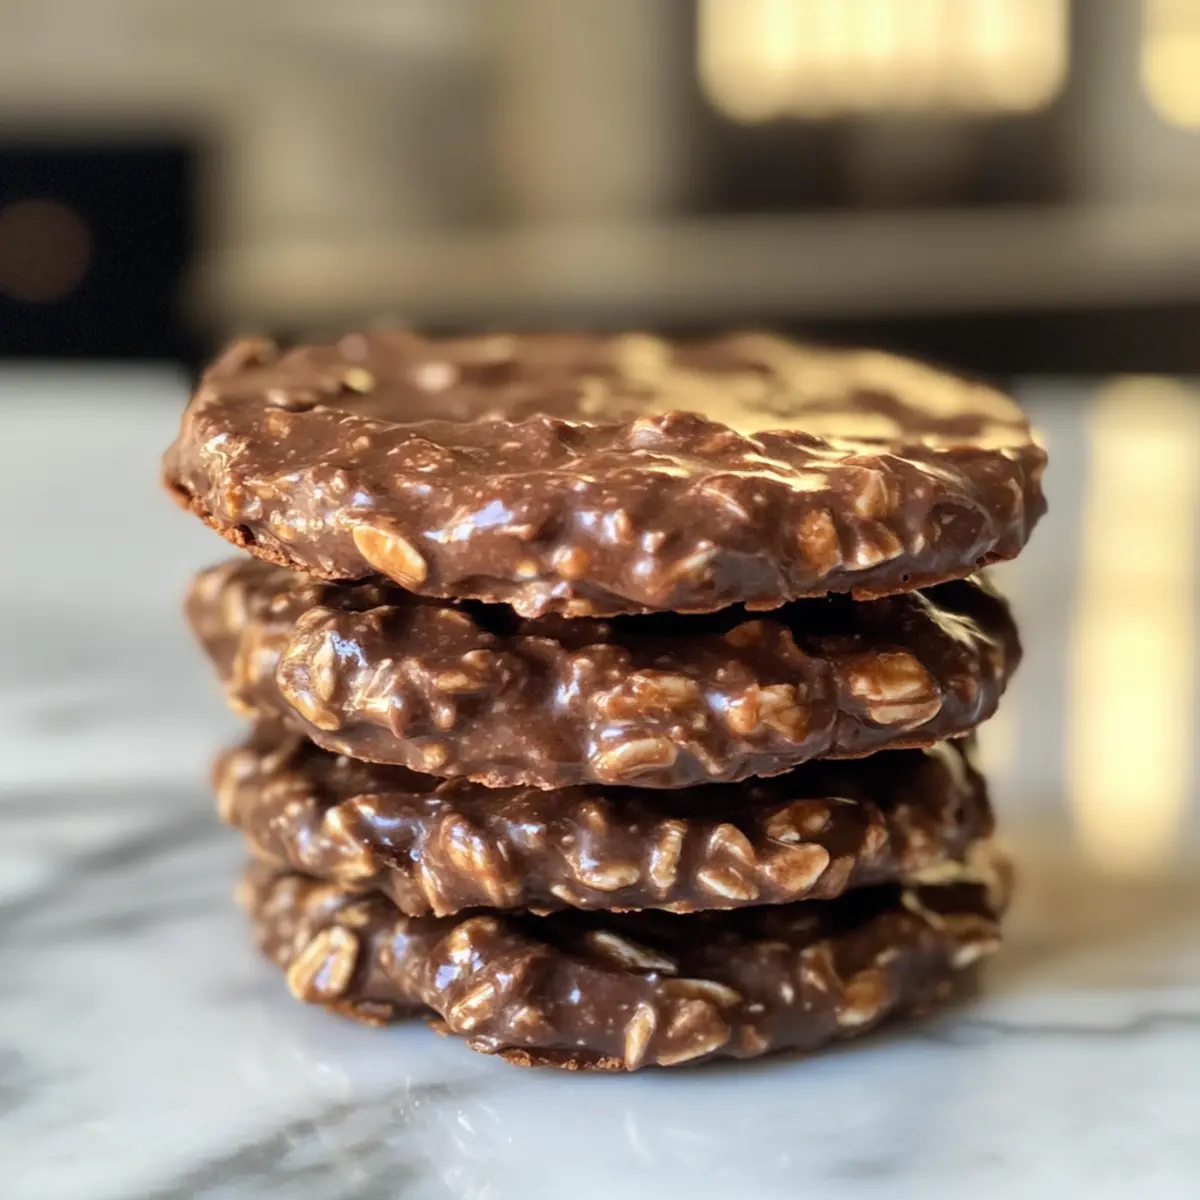
Place the tray of shaped cookies into the refrigerator and let them chill for at least 30 minutes, or until they firm up. This chilling period allows the cookies to set properly, making them easier to handle. Once they’re firm to the touch, you’ll have delicious, ready-to-enjoy chocolate oat cookies that are both nutritious and satisfying!
Step 5: Serve and Store
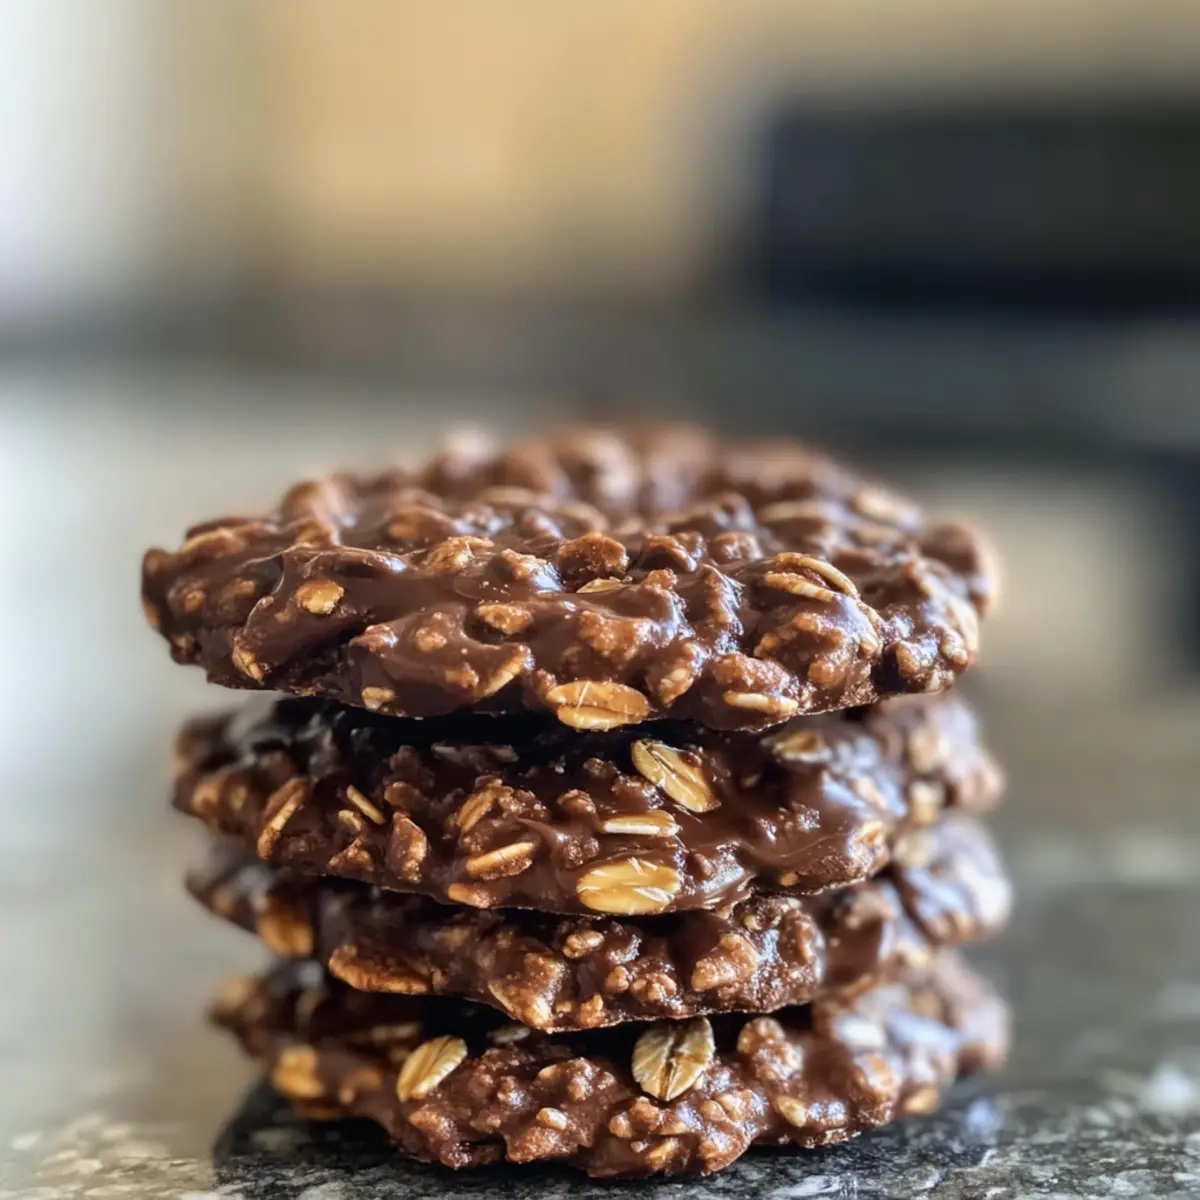
After chilling, remove your cookies from the fridge and enjoy them right away, or store leftovers in an airtight container. They can be kept in the refrigerator for up to a week, maintaining their chewy texture and rich flavor. Prepare to indulge in these scrumptious 4-ingredient no-bake chocolate oat cookies whenever the craving strikes!
Expert Tips for Chocolate Oat Cookies
Room Temperature Butter: Ensure your nut butter is at room temperature for easier mixing, resulting in a smoother cookie dough.
Mixing Caution: Avoid overmixing your dough. A gentle stir until ingredients are combined will maintain the cookies’ delightful chewy texture.
Adjusting Stickiness: If your mixture feels too sticky, try adding an extra tablespoon of oats to achieve the perfect consistency for your flavor-packed cookies.
Chill Time: Don’t skip the chilling step! It’s essential for firming up the cookies, making them easier to handle and delightfully chewy.
Flavor Variations: Feel free to experiment with different nut butters or sweeteners for unique twists on your chocolate oat cookies, catering to all taste preferences.
How to Store and Freeze Chocolate Oat Cookies
Airtight Container: Store your chocolate oat cookies in an airtight container in the refrigerator for up to 1 week to maintain their fresh, chewy texture.
Freezing: To keep these cookies for longer, freeze them in a single layer on a baking sheet, then transfer to a freezer-safe bag. They’ll last up to 3 months!
Reheating: If you prefer warm cookies, heat them for a few seconds in the microwave right before serving. This will revive that delicious chewy goodness!
Thoughtful Gift: Share the love! Pack some of these flavor-packed chocolate oat cookies in a cute tin or box—perfect as a wholesome homemade gift for friends and family.
Flavor-Packed Chocolate Oat Cookie Variations
Feel free to let your creativity shine by customizing these delightful cookies to suit your taste buds!
-
Gluten-Free: Swap regular oats with certified gluten-free oats for a delicious treat that everyone can enjoy, without the worry of gluten.
-
Vegan Delight: Use maple syrup instead of honey and choose a nut butter that’s plant-based, ensuring a fully vegan snack that still satisfies your cravings.
-
Nut-Free Alternative: Reach for sun butter instead of nut butter; it adds a creamy texture and is perfect for those with nut allergies. You won’t even miss the nuts!
-
Crunchy Twist: Fold in chopped walnuts or pecans to give your cookies a satisfying crunch amidst the soft chewiness – a delightful contrast!
-
Decadent Chocolate Boost: For a richer flavor, add dark chocolate chips or chunks to the mixture. Each bite becomes an indulgent treat that’s simply irresistible!
-
Fruity Burst: Enhance your cookies with dried fruit like cranberries or raisins. These little gems add a sweet, chewy element that pairs wonderfully with the chocolate.
-
Spiced Up: Mix in a dash of cinnamon or a pinch of chili powder for a warm, spicy twist that unexpectedly elevates the chocolate flavor to new heights.
-
Protein Packed: Stir in a scoop of protein powder to amp up the nutritional value. These cookies will not only taste great but also fuel your day!
Remember, each variation is a fresh take on these classic cookies, just like how our Mini Chicken Pot or Chicken Bacon Ranch recipes can bring something special to your table. Enjoy experimenting!
Make Ahead Options
These 4-Ingredient No-Bake Chocolate Oat Cookies are perfect for meal prep enthusiasts! You can mix the dry ingredients (oats and cocoa powder) and store them in an airtight container up to 3 days in advance to save time. Additionally, you can prepare the entire mixture and shape it into cookies, then refrigerate them for up to 24 hours before chilling. This ensures they’re fresh and ready to enjoy at your convenience. When ready to serve, simply chill for at least 30 minutes to firm them up. By prepping ahead, you can always have a quick, delicious treat on hand, making your busy days a little sweeter!
What to Serve with 4-Ingredient No-Bake Chocolate Oat Cookies
Indulge in a delightful mix of flavors that will transform your chocolate oat cookie experience into a memorable treat.
- Fresh Berries: Juicy strawberries or blueberries add a burst of freshness that contrasts beautifully with the rich, chocolaty flavors of the cookies.
- Nutty Granola: A handful of granola on the side complements the chewy texture of the cookies, making for a satisfying snack.
- Coconut Yogurt: Creamy coconut yogurt serves as a light and refreshing dip, enhancing the chocolate experience while adding a tropical twist.
- Chai Tea: The warm spices of chai tea pair harmoniously with the cookies’ rich chocolate, providing a cozy, comforting drink option.
- Sliced Bananas: Top your cookies with banana slices for an extra fruity twist, adding a creamy texture that offsets the cookie’s chewiness.
- Dark Chocolate Drizzle: Elevate your cookies by drizzling melted dark chocolate on top, accentuating the chocolate flavor and adding elegance.
- Almond Milk: A glass of chilled almond milk makes for a smooth, nutty pairing that balances out the sweetness of the cookies.
- Dried Fruits: Raisins or apricots can be enjoyed alongside the cookies, adding a chewy texture and natural sweetness to each bite.
- Ice Cream: For a decadent treat, pair your cookies with a scoop of vanilla or chocolate ice cream, creating an irresistible dessert combo!
Chocolate Oat Cookies Recipe FAQs
How should I select the best oats for my cookies?
It’s best to use quick or rolled oats for these cookies, as they provide the right chewiness. Look for oats that are whole grain and free from additives for the healthiest option.
What’s the best way to store these cookies and how long do they last?
Store your chocolate oat cookies in an airtight container in the refrigerator, where they’ll stay fresh for up to 1 week. Alternatively, you can freeze them for longer storage.
Can I freeze the chocolate oat cookies? How do I do it?
Absolutely! To freeze your cookies, place them in a single layer on a baking sheet and freeze until solid. Then, transfer them to a freezer-safe bag, removing as much air as possible. They’ll keep well for up to 3 months! Just thaw or reheat them briefly for a delicious treat.
What should I do if my mixture is too sticky?
If you find that your mixture is overly sticky, this can often be solved by simply adding an extra tablespoon of oats to the mixture. This will help absorb some of the moisture and make it easier to shape within minutes.
Are there any dietary considerations for these cookies?
Yes! If anyone has nut allergies, you can substitute the nut butter with sunflower seed butter for a safe and delicious nut-free option. Additionally, stick to maple syrup for a vegan-friendly sweetener, ensuring everyone can enjoy these flavor-packed cookies!
Irresistible Flavor-Packed Chicken Torta Sandwich Recipe
Ingredients
Equipment
Method
- Mix Dry Ingredients: Combine oats and cocoa powder in a bowl.
- Add Wet Ingredients: Mix nut butter and sweetener into dry ingredients until combined.
- Shape Cookies: Spoon dough onto a tray and shape into cookies.
- Chill: Refrigerate for at least 30 minutes to firm up.
- Serve and Store: Enjoy or store in an airtight container.
Leave a Reply