
“Did you catch that? The tantalizing sound of sizzling cod as it hits hot oil can transport you to a lively seaside eatery in an instant. Today, I’m excited to share my Crispy Fried Cod Sandwich recipe—an easy lunch option that’s perfect for any home chef ready to dive into the world of homemade seafood bliss. This versatile dish features flaky, tender cod encased in a deliciously golden batter, topped with creamy tartar sauce and served on a soft, toasted bun. Not only is it quick to whip up, but it’s also a crowd-pleaser that invites you to experiment with flavors and ingredients. Ready to bring that coastal charm to your kitchen? Let’s get started!”
Why is this sandwich a must-try?
Simplicity: You only need a handful of ingredients to make this restaurant-quality sandwich at home.
Crispy Texture: The combination of panko breadcrumbs and perfectly fried cod creates a delightful crunch that’s hard to resist.
Versatility: Feel free to substitute cod with your favorite fish like haddock or even try a gluten-free option with alternative flours—perfect for customizing!
Crowd-Pleaser: This sandwich is sure to impress family and friends. Pair it with Cinnamon Fried Apples for a deliciously nostalgic meal.
Quick Prep: With simple steps and a short frying time, you can have a delicious sandwich in no time, making it an ideal lunch or dinner option.
Dive into this culinary adventure and elevate your weekday meals with a taste of the sea!
Crispy Fried Cod Sandwich Ingredients
• Get ready for deliciousness!
For the Cod
- Cod fillets – Main protein; skinless and cut to fit your bun.
- All-purpose flour – Base for coating; swap for gluten-free flour if needed.
- Salt – Essential for flavor; adjust according to your taste.
- Black pepper – Adds a subtle heat; white pepper is a milder alternative.
- Garlic powder – Provides savory depth, but fresh garlic can change texture.
- Paprika – Adds color and mild flavor; smoked paprika gives a different twist.
- Cayenne pepper – Optional for a kick; leave it out for a milder option.
For the Breading
- Eggs – Binds everything together; no substitutes for this critical step.
- Milk – Enriches the egg wash; use almond or soy milk for lactose-free.
- Panko breadcrumbs – Creates extra crunch; regular breadcrumbs are a substitute, but texture varies.
For Frying
- Vegetable oil – Perfect for frying; canola or peanut oil are viable alternatives.
For the Tartar Sauce
- Mayonnaise – The base for creamy tartar; Greek yogurt can lighten it.
- Dill pickle relish – Adds tang and texture; chopped pickles are a great alternative.
- Red onion – Delivers flavor and crunch; substitute with shallots or green onions.
- Lemon juice – Brightens the sauce; fresh lemon is best.
- Capers – Optional tanginess; can be omitted if preferred.
- Dijon mustard – Adds sharpness; regular mustard works too.
For Assembling
- Brioche buns – Soft and delightful base; try other rolls for variety.
- Lettuce – Adds a refreshing crunch; Romaine or butter lettuce are fantastic choices.
- Tomato and red onion slices – Optional for added freshness and flavor.
- Lemon wedges – For serving; enhances the presentation and flavor.
This Crispy Fried Cod Sandwich is ready to be brought to life with these delightful ingredients! Happy cooking!
Step‑by‑Step Instructions for Crispy Fried Cod Sandwich
Step 1: Prep Cod
Begin by drying the cod fillets thoroughly using paper towels; this step ensures a crispier coating. Check the fillets for any lingering bones, carefully removing them with fish tweezers if necessary. Once prepped, set them aside as you prepare the breading stations for the Crispy Fried Cod Sandwich.
Step 2: Prepare Breading Stations
Create three shallow dishes for the breading process: fill the first with all-purpose flour mixed with salt, black pepper, garlic powder, paprika, and cayenne pepper for a flavorful coating. In the second bowl, whisk together eggs and milk to create a rich egg wash, while the third dish should hold panko breadcrumbs to add that irresistible crunch.
Step 3: Bread the Cod
Take each cod fillet and gently dredge it in the seasoned flour, ensuring an even coating. Next, dip the floured fillet into the egg wash, allowing any excess to drip off, then roll it in panko breadcrumbs until fully covered. Repeat this process for all fillets, presenting them beautifully for frying.
Step 4: Rest Breaded Fillets
Arrange the breaded fillets in a single layer on a wire rack. Allow them to rest for 10-15 minutes to set the breading; this crucial step helps ensure the panko adheres well during frying, leading to that delightful crunch we crave in a Crispy Fried Cod Sandwich.
Step 5: Make Tart Sauce
While the fillets rest, prepare the tartar sauce by mixing mayonnaise, dill pickle relish, finely chopped red onion, fresh lemon juice, capers, Dijon mustard, and seasoned black pepper in a bowl. Give it a good stir and refrigerate for about 30 minutes to let the flavors marry, creating a zesty accompaniment for your sandwich.
Step 6: Heat Oil
In a deep pot, pour enough vegetable oil to submerge the fillets about halfway. Heat the oil over medium-high heat, monitoring it closely until it reaches a temperature of 350-375°F (175-190°C). Use a deep-fry thermometer to ensure accuracy; a hot oil temperature is essential for achieving the crispy texture of the fried cod.
Step 7: Fry Cod
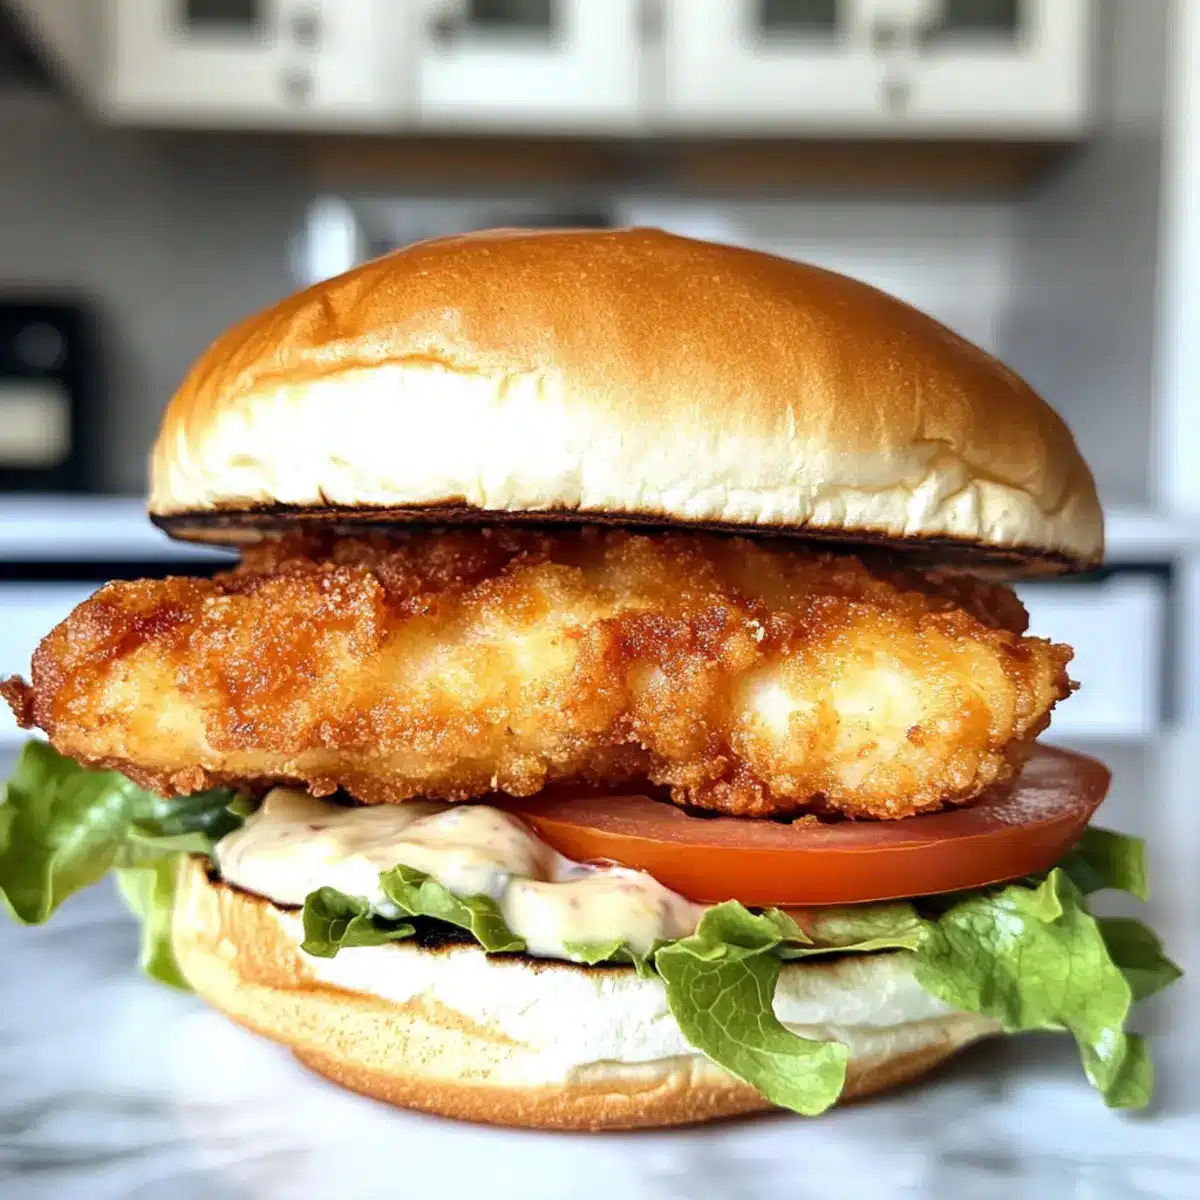
Carefully lower a few fillets at a time into the hot oil, being mindful not to overcrowd the pot. Fry each portion for approximately 3-4 minutes on each side or until golden brown and their internal temperature reaches 145°F (63°C). Once finished, transfer the cooked fillets to a paper towel-lined plate to absorb excess oil.
Step 8: Toast Buns
As the fried cod cools slightly, take your brioche buns and lightly toast them on a skillet or in a toaster until golden brown. This step adds an inviting crunch and warmth to the buns that perfectly complements the crispy fish.
Step 9: Assemble Sandwiches
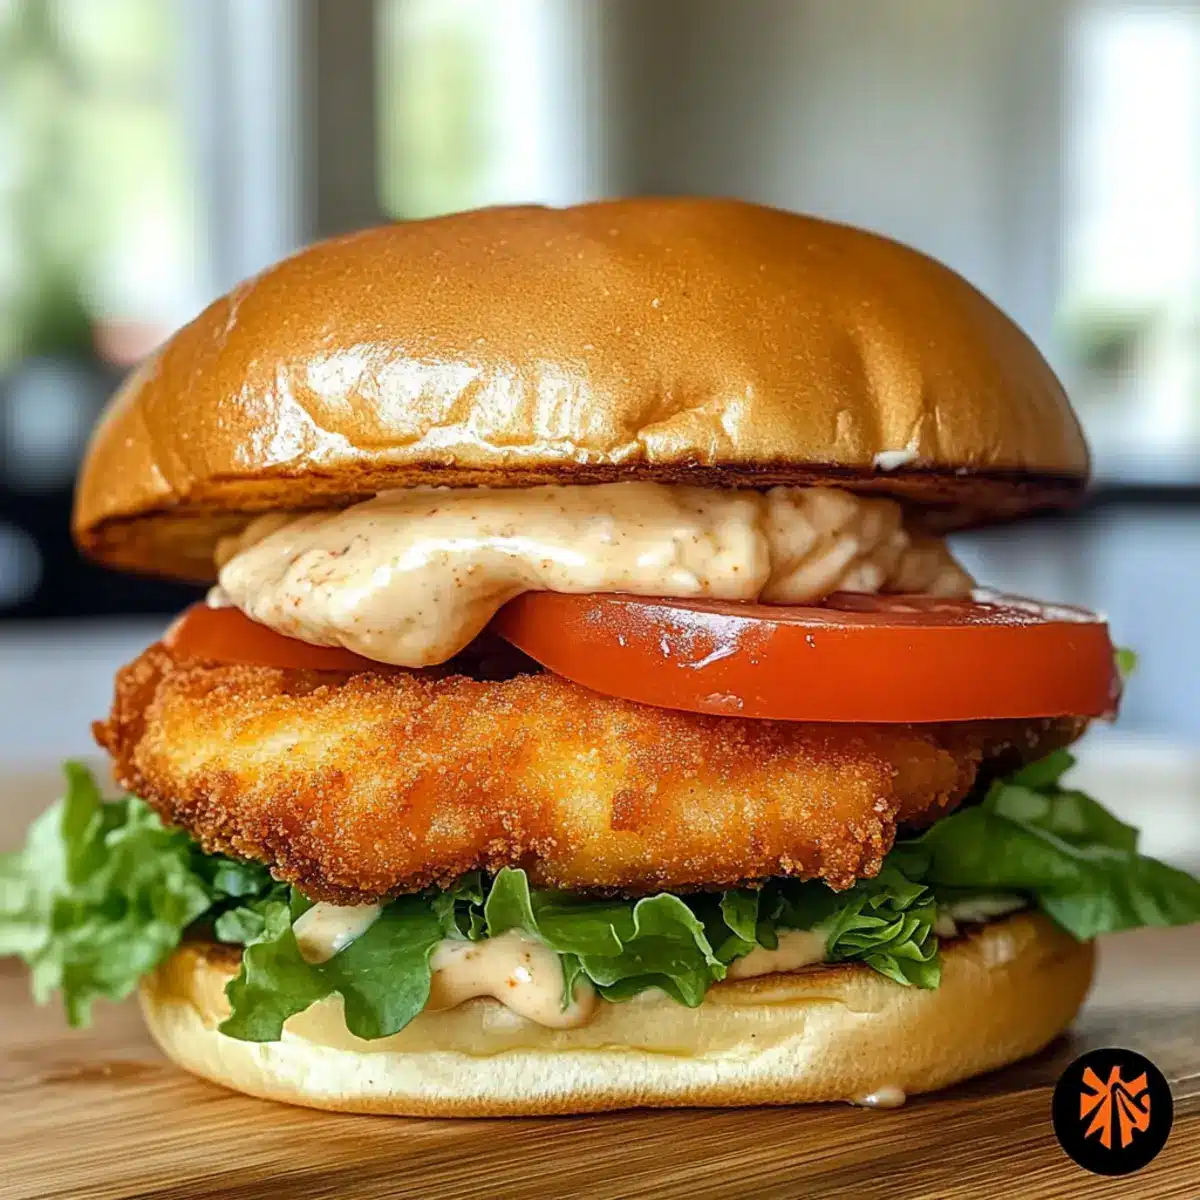
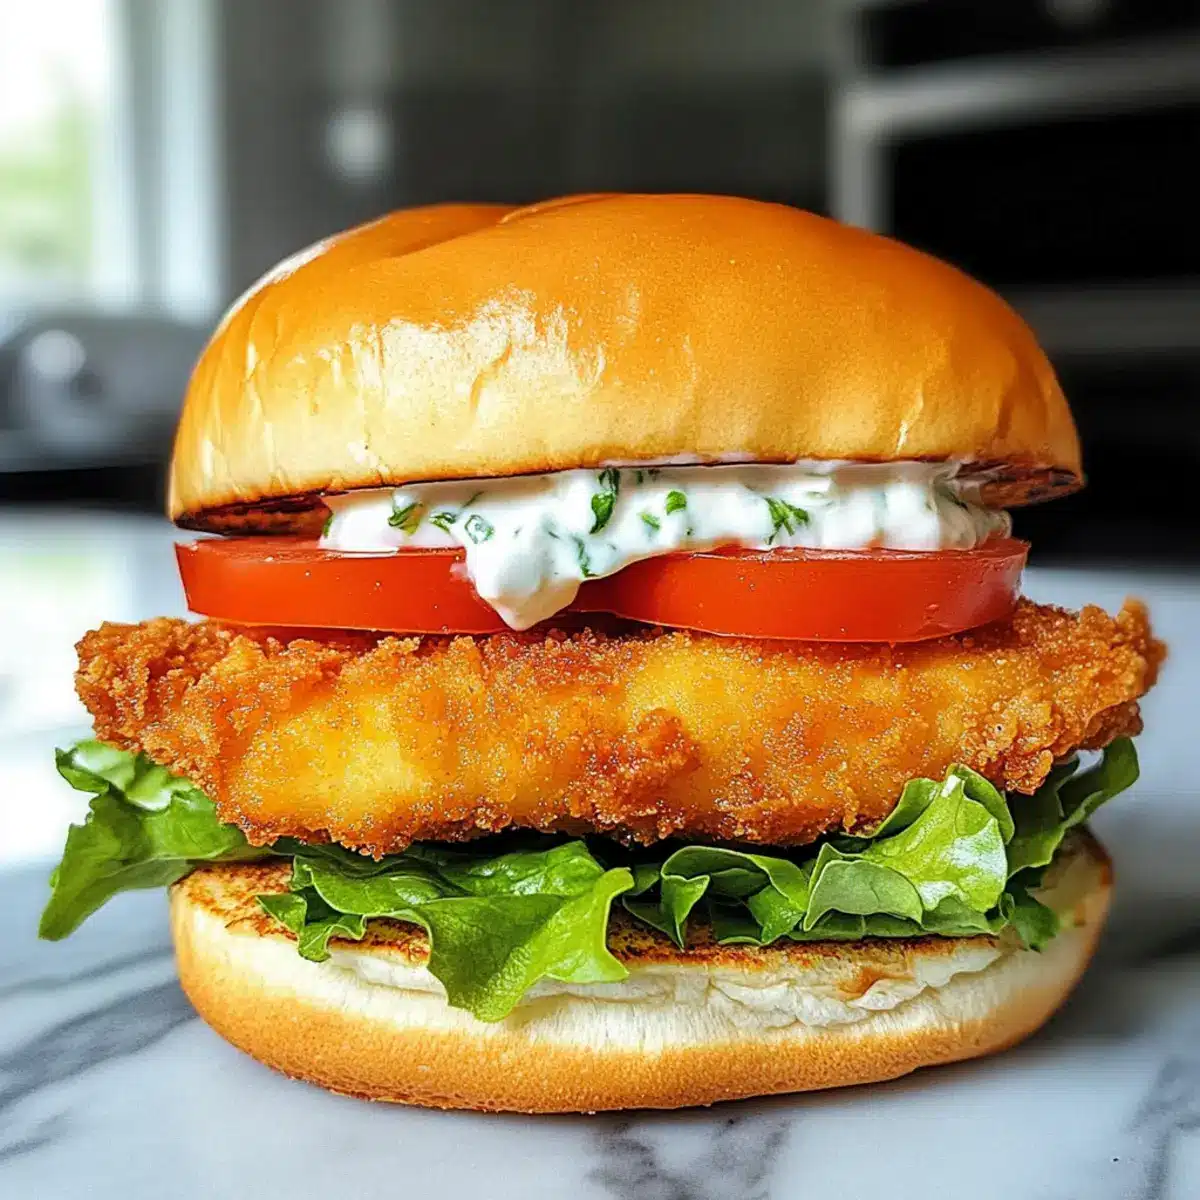
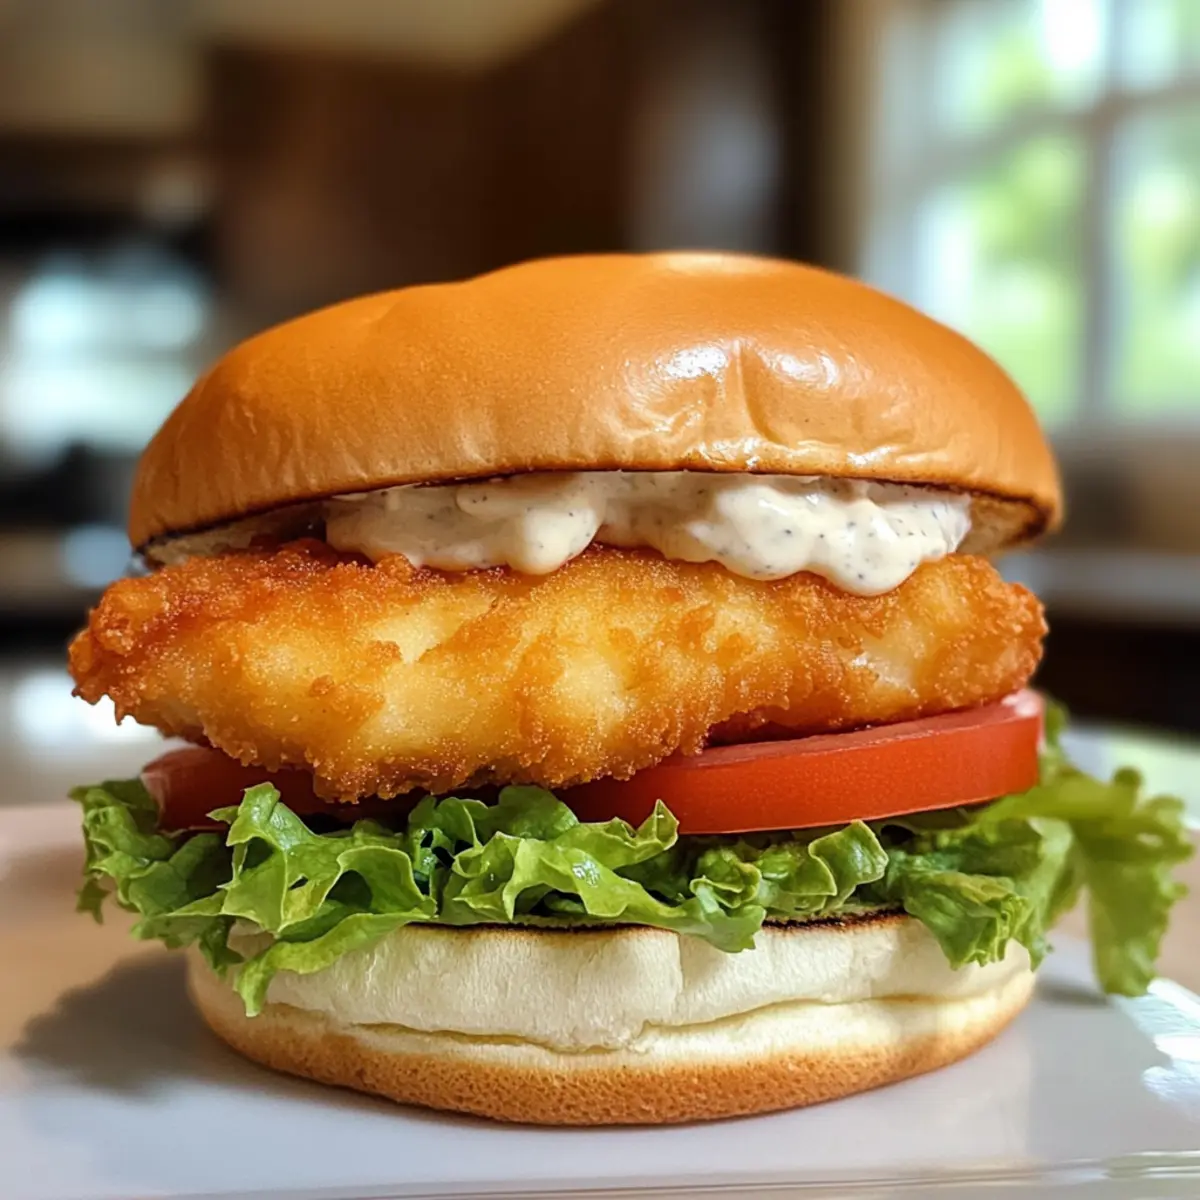
Spread a generous layer of the prepared tartar sauce on the bottom half of each toasted bun. Layer fresh lettuce on top, followed by the crispy fried cod fillet. Add optional slices of tomato and red onion to enhance the flavors and textures, then place the top bun gently over the filling, creating a satisfying Crispy Fried Cod Sandwich.
Step 10: Serve
Plate your sandwiches immediately, pairing them with lemon wedges for added brightness and a classic touch. Enjoy this beloved Crispy Fried Cod Sandwich hot, celebrating the perfect blend of crispy textures and creamy tartar sauce.
Make Ahead Options
These Crispy Fried Cod Sandwiches are a fantastic choice for meal prep enthusiasts looking to save time during busy weeknights! You can easily prep the breaded cod fillets up to 24 hours in advance by following the breading steps and then storing them in the refrigerator, covered with plastic wrap to maintain their crispiness. The tartar sauce can also be made up to 3 days ahead; just keep it refrigerated to preserve its fresh taste. When you’re ready to enjoy your sandwich, simply fry the prepped fillets straight from the fridge until golden brown. Serving them immediately ensures crispiness that’s just as delicious as freshly made!
Storage Tips for Crispy Fried Cod Sandwich
Fridge: Keep any leftover sandwich components separately; the fried cod can be stored in an airtight container for up to 2 days, but fresh is best for flavor and texture.
Freezer: Uncooked, breaded cod fillets can be frozen for up to 2 months. Lay them flat on a baking sheet until frozen, then transfer to a freezer bag for future use.
Reheating: To enjoy leftover fried cod, reheat in an oven at 350°F (175°C) for about 10-15 minutes, ensuring it crisps up again. Avoid microwaving, as it can make the breading soggy.
Tartar Sauce: Homemade tartar sauce can be stored in the fridge for up to 3 days. Mix it fresh for best results, but it can easily be made a day in advance to save time.
Expert Tips for Crispy Fried Cod Sandwich
-
Oil Temperature Check: Ensure your oil is at the right temperature (350-375°F) before frying. If too cool, your fish will be greasy instead of crispy.
-
Resting Time Matters: Let the breaded cod fillets rest for 10-15 minutes on a wire rack. This helps the breadcrumbs adhere better and enhances the crunch.
-
Don’t Overcrowd: Fry fillets in small batches to maintain oil temperature. Overcrowding the pot results in soggy fish and uneven frying.
-
Monitor Cooking Time: Fry the cod for about 3-4 minutes on each side, but watch closely to avoid overcooking and ensure it’s perfectly flaky and juicy.
-
Experiment with Buns: While brioche is delightful, try whole grain or pretzel buns for interesting flavors in your Crispy Fried Cod Sandwich.
What to Serve with Crispy Fried Cod Sandwich
The delicious flavors and textures of the crispy fried cod sandwich call for equally delightful sides and pairings to create a memorable meal.
-
Classic Coleslaw: The crunch of coleslaw adds a refreshing contrast to the crispy sandwich, enhancing every bite with a tangy zing.
-
Crispy French Fries: Perfectly fried, golden potatoes moodily complement the sandwich’s crunchiness, making for a traditional yet comforting duo.
-
Sweet Potato Fries: These offer a subtly sweet flavor that balances the savory sandwich beautifully. Dip them in your favorite sauce for added fun!
-
Simple Green Salad: A light salad made with mixed greens, cucumber, and a vinaigrette dressing adds freshness and cuts through the richness of the sandwich.
-
Pickle Chips: Crispy, zesty pickles evoke memories of seaside dining, providing a pleasing crunch and bite that enhances the flavors of your sandwich.
-
Lemonade: A refreshing glass of lemonade pairs wonderfully with the sandwich, balancing its savory nature with a bright citrus zing.
-
Beer Batter Onions Rings: These decadent rings add another layer of crunch to your meal while echoing the flavor of fried seafood—perfect for sharing!
-
Apple Pie: End your meal on a sweet note! The warm spices and sweetness of the pie make for a comforting classic alongside the savory cod.
Elevate your dining experience by pairing these items with your crispy fried cod sandwich and savor each delicious moment!
Crispy Fried Cod Sandwich Variations
Feel free to make this Crispy Fried Cod Sandwich your own, tantalizing your taste buds with some simple tweaks!
-
Fish Swap: Substitute cod with haddock or pollock for different seafood flavors. Each fish brings its unique taste and texture to this delightful dish.
-
Gluten-Free: Replace all-purpose flour with a gluten-free flour blend. This makes the sandwich accessible to those with gluten sensitivities while still keeping that crispy charm.
-
Spicy Kick: Mix in a teaspoon of Old Bay seasoning or your favorite hot sauce into the flour for a flavorful kick. You can easily adjust the amount to match your heat tolerance!
-
Change the Buns: Experiment with pretzel buns or whole grain rolls instead of brioche. Each option adds its own delicious flavor and texture to the sandwich.
-
Creamy Options: Instead of traditional tartar sauce, try a spicy mayo with sriracha or chipotle sauce for a new layer of flavor that’s bursting with excitement.
-
Vegetable Variety: Sneak in some crispy pickled jalapeños or sliced avocado for an extra crunch and refreshing twist. Add texture and flavor with each bite!
-
Herb Infusion: Incorporate fresh herbs like parsley or cilantro into your tartar sauce for an added freshness that brightens up the dish.
Pair your crispy sandwich with a side of classic coleslaw for a wonderful balance, or try it alongside Crispy Bacon Honey Roasted Potatoes for a satisfying meal that delights! Let your culinary creativity shine!
Crispy Fried Cod Sandwich Recipe FAQs
What type of cod should I use for this sandwich?
Absolutely! Fresh, skinless cod fillets are ideal; they should be firm and without any dark spots. Look for fillets that are bright and moist. You can also substitute cod with haddock or pollock if you prefer a different flavor profile.
How should I store leftover fried cod or sandwich components?
Very! Store any leftover fried cod in an airtight container in the fridge for up to 2 days. However, it’s best enjoyed fresh! Keep other components, like buns and tartar sauce, separately to maintain their textures.
Can I freeze the breaded cod fillets for later use?
Of course! To freeze, lay the uncooked, breaded fillets flat on a baking sheet and freeze until solid. Then transfer them to a freezer bag, where they can last up to 2 months. Just make sure to label the bags with the date for easy use.
What can I do if the breading isn’t sticking to the fish?
Don’t worry! If the breading isn’t adhering well, you might need to let the breaded fillets rest longer before frying—about 10-15 minutes on a wire rack helps the coating set. Also, ensure that the fillets are patted dry before dredging to reduce excess moisture.
Is this recipe suitable for those with dietary restrictions?
Certainly! To make it gluten-free, substitute all-purpose flour with a gluten-free flour blend, and use gluten-free panko breadcrumbs. For dairy-free, almond or soy milk can replace the regular milk in the egg wash. Always adjust spices to accommodate any allergies.
How long will the homemade tartar sauce last?
Great question! Homemade tartar sauce can be refrigerated for up to 3 days, which is enough time to enjoy it with other meals. You can make it a day ahead to save time on your cooking day. Just be sure to stir it well before serving to refresh the flavors!
Crispy Fried Cod Sandwich: Your New Favorite Lunch Adventure
Ingredients
Equipment
Method
- Begin by drying the cod fillets thoroughly using paper towels; remove any lingering bones if necessary.
- Create three shallow dishes for the breading process: fill the first with all-purpose flour mixed with salt and spices, the second with whisked eggs and milk, and the third with panko breadcrumbs.
- Dredge each cod fillet in flour, dip in egg wash, and then roll in panko breadcrumbs until fully covered.
- Arrange the breaded fillets on a wire rack and let them rest for 10-15 minutes.
- Mix all tartar sauce ingredients, stir well, and refrigerate for about 30 minutes.
- Heat vegetable oil in a deep pot until it reaches 350-375°F (175-190°C).
- Fry the cod fillets in batches for 3-4 minutes per side until golden brown.
- Toast the brioche buns until golden brown.
- Spread tartar sauce on the bottom half of each bun, add lettuce, fried cod, and optional toppings, then cap with the top bun.
- Serve immediately with lemon wedges.
Leave a Reply