
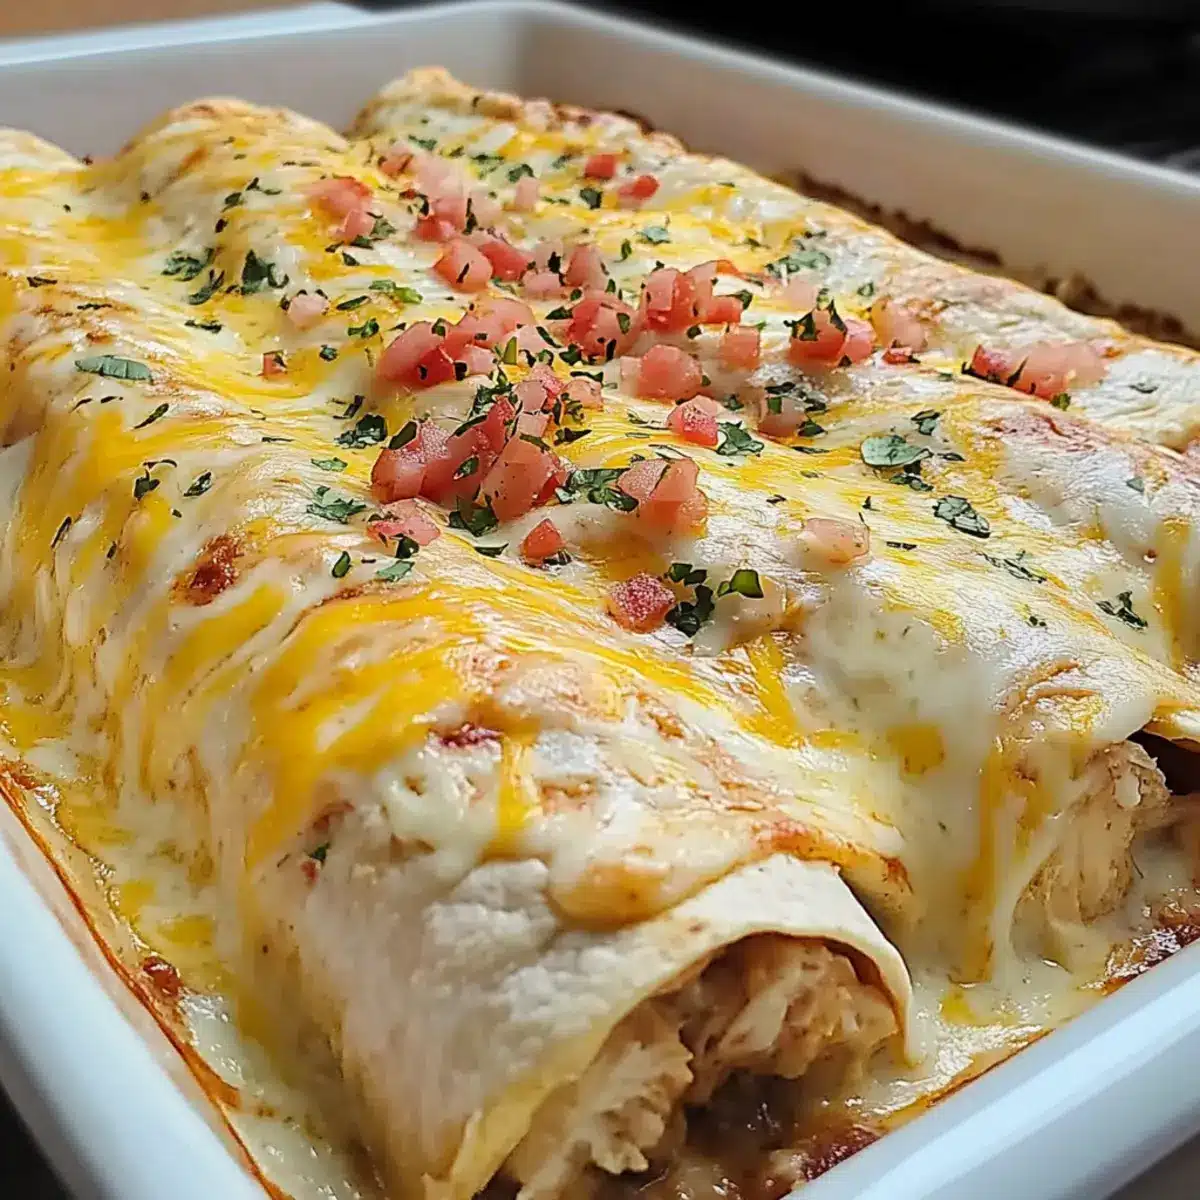
The aroma of melted cheese wafting through the kitchen is a daily reminder of the joy of home-cooked meals. I’m always searching for recipes that bring that cozy feeling to the dinner table, and this Creamy Queso Chicken Enchiladas Bake does exactly that. With its creamy cheesy filling and tender shredded chicken, it’s a delightful Tex-Mex twist destined to become your new weeknight favorite. What sets this dish apart is not only how quickly it comes together—roughly 30 minutes—but also its ability to evoke smiles around the dinner table, making it a definite crowd-pleaser. Ready to dive into an easy yet satisfying recipe that feels like a warm hug in every bite? Let’s get cooking!
Why will you adore this bake?
Quick and Easy: In just about 30 minutes, you’ll have a deliciously comforting meal ready to savor, perfect for busy weeknights.
Flavorful Filling: The creamy queso and taco-seasoned chicken blend beautifully to create a rich taste that satisfies everyone at the table.
Customizable: Feel free to swap in your favorite proteins, like shredded turkey or leftover rotisserie chicken, and add veggies to make it your own! Consider serving it alongside some Mini Chicken Pot for a delightful dinner spread.
Crowd-Pleasing: Everyone loves a cheesy dish—this bake will have your family members and guests fighting over the last bite!
Comfort Food: This recipe encapsulates the warm, inviting essence of Tex-Mex cuisine, making it a go-to for family gatherings. Prepare to bring on the smiles as you serve this warm, delicious creation right from the oven.
Queso Chicken Enchiladas Bake Ingredients
• Here’s everything you need for this delightful Tex-Mex dish!
For the Enchiladas
- Flour Tortillas – Soft base for enchiladas; warm them up to prevent tearing.
- Shredded Chicken – Main protein source; rotisserie chicken is a great shortcut!
- Taco Seasoning – Essential for flavor; adds a hint of spice to the chicken mixture.
- Sour Cream – Adds creaminess and balances heat; vital for that luscious texture.
- Shredded Cheddar Cheese – Provides flavor and richness; fresh cheese melts best!
- Chopped Green Chilies – Adds mild heat; use jalapeños for extra kick if desired.
- Diced Tomatoes with Green Chilies – Smooths out the queso sauce; don’t drain!
- Velveeta Queso Blanco – Key for a creamy sauce; substitute with melty cheese blend if needed.
Step‑by‑Step Instructions for Queso Chicken Enchiladas Bake
Step 1: Preheat the Oven
Begin by preheating your oven to 350°F (175°C). This ensures your Queso Chicken Enchiladas Bake will cook evenly and be delightful when served. While the oven is heating, gather your ingredients and get ready to assemble this scrumptious dish.
Step 2: Prepare the Filling
In a large mixing bowl, combine the shredded chicken, taco seasoning, sour cream, shredded cheddar cheese, and chopped green chilies. Stir everything together until fully incorporated, creating a flavorful and creamy filling. This mixture should be well-blended and have an inviting aroma, perfect for your enchiladas.
Step 3: Make the Queso Sauce
In a medium saucepan over medium heat, melt the Velveeta Queso Blanco with the undrained diced tomatoes. Stir the mixture continuously until it reaches a smooth, creamy consistency—this should take about 5 minutes. Once melted and creamy, remove it from heat and set it aside, letting it cool slightly while you prepare the tortillas.
Step 4: Fill the Tortillas
Warm the flour tortillas for about 15 seconds in the microwave to make them pliable and prevent tearing. Lay each tortilla flat, then scoop about ½ to ¾ cup of the chicken filling into the center. Roll the tortilla tightly to form a burrito, ensuring the filling is completely enclosed. Repeat this process until all tortillas are filled.
Step 5: Arrange in the Casserole Dish
Take a 9×13-inch casserole dish and lightly grease it. Place the filled tortillas seam-side down in the dish, packing them snugly together. This arrangement will help keep them from unrolling during baking. Once all the enchiladas are in the dish, prepare to drizzle the warm queso sauce over the top.
Step 6: Pour the Queso Sauce
Gently pour the creamy queso sauce evenly over the assembled enchiladas in the casserole dish. Ensure every enchilada is generously coated with the cheesy goodness, as this will create a beautiful, bubbly top as it bakes.
Step 7: Bake to Perfection
Transfer the casserole dish to the preheated oven and bake for 20–25 minutes. You’ll know it’s done when the edges are bubbly and the cheese is golden and slightly browned. The enticing aroma of your Queso Chicken Enchiladas Bake will fill your kitchen, promising a delicious meal.
Step 8: Serve and Enjoy
Once baked, remove the casserole from the oven and allow it to cool for a few minutes. This will make serving easier and enhance safety. Scoop out portions onto plates and serve hot, ready to indulge in the cheesy, comforting delight of your homemade Queso Chicken Enchiladas Bake!
Storage Tips for Queso Chicken Enchiladas Bake
Fridge: Store leftovers tightly covered in the refrigerator for up to 3 days. This keeps your enchiladas fresh and ready for a quick reheat after a busy day.
Freezer: For longer storage, wrap the enchiladas well in foil or plastic wrap and freeze for up to 2 months. When ready to enjoy, thaw overnight in the fridge before baking.
Reheating: To reheat, bake the enchiladas at 350°F (175°C) for about 20 minutes, or until heated through. If they seem dry, add a splash of chicken broth before covering with foil.
Assembly Tip: Consider assembling the Queso Chicken Enchiladas Bake in advance and storing in the fridge overnight for an easy weeknight dinner solution.
Make Ahead Options
These Queso Chicken Enchiladas Bake are a dream for busy home cooks looking to streamline their meal prep! You can assemble the enchiladas up to 24 hours in advance; simply cover the casserole dish tightly with plastic wrap and refrigerate. For even tastier results, consider preparing the creamy queso sauce and storing it separately in the fridge for the same duration. When you’re ready to serve, preheat your oven and bake the enchiladas straight from the refrigerator, adding an extra 5-10 minutes to ensure they’re heated through and bubbly. With these make-ahead techniques, you can enjoy a comforting, homemade meal without the last-minute rush!
What to Serve with Queso Chicken Enchiladas Bake
Complement your meal with delightful sides that enhance the flavors of this cheesy masterpiece and create a satisfying spread.
- Spanish Rice: The subtly spiced grains absorb the creamy queso, offering a perfect base to balance the rich flavors.
- Refried Beans: Creamy and comforting, refried beans add texture while staying true to the Tex-Mex theme, providing a hearty addition to your plate.
- Guacamole: Creamy avocado pairs beautifully with the zesty enchiladas, bringing fresh brightness to the dish and a contrast of flavors.
- Fresh Salsa: A refreshing side that adds a burst of color and flavor; the acidity of the tomatoes cuts through the richness.
- Corn Salad: Sweet corn, mixed with vibrant bell peppers and lime, introduces a crunchy texture that complements the creamy enchiladas magically.
- Chips and Queso: Keep the cheesy goodness flowing with crispy tortilla chips and extra queso dip—everyone loves this timeless combination!
- Mixed Green Salad: A light, crisp salad tossed with a zesty vinaigrette adds a contrast that brightens your meal and refreshes the palate.
- Margaritas: For a perfect drink pairing, enjoy a classic margarita with lime and salt, which enhances the Tex-Mex experience elegantly.
Expert Tips for Queso Chicken Enchiladas Bake
Warm Tortillas: Ensure tortillas are warm before filling; this prevents cracking and makes rolling easier.
Flavor Boost: Enhance the chicken filling with extra taco seasoning for a more pronounced flavor that complements the creamy queso.
Customize Ingredients: Feel free to swap proteins like ground beef or turkey for shredded chicken. Adding black beans or corn can enhance texture and taste.
Make Ahead Option: Assemble the enchiladas in advance, cover, and refrigerate. Bake just before serving for a fresher taste.
Storage Tips: Leftovers can be stored tightly covered in the fridge for up to three days or frozen for up to two months—perfect for quick weeknight meals!
Variations & Substitutions for Queso Chicken Enchiladas Bake
Feel free to get creative and customize your dish with these delightful swaps and additions!
-
Gluten-Free: Use corn tortillas instead of flour to make this dish gluten-free, ensuring everyone can enjoy it.
-
Vegetarian: Replace shredded chicken with sautéed mushrooms and spinach or a mix of your favorite vegetables for a delicious meat-free option.
-
Extra Creamy: Add a dollop of cream cheese into the chicken filling for an even richer, creamier texture. The creaminess elevates the dish to a new level!
-
Spicy Kick: Toss in some diced jalapeños or a splash of hot sauce to the filling for those who crave that extra heat. It’s a great way to make your enchiladas sing with flavor!
-
Cheesy Upgrade: Mix in some pepper jack cheese along with cheddar for a zesty, melty twist that packs a flavor punch. Pair this with a fresh side salad for an extra refreshing touch!
-
Protein Packed: Swap out the chicken entirely for black beans or lentils, or mix in some shredded rotisserie chicken for a super quick alternative. It’s perfect for those evenings when time is tight.
-
Savory Add-Ins: You can add black beans or corn right into the filling for added texture and nutrients. This little extra touch can transform your enchiladas into a hearty meal.
For a deliciously varied dinner spread, why not serve these enchiladas with some Chicken Bacon Ranch Fries or accompany them with a side of Baked Mini Hasselback Potatoes? Explore flavors and textures that create a unique experience at home!
Queso Chicken Enchiladas Bake Recipe FAQs
What type of tortillas should I use for the enchiladas?
Flour tortillas are ideal for a soft, pliable base. If you’re gluten-free, corn tortillas are a great alternative! Just warm them slightly before filling to prevent tearing.
How do I store leftovers?
Store any leftover enchiladas tightly covered in the refrigerator for up to 3 days. This preserves their freshness and makes reheating easy for busy nights.
Can I freeze the Queso Chicken Enchiladas Bake?
Absolutely! For longer storage, wrap the enchiladas tightly in foil or plastic wrap and freeze for up to 2 months. When ready to enjoy, thaw them overnight in the fridge before baking.
What if I don’t have Velveeta queso?
If Velveeta queso is unavailable, you can create a similar sauce by combining a melty cheese blend (like mozzarella or cheddar) with cream cheese. Heat them together with the undrained diced tomatoes until smooth. This creates a creamy consistency that works wonderfully!
Are there any dietary considerations?
While the Queso Chicken Enchiladas Bake is suitable for general audiences, be cautious of dietary restrictions. Make sure to check for allergies related to dairy or gluten. If cooking for pets, avoid giving them any of the seasoned fillings, as spices can be harmful to them.
What are some common issues and solutions when making enchiladas?
If the tortillas tear while filling, make sure they’re warmed as this helps maintain flexibility. If your queso sauce is too thick, a splash of milk or chicken broth can help achieve a creamier texture. And if the enchiladas aren’t as cheesy as you like, you can always sprinkle extra cheese on top before baking for that added gooey goodness!

Cheesy Queso Chicken Enchiladas Bake for Cozy Nights
Ingredients
Equipment
Method
- Preheat your oven to 350°F (175°C).
- In a large mixing bowl, combine shredded chicken, taco seasoning, sour cream, shredded cheddar cheese, and chopped green chilies.
- In a medium saucepan over medium heat, melt Velveeta Queso Blanco with the undrained diced tomatoes. Stir until smooth and creamy.
- Warm flour tortillas in the microwave for about 15 seconds. Fill each tortilla with chicken filling and roll tightly.
- Grease a 9x13-inch casserole dish and place filled tortillas seam-side down.
- Pour the queso sauce evenly over the enchiladas in the casserole dish.
- Bake for 20–25 minutes until edges are bubbly and cheese is golden.
- Allow to cool for a few minutes before serving hot.
Leave a Reply