
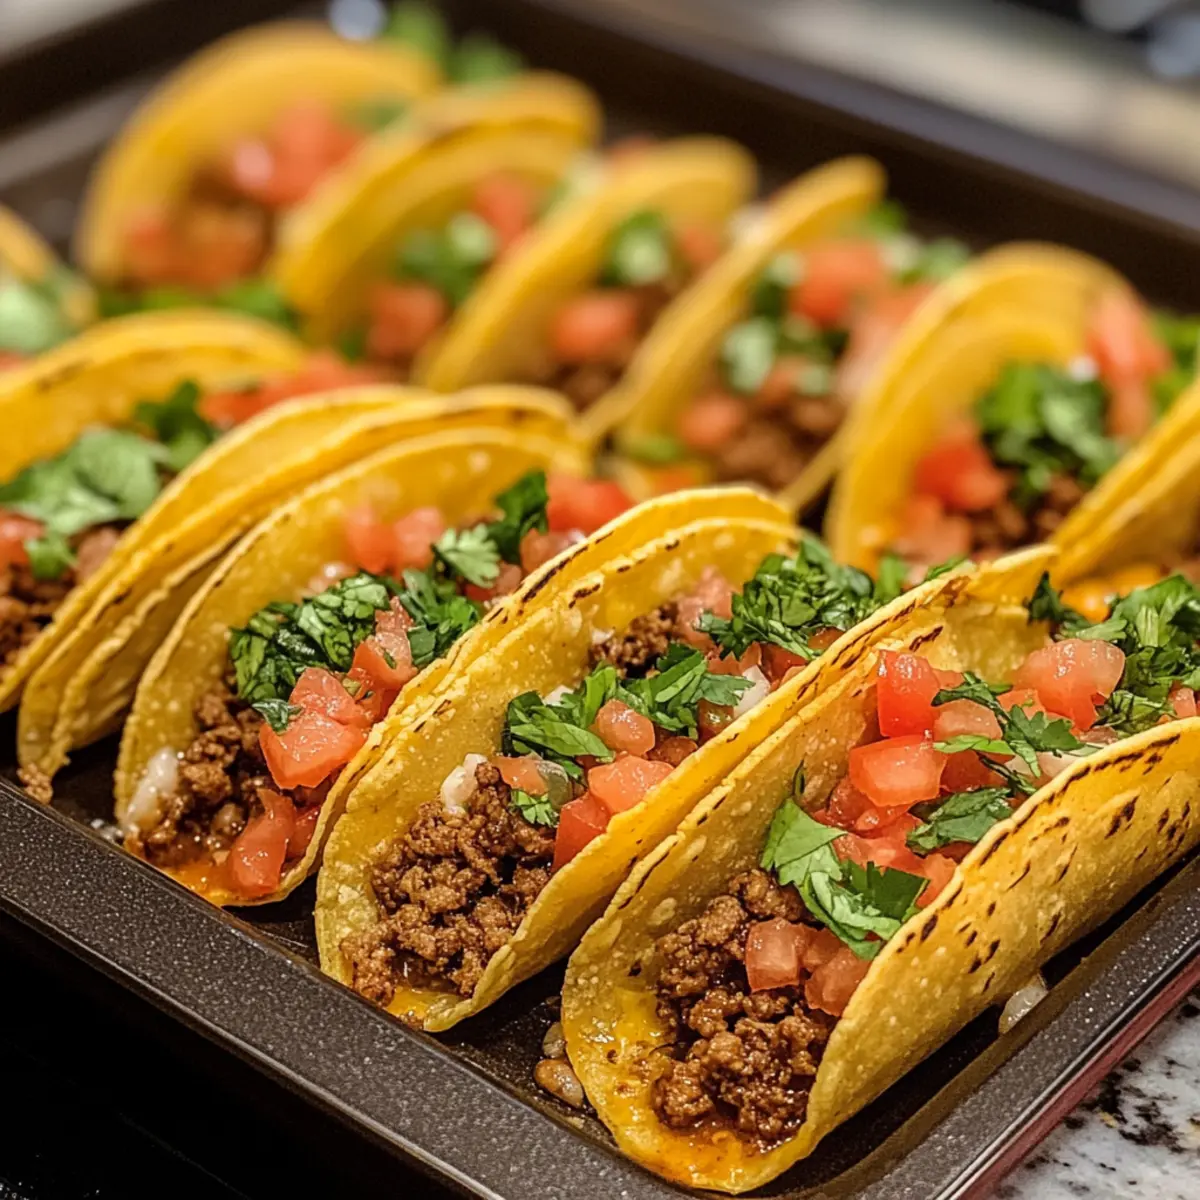
The aroma of sizzling beef and melted cheese wafting through the kitchen is a cue that dinner is about to become a delightful adventure. I can’t tell you how many times the rush of a busy weeknight has been saved by my favorite comfort food: Oven-Baked Cheesy Tacos. These crispy, loaded beauties come together in just 30 minutes and make for a thrilling meal that everyone can customize to their taste. Whether you stick with classic ground beef or opt for a lighter turkey or vegetarian option, the sheer joy of filling each taco shell with your chosen toppings is a culinary experience everyone can get behind. Ready to transform mealtime into a crunchy celebration? Let’s dive into these easy, flavorful tacos!
Why are Oven-Baked Cheesy Tacos Amazing?
Quick and Easy: Whip up dinner in just 30 minutes, making it the ideal choice for busy weeknights.
Customizable: Everyone can personalize their toppings—whether you enjoy classic salsa or a sprinkle of jalapeños!
Crowd-Pleasing: Perfect for family dinners or game nights, these tacos are sure to become a hit with everyone.
Flavor Packed: Each bite bursts with savory seasoned beef, melty cheese, and fresh ingredients, satisfying your taste buds.
Healthier Twist: Opt for ground turkey or lentils to lighten it up without sacrificing flavor—perfect for health-conscious foodies!
For more delicious ideas, check out Cheesy Christmas Tree for a festive touch or bring some flair to your meals with Birria Tacos Wow.
Oven-Baked Cheesy Tacos Ingredients
For the Filling
• Ground Beef – Provides the main protein and savory flavor; feel free to substitute with ground turkey, chicken, or lentils for a lighter take.
• Onion – Adds sweetness and aroma; a yellow or white onion works best, but shallots can be a delightful alternative.
• Minced Garlic – Enhances the overall flavor; using fresh garlic gives the best results, but garlic powder can work in a pinch.
• Taco Seasoning – Gives the beef its signature taste; consider making your own blend for a personal twist.
• Tomato Sauce/Salsa – Adds moisture and tang; swapping in diced tomatoes can provide extra texture if desired.
For the Shells and Toppings
• Hard Taco Shells – The sturdy base for your tacos; choose any variety and opt for gluten-free options if needed.
• Shredded Cheese – Melts beautifully for a gooey topping; cheddar, Monterey Jack, or dairy-free cheese substitutes are excellent choices.
• Fresh Toppings – Such as lettuce, diced tomatoes, red onion, and cilantro; customize these to your personal taste for a burst of freshness.
Step‑by‑Step Instructions for Oven-Baked Cheesy Tacos
Step 1: Preheat the Oven
Begin your cooking adventure by preheating your oven to 400°F (200°C). This step is crucial for ensuring your Oven-Baked Cheesy Tacos achieve that delightful crispy texture. While your oven is warming up, gather your ingredients to create a seamless cooking experience.
Step 2: Arrange the Taco Shells
Once the oven is ready, grab a baking dish and neatly arrange your hard taco shells upright inside it. This positioning not only gives your tacos a charming presentation but ensures they crisp up evenly. You want them securely in place, ready to be filled with that delicious beef mixture.
Step 3: Cook the Meat
In a large skillet over medium heat, add the ground beef along with diced onion, stirring occasionally until the beef is browned—about 5-7 minutes. While cooking, keep an eye on the meat to drain any excess fat for a leaner, tastier filling. The aroma of the beef and onion will begin to fill your kitchen beautifully!
Step 4: Flavor the Beef
Once the meat is nicely browned, toss in the minced garlic and taco seasoning. Stir the mixture for about 1 minute until fragrant, allowing the flavors to meld perfectly. This step transforms your ground beef, infusing it with that classic taco flavor that makes the Oven-Baked Cheesy Tacos irresistible.
Step 5: Add Tomato Sauce
Pour in the tomato sauce or salsa and stir until thoroughly combined. Let the mixture simmer for 5 minutes on low heat—this allows the flavors to deepen and blend beautifully. Keep an eye out for a slight bubbling, signaling the filling is ready for the next step.
Step 6: Fill the Taco Shells
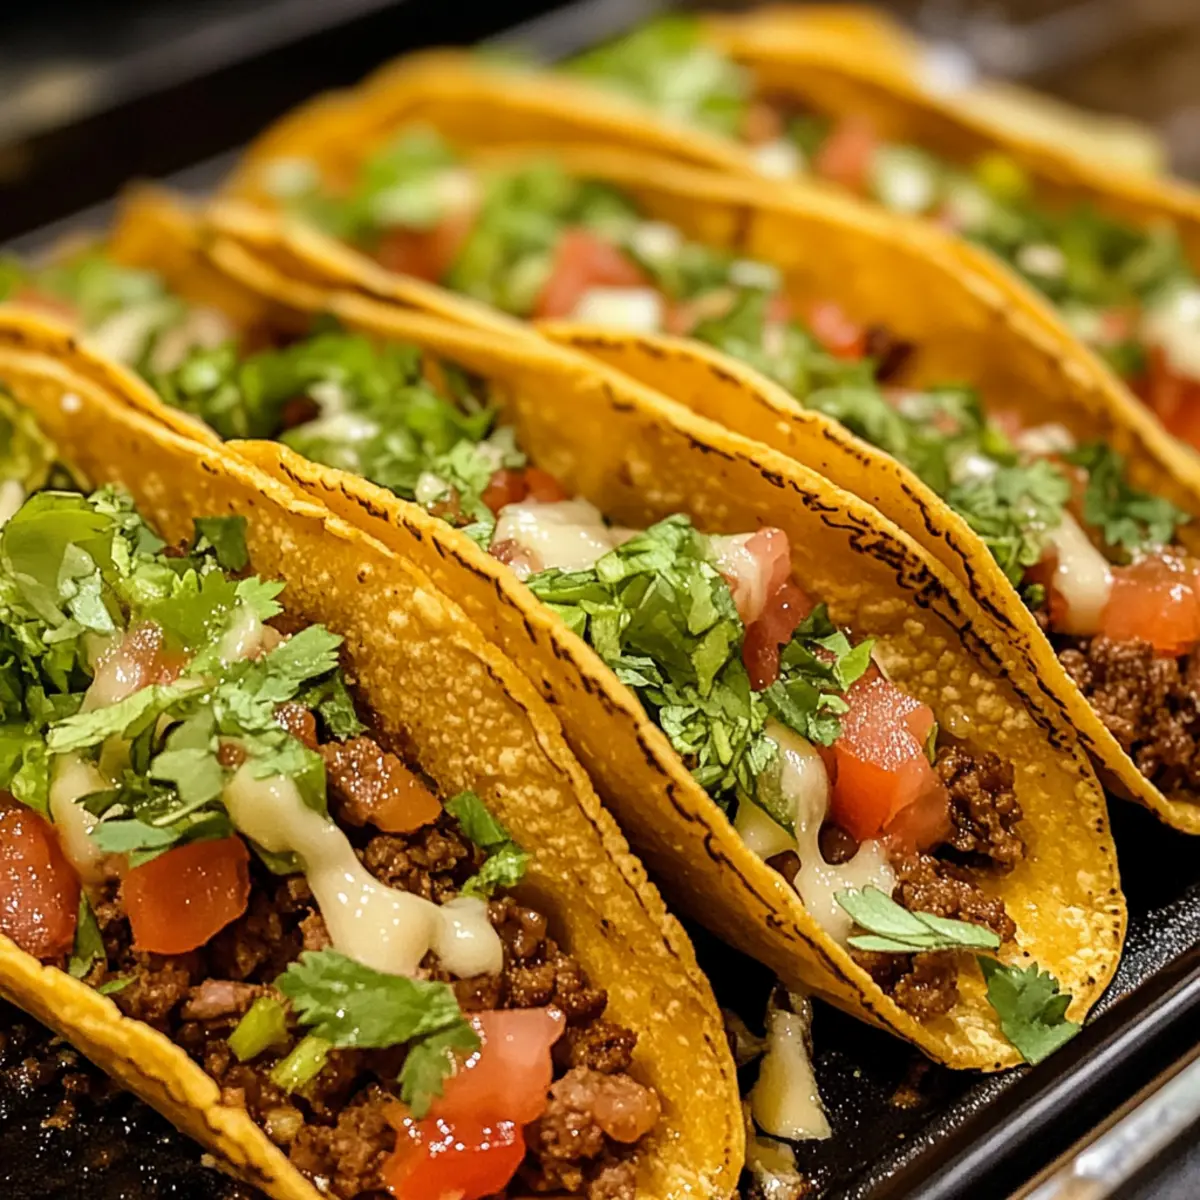
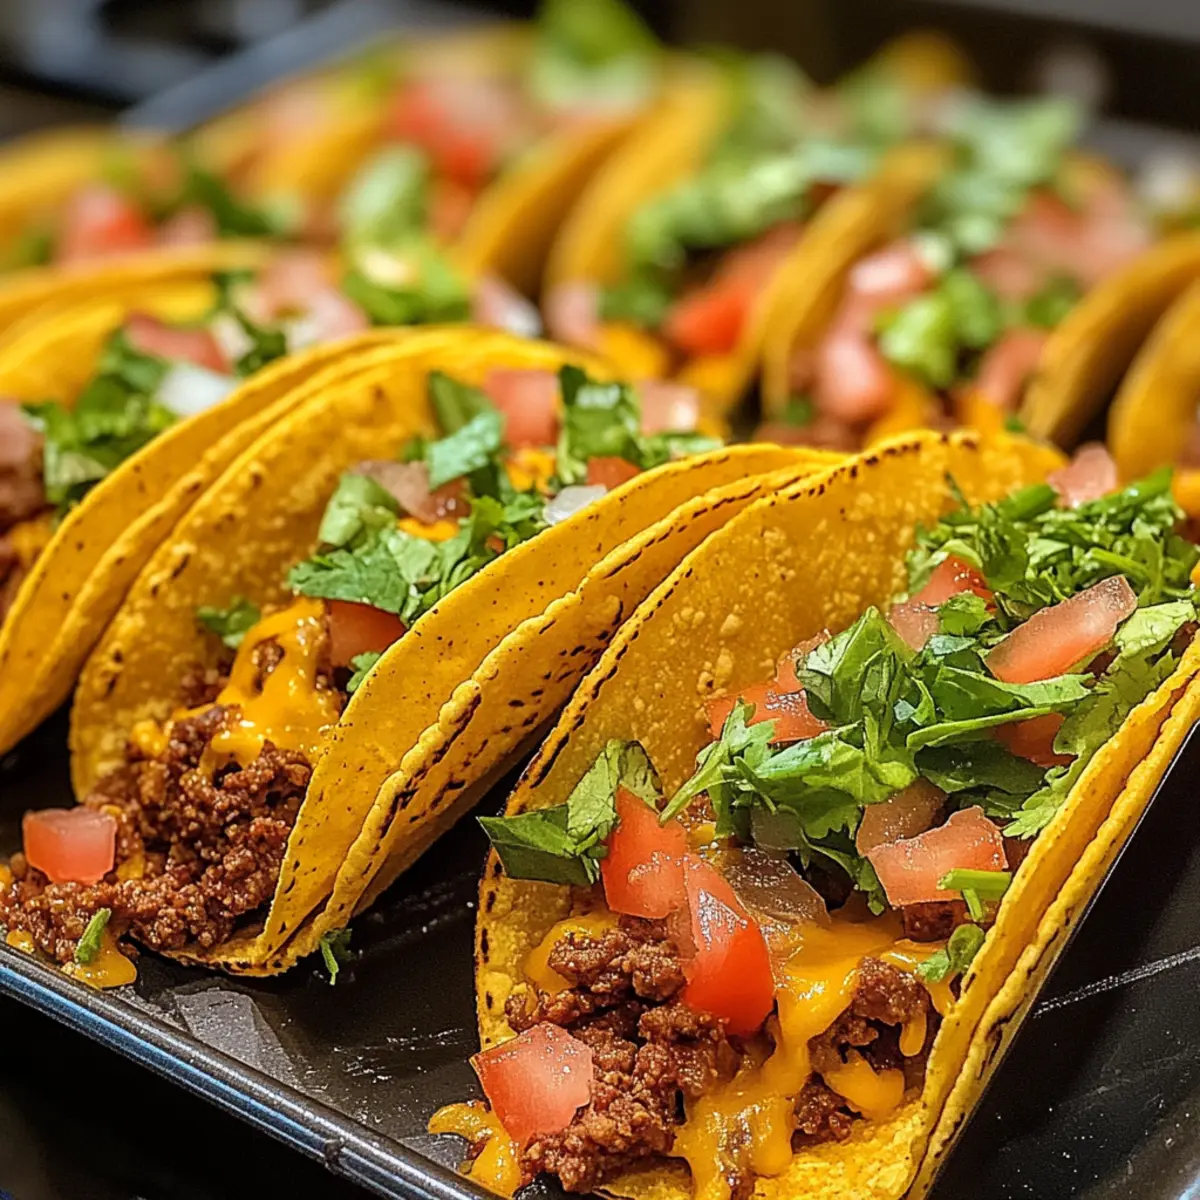
Carefully spoon the flavorful beef mixture into each taco shell, filling them generously but without overflowing. Once filled, generously sprinkle shredded cheese over the top of each taco. This cheese will melt and create a delicious gooey layer that is a hallmark of the Oven-Baked Cheesy Tacos.
Step 7: Bake the Tacos
Place the filled taco shells in the preheated oven and bake them for 10-15 minutes. Keep a close watch as the cheese melts and the taco shells turn a lovely golden brown. The oven will work its magic, transforming these tacos into a crispy, cheesy delight!
Step 8: Add Fresh Toppings
Once out of the oven, let your tacos cool for a minute before topping them with fresh ingredients. Sprinkle over crunchy lettuce, diced tomatoes, red onions, and fresh cilantro. This vibrant array of toppings not only enhances the visual appeal but also adds a refreshing crunch to your Oven-Baked Cheesy Tacos.
Oven-Baked Cheesy Tacos Variations
Feel free to unleash your creativity and tailor these delightful tacos to suit your mood and dietary preferences!
-
Protein Swap: Use ground turkey, chicken, or black beans instead of beef for a lighter or vegetarian option. Each brings a unique twist while maintaining that hearty taco experience.
-
Cheese Blend: Experiment with different cheeses like pepper jack for a little spice or a blend of mozzarella and cheddar for a creamy texture. The results will surprise and delight you!
-
Spicy Kick: Top your tacos with sliced jalapeños or a drizzle of hot sauce for extra heat. This touch can turn an enjoyable meal into a fiery feast!
-
Vegetarian Delight: Replace meat with lentils or quinoa for a wholesome, plant-based version. This offers a healthy, protein-packed alternative that doesn’t skimp on flavor.
-
Salsa Variations: Switch out tomato sauce for a zesty pico de gallo or your favorite salsa verde for a fresh twist. The vibrant flavors will elevate your Oven-Baked Cheesy Tacos!
-
Crunchy Toppings: Add crushed tortilla chips or crispy fried onions on top for an extra layer of texture. This simple addition makes each bite even more satisfying.
-
Herb Infusion: Sprinkle fresh herbs like cilantro or parsley into your filling for vibrant flavor. It adds a refreshing lift that complements the richness of the cheese beautifully.
For even more culinary inspiration, why not explore the festive spirit of Cheesy Christmas Tree or dive into the flavor-packed world of Birria Tacos Wow? Happy cooking!
Make Ahead Options
These Oven-Baked Cheesy Tacos are perfect for meal prep enthusiasts! You can prepare the beef filling up to 3 days in advance and store it in an airtight container in the refrigerator to keep it fresh and flavorful. Additionally, you can assemble the tacos but leave them unbaked; wrap the filled taco shells tightly and freeze for up to 3 months. When ready to serve, simply bake from frozen for about 20-25 minutes at 400°F (200°C) until heated through and the cheese is bubbly. To maintain quality, ensure the taco shells are not overfilled to prevent sogginess during baking. Enjoy the convenience of these delicious tacos on busy weeknights!
What to Serve with Oven-Baked Cheesy Tacos
Elevate your taco night by exploring delicious sides and complementary flavors that tantalize every taste bud.
-
Mexican Rice: Fluffy and flavorful, this side brings a comforting contrast to the crunchy tacos, soaking up all the delicious drippings.
-
Refried Beans: Creamy and rich, they offer a heartiness that pairs wonderfully with the crispy texture of the tacos, creating a satisfying meal.
-
Fresh Guacamole: Silky and vibrant, this avocado dip adds a creamy element, balancing the bold, savory flavors of the tacos.
-
Chopped Salad: A mix of fresh greens, tomatoes, and cucumbers provides a refreshing crunch that complements the cheesy indulgence perfectly.
-
Pico de Gallo: This fresh salsa brings a bright, zesty kick that enhances your cheesy tacos while adding layers of flavor with each bite.
-
Sour Cream Drizzle: This cool, tangy topping is perfect for adding a luscious creaminess to each taco bite, tying the flavors together.
-
Chilled Horchata: This sweet, creamy drink offers a refreshing contrast to the savory tacos, ensuring a delightful balance for your palate.
Expert Tips for Oven-Baked Cheesy Tacos
• Preheat Perfectly: Ensure your oven is at the correct temperature before baking to achieve that delightful crunch.
• Shell Balance: Avoid overstuffing taco shells to prevent sogginess; a heaping spoonful of filling is usually just right.
• Customize Wisely: Explore various protein options—ground turkey, chicken, or lentils—for delicious Oven-Baked Cheesy Tacos suitable for all preferences.
• Cheese Choices: Don’t hesitate to mix different cheese varieties for a richer flavor profile, but ensure they melt evenly.
• Fresh Toppings: Adding toppings just after baking preserves their crispness, so hold off until the tacos are out of the oven!
Storage Tips for Oven-Baked Cheesy Tacos
Fridge: Store leftover Oven-Baked Cheesy Tacos in an airtight container for up to 3 days. This keeps them fresh while preventing sogginess.
Freezer: If you have assembled but unbaked tacos, wrap them tightly in plastic wrap and freeze for up to 2 months. Bake straight from the freezer, adding a few extra minutes to the cooking time.
Reheating: To enjoy your stored tacos again, reheat in the oven at 350°F (175°C) for 10-15 minutes, or until heated through and crispy. Avoid using the microwave for best results.
Make-Ahead Option: Prepare your taco filling in advance and refrigerate it. When ready to serve, simply fill your taco shells and bake, making dinner a breeze.

Oven-Baked Cheesy Tacos Recipe FAQs
What kind of ground meat can I use for my tacos?
Absolutely! While ground beef is a classic choice for these Oven-Baked Cheesy Tacos, you can easily swap it for ground turkey, chicken, or even plant-based proteins like lentils or black beans. Each variation will bring unique flavors and textures to your tacos, catering to different dietary preferences while still delivering that delicious crunch and gooey cheese.
How should I store leftover tacos?
To keep your Oven-Baked Cheesy Tacos fresh, store any leftovers in an airtight container in the fridge for up to 3 days. This method maintains their flavor and prevents sogginess. When you’re ready to enjoy them again, just pop them in the oven at 350°F (175°C) for about 10-15 minutes until they’re warmed through and the cheese is melty once more!
Can I freeze uncooked assembled tacos?
Absolutely! If you’ve assembled your tacos but haven’t baked them yet, wrap them tightly in plastic wrap and store them in the freezer for up to 2 months. When you’re ready to bake, remove the wrap, place them in a preheated oven, and cook for an extra few minutes to account for freezing. This is a fantastic make-ahead option for busy evenings!
What do I do if my taco shells are soggy?
To prevent soggy taco shells, it’s essential to avoid overloading them with filling before baking. A generous spoonful of beef and toppings is perfect. If you find that your shells are soggy after baking, consider pre-baking the empty taco shells for a few minutes to crisp them up before adding the filling. This simple trick helps achieve that ideal crunch!
Are there any allergy considerations I should be aware of?
Definitely! If you’re serving these Oven-Baked Cheesy Tacos to a group, it’s wise to consider common allergens. Make sure to check the labels on taco shells and cheese for gluten and dairy-free options. If anyone has a sensitivity to onions or garlic, using powder instead or leaving them out is a viable option. Feel free to customize your toppings to accommodate any dietary restrictions while keeping it delicious!
Oven-Baked Cheesy Tacos for Quick & Crispy Comfort
Ingredients
Equipment
Method
- Preheat your oven to 400°F (200°C).
- Arrange the hard taco shells upright in a baking dish.
- Cook the ground beef with diced onion in a skillet over medium heat until browned (5-7 minutes).
- Add minced garlic and taco seasoning, stir for 1 minute until fragrant.
- Pour in tomato sauce and simmer for 5 minutes, stirring to combine.
- Fill each taco shell with the beef mixture and top with shredded cheese.
- Bake the filled taco shells in the oven for 10-15 minutes or until cheese is melted and shells are golden brown.
- Let cool for a minute, then add fresh toppings.
Leave a Reply