
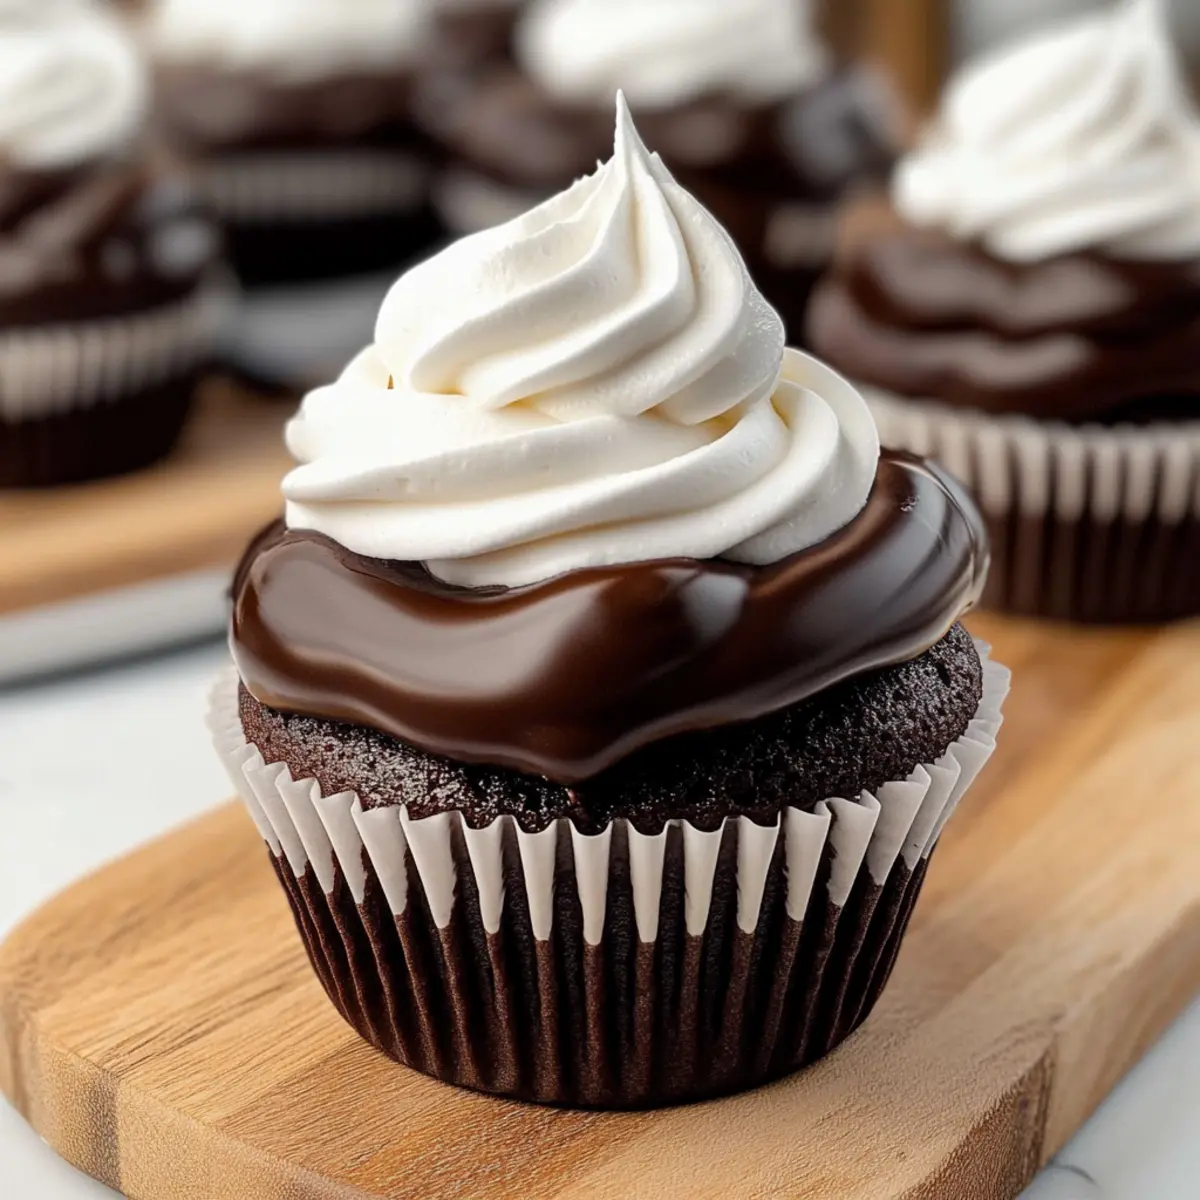
As I flipped through an old recipe book, a delightful gem caught my eye: Hi Hat Cupcakes. These whimsical desserts are a nostalgic nod to the vibrant world of American sweets, featuring a cloud-like dome of marshmallow fluff perched atop a rich chocolate base. What makes these cupcakes truly special is their heavenly crunch, encased in a glossy chocolate shell that creates a delightful contrast. Perfect for celebrations or just because, these Hi Hat Cupcakes are quick to prepare and sure to impress any crowd. With every bite, you’ll experience layers of flavor and texture that transform ordinary moments into sweet memories. Curious to whip up this enchanting treat? Let’s dive into the recipe!
Why are Hi Hat Cupcakes so special?
Nostalgic Taste: Hi Hat Cupcakes are a fun throwback to childhood, evoking memories of classic American confections.
Irresistible Texture: The fluffy marshmallow topping contrasts beautifully with the moist chocolate cake and crunchy chocolate shell, creating a delightful bite every time.
Quick to Make: This recipe is surprisingly easy, allowing you to whip up these scrumptious treats in no time, perfect for unexpected guests or sweet cravings.
Crowd Pleaser: Their eye-catching appearance and delicious flavors guarantee they’ll be the star at any gathering—consider serving them alongside a warm bowl of Bean Soup Warms for a cozy meal!
Customizable Delights: Add your favorite flavors or toppings, like sprinkles or flavored extracts, making each batch uniquely yours! Plus, enjoy them paired with a cup of coffee or milk for the ultimate dessert experience.
Hi Hat Cupcake Ingredients
• Dive into the delicious world of Hi Hat Cupcakes with these essential ingredients!
For the Cupcake Base
• All-Purpose Flour – Provides the structure for a tender cake that’s perfect for holding the marshmallow topping.
• Granulated Sugar – Adds sweetness and moisture; brown sugar can deepen the flavor.
• Cocoa Powder – Brings the rich chocolate flavor to life; Dutch-processed cocoa will give you a darker hue.
• Espresso Powder – Enhances the chocolate richness; skip it if you don’t have it handy.
• Baking Powder & Baking Soda – Essential leavening agents that help the cupcakes rise beautifully.
• Buttermilk – Adds moisture and a tender texture; substitute with regular milk mixed with a tablespoon of vinegar or lemon juice.
• Vegetable Oil – Keeps the cupcakes moist; melted butter works well for additional flavor.
• Eggs – Provide moisture and structure; you can use egg substitutes for a vegan option.
• Vanilla Extract – Enhances flavor; imitation vanilla is a suitable substitute if needed.
For the Frosting
• Granulated Sugar (for Frosting) – Sweetens the frosting; powdered sugar can achieve a smoother consistency.
• Light Corn Syrup – Gives the frosting a glossy finish; honey or agave syrup can work as alternatives.
• Water – Helps dissolve the sugars for a smooth frosting; filtered water is best.
• Egg Whites – Creates a fluffy, voluminous frosting; egg replacers can be used for vegan diets.
• Cream of Tartar – Stabilizes the egg whites; lemon juice can work as a substitute in a pinch.
For the Coating
• Chocolate Chips – Forms the delectable crunchy shell; dark or semisweet chips can be decided based on your sweetness preference.
• Coconut Oil – Thins the chocolate for easy dipping; you may use shortening as an alternative.
Get ready to create these dreamy Hi Hat Cupcakes that are sure to impress!
Step‑by‑Step Instructions for Hi Hat Cupcakes
Step 1: Preheat the Oven
Begin by preheating your oven to 350°F (175°C) and prepare a standard cupcake pan by lining it with 12 cupcake liners. This will ensure easy removal once baked and create a perfect presentation for your Hi Hat Cupcakes. While the oven heats, gather all your ingredients to streamline the upcoming steps.
Step 2: Mix the Dry Ingredients
In a large mixing bowl, whisk together 1 ½ cups of all-purpose flour, 1 cup of granulated sugar, ½ cup of cocoa powder, ½ teaspoon of espresso powder, 1 teaspoon of baking powder, and ½ teaspoon of baking soda. This blend is crucial as it creates the fluffy foundation of your cupcakes. Keep whisking until there are no lumps, and the mixture is well combined, inviting in that rich chocolate aroma.
Step 3: Combine the Wet Ingredients
In another bowl, whisk together 1 cup of buttermilk, ½ cup of vegetable oil, 2 large eggs, and 2 teaspoons of vanilla extract until smooth. The wet ingredients bring moisture and flavor to your Hi Hat Cupcakes, ensuring they’re tender and delicious. Once mixed, take care to gradually combine them with the dry ingredients in the first bowl, mixing just until fully incorporated.
Step 4: Bake the Cupcakes
Carefully divide the batter evenly among the prepared cupcake liners, filling each about two-thirds full. Place the filled pan into the preheated oven and bake for 16-18 minutes, or until a toothpick inserted into the center comes out clean. Allow the cupcakes to rise beautifully, and once done, remove them from the oven to cool completely on a wire rack.
Step 5: Prepare the Marshmallow Frosting
As the cupcakes cool, begin preparing the marshmallow frosting. In a saucepan, combine 1 cup of granulated sugar, ¼ cup of light corn syrup, and 2 tablespoons of water. Bring this mixture to a boil over medium heat until it reaches 240°F (soft ball stage) while simultaneously whipping 2 egg whites with a pinch of cream of tartar in a large bowl, creating soft peaks.
Step 6: Combine Syrup with Egg Whites
Once the syrup reaches the right temperature, slowly drizzle it into the whipped egg whites while the mixer is running on medium speed. This gentle incorporation is vital to achieving volume and fluffiness in your frosting. Continue to whip until the mixture is thick, glossy, and stands in stiff peaks, mimicking that light, airy texture of a cloud.
Step 7: Pipe the Frosting
Using a piping bag fitted with a large round tip, generously pipe the fluffy marshmallow frosting onto each cooled cupcake, creating a tall, swirled dome. This dome is the signature look of Hi Hat Cupcakes, and it’s important to make it as lovely and fluffy as possible. Ensure even coverage for the perfect base for the next step.
Step 8: Chill to Set
Place the iced cupcakes in the refrigerator for approximately 30 minutes to allow the marshmallow frosting to set properly. Chilling helps the frosting hold its shape when dipped and results in a more satisfying bite. While waiting, prepare your chocolate coating to ensure smooth and easy dipping.
Step 9: Melt the Chocolate
In a microwave-safe bowl, combine 1 cup of chocolate chips with 1 tablespoon of coconut oil. Microwave in 30-second intervals, stirring between each session until the chocolate is completely melted and smooth. The coconut oil makes the chocolate coating easier to work with, ensuring a glossy finish on your Hi Hat Cupcakes.
Step 10: Dip the Cupcakes
Carefully dip each cupcake, frosting-side down, into the melted chocolate. Allow any excess chocolate to drip back into the bowl, ensuring a smooth coating. This hard shell complements the fluffy marshmallow frosting beautifully. Place the dipped cupcakes back onto the wire rack to allow the chocolate to set properly.
Step 11: Serve and Store
Once the chocolate has fully hardened, your Hi Hat Cupcakes are ready to delight! Serve them fresh, or store any leftovers in an airtight container in the fridge for up to 5 days. These charming treats are perfect for gatherings or a sweet indulgence at home, ready to bring joy to any occasion.
Make Ahead Options
These delightful Hi Hat Cupcakes are perfect for busy home cooks looking to save time during their baking adventures! You can make the cupcake base up to 3 days in advance. Simply bake and cool the cupcakes, then wrap them tightly in plastic wrap and store them in the refrigerator to keep them fresh. The marshmallow frosting can also be prepared up to 24 hours ahead; just refrigerate it in an airtight container. When you’re ready to serve, take the cupcakes out, pipe on the chilled frosting, and dip them into melted chocolate for that fabulous finish. This way, you’ll enjoy your cupcakes just as delicious on the day of serving, transforming any moment into a special treat!
What to Serve with Hi Hat Cupcakes?
Elevate your dessert experience with delightful pairings that complement the sweetness and textures of these remarkable treats.
- Creamy Ice Cream: The coolness of vanilla or chocolate ice cream balances the rich chocolate flavor, creating a deliciously nostalgic pairing.
- Fresh Berries: Juicy raspberries or strawberries add a tart element that contrasts beautifully with the sweet marshmallow frosting. Their vibrant colors brighten up your dessert table.
- Rich Coffee: A hot cup of coffee enhances the chocolate notes, creating a perfect combination for an afternoon pick-me-up. The bold flavors of coffee and chocolate are a match made in heaven.
- Sweet Milkshake: Try pairing with a chocolate or vanilla milkshake for an indulgent treat; the creaminess pairs well with the crunchy shell.
- Chocolate Sauce: Drizzle some additional chocolate sauce over the cupcakes for a double chocolate delight that ensures every bite is decadent and satisfying.
- Nutty Brownies: Serve alongside fudgy brownies to create a chocolate lover’s paradise; the contrast in textures from chewy brownies and fluffy cupcakes is simply divine.
How to Store and Freeze Hi Hat Cupcakes
Fridge: Store Hi Hat Cupcakes in an airtight container in the refrigerator for up to 5 days. This keeps the marshmallow frosting fresh and prevents them from drying out.
Freezer: For longer storage, you can freeze Hi Hat Cupcakes without the chocolate shell. Wrap them tightly in plastic wrap and place them in a freezer-safe container for up to 3 months. When ready to enjoy, thaw in the fridge overnight and dip in chocolate.
Reheating: If you’d like to enjoy them warm, gently reheat the cupcakes in the microwave for about 10-15 seconds, being careful not to overheat.
Airtight Storage: Make sure to use an airtight container to keep the flavors intact, especially for those delightful marshmallow tops!
Hi Hat Cupcakes Variations & Substitutions
Feel free to explore and personalize your Hi Hat Cupcakes with these fun variations!
- Gluten-Free: Substitute all-purpose flour with a gluten-free blend to cater to gluten sensitivities. Your guests will love these just as much!
- Vegan: Use non-dairy milk, vegetable oil, and egg replacements to create a vegan version of these delightful cupcakes. They’ll be a hit at any gathering!
- Flavored Frosting: Experiment with flavored extracts like almond or mint to give your frosting a unique twist that surprises your taste buds. Each bite becomes a delightful adventure!
- Fruit-Infused: Fold in pureed fruits, like raspberries or strawberries, into the cupcake batter for a refreshing burst of flavor. The fruity notes beautifully complement the chocolate.
- Nutty Delight: Add crushed nuts to the cupcake batter or sprinkle them on top after frosting for an exciting crunch. Consider walnuts or pistachios for added depth!
- Holiday Cheer: Decorate with seasonal sprinkles or edible glitter for occasions like Christmas or birthdays. Your cupcakes will steal the spotlight at any festive celebration!
- Chocolate Variations: Switch to white chocolate or even flavored chocolate for the coating to match the mood. Imagine a luscious dark chocolate exterior paired with marshmallow; pure bliss!
- Serve with Love: Pair your Hi Hat Cupcakes with a comforting bowl of Southern Maple Casserole or alongside rich Birria Tacos for a delightful meal, creating well-rounded enjoyment.
Get creative, and let your taste buds lead the way!
Expert Tips for Hi Hat Cupcakes
Avoid Overmixing: Keep it gentle when combining the wet and dry ingredients; overmixing can lead to dense cupcakes that don’t rise nicely.
Use Fresh Leavening Agents: Ensure your baking powder and baking soda are fresh for maximum lift in your cupcakes. Stale agents can result in flat treats.
Temperature Check: When boiling the sugar syrup for the frosting, use a candy thermometer for precise temperature control, crucial for achieving that perfect marshmallow texture.
Pipe High and Fluffy: When frosting the cupcakes, aim for a tall swirled dome; the height adds visual appeal and enhances the texture experience of the Hi Hat Cupcakes.
Cool Completely: Let your cupcakes cool completely before frosting. This helps the marshmallow fluff hold its shape and prevents melting when dipped in chocolate.
Chill for Best Results: Refrigerate frosted cupcakes before dipping. Chilling the frosting ensures it stays intact while creating a hard chocolate shell that contrasts beautifully.
Hi Hat Cupcakes Recipe FAQs
How can I tell if my ingredients are ripe or fresh?
Absolutely! For the freshest results, check your baking powder and baking soda by adding a little to vinegar or water—if they fizz, they’re still good! The same goes for eggs; if they float in water, it’s best to discard them. When it comes to cocoa powder, ensure there are no hard lumps, which could indicate it’s past its prime.
What is the best way to store Hi Hat Cupcakes?
Hi Hat Cupcakes should be stored in an airtight container in the fridge for up to 5 days. This keeps the marshmallow frosting fresh and prevents them from drying out. I often recommend placing a layer of parchment paper in between the layers of cupcakes if they’re stacked, to preserve that fluffy frosting.
Can I freeze Hi Hat Cupcakes?
Absolutely! For longer storage, you can freeze Hi Hat Cupcakes before adding the chocolate shell. Wrap them tightly in plastic wrap and place them in a freezer-safe container for up to 3 months. When you’re ready to enjoy them, thaw in the fridge overnight and dip in melted chocolate for that delicious crunch.
What should I do if my marshmallow frosting isn’t fluffy?
If your marshmallow frosting isn’t reaching the desired fluffiness, check the temperature of your sugar syrup; it should reach 240°F (soft ball stage). If your egg whites aren’t whipped well, ensure your mixing bowl is completely clean and free of grease—any residue can prevent them from whipping up properly. Gradually adding the syrup while mixing is key to achieving that divine volume.
Are Hi Hat Cupcakes safe for my allergies?
When making Hi Hat Cupcakes, be mindful of any allergies within your household. To make them nut-free, ensure your chocolate chips are made in a nut-free facility. If dairy is a concern, vegan substitutes such as non-dairy milk and egg replacers can be utilized. Always double-check labels to ensure your chosen ingredients suit your needs.
Can I customize the flavor of my Hi Hat Cupcakes?
Very! You can easily swap in different extracts, like almond or peppermint, to infuse unique flavors into your marshmallow frosting. For a fun twist, consider adding a dash of orange or lemon zest to brighten the chocolate. You can also experiment with different chocolate types for the shell—milk, dark, or even white chocolate can lead to delightful variations!
Heavenly Hi Hat Cupcakes with Marshmallow Bliss and Chocolate
Ingredients
Equipment
Method
- Preheat your oven to 350°F (175°C) and line a cupcake pan with 12 liners.
- In a large mixing bowl, whisk together all-purpose flour, granulated sugar, cocoa powder, espresso powder, baking powder, and baking soda until combined.
- In another bowl, whisk together buttermilk, vegetable oil, eggs, and vanilla until smooth. Gradually combine with dry ingredients.
- Fill cupcake liners two-thirds full with batter. Bake for 16-18 minutes until a toothpick comes out clean. Cool on a wire rack.
- In a saucepan, combine granulated sugar, corn syrup, and water. Boil until it reaches 240°F while whipping egg whites with cream of tartar.
- Slowly drizzle the syrup into the whipped egg whites while mixing. Continue to whip until thick and glossy.
- Pipe the marshmallow frosting onto each cooled cupcake.
- Chill the cupcakes for 30 minutes to set the frosting.
- Melt chocolate chips and coconut oil in a microwave-safe bowl. Stir until smooth.
- Dip each cupcake frosting-side down into melted chocolate. Set back on wire rack to harden.
- Serve and store any leftovers in an airtight container in the fridge for up to 5 days.
Leave a Reply