
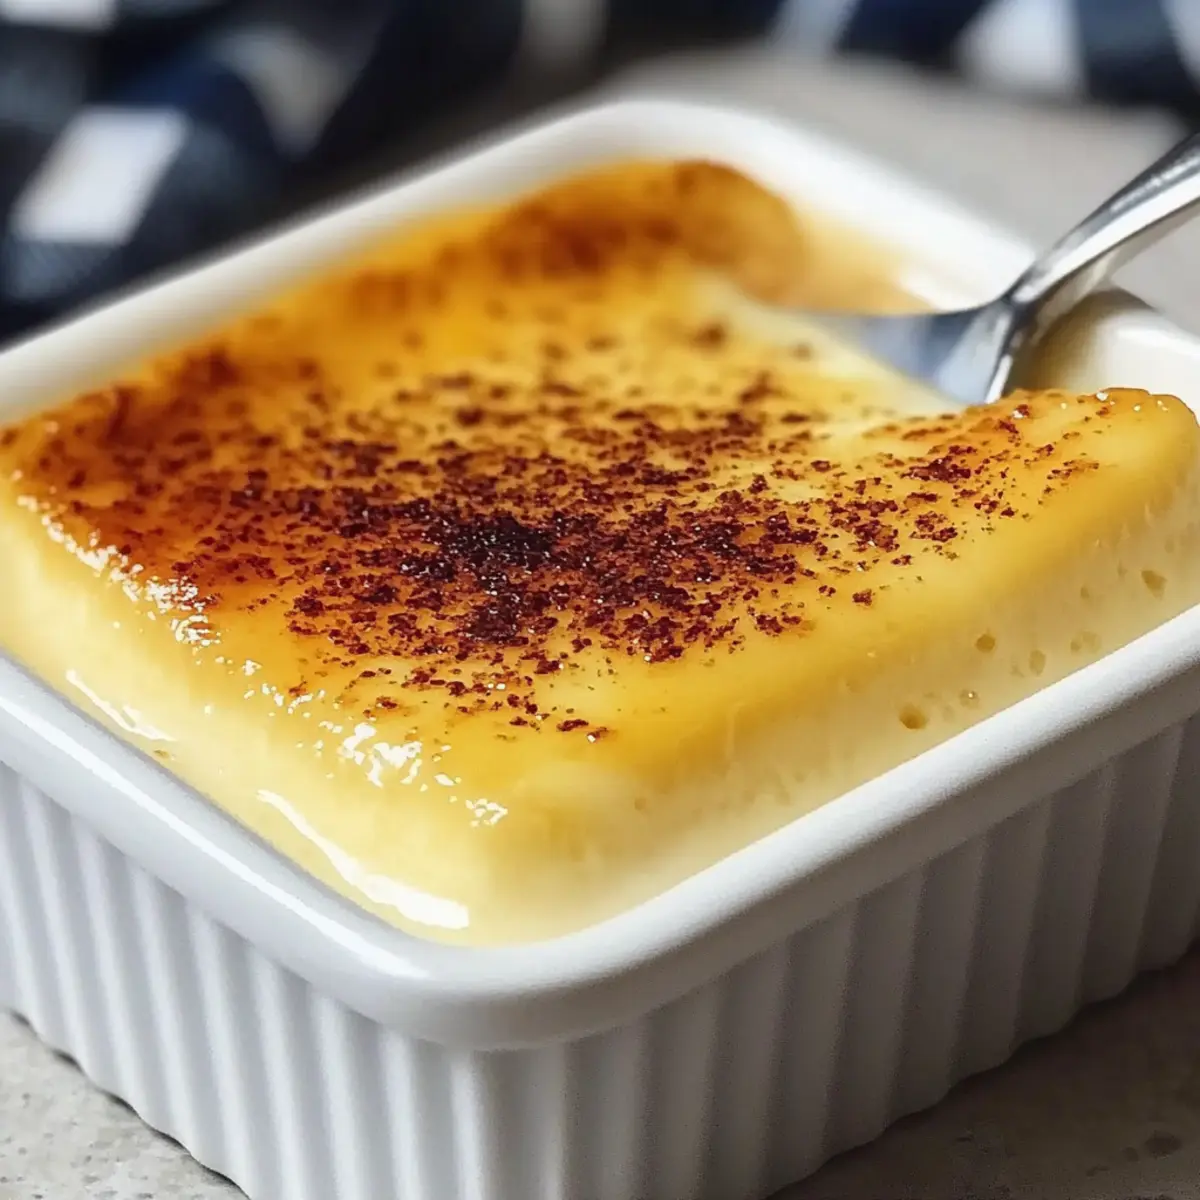
The sweet aroma of creamy custard wafting through the kitchen is like an embrace for the senses. As I whisk together a few simple ingredients, I’m reminded of the joy that comes from creating something delightful with just a little effort. This Easy and Creamy Fail-Proof Egg Custard is a go-to dessert that never fails to impress, whether I’m entertaining guests or satisfying a late-night craving. The beauty of this recipe lies not only in its silky texture but also in its versatility; you can serve it warm or chilled, and easily customize it with dairy-free or lower-calorie options. It’s a perfect solution for busy nights when you want something homemade that feels like a warm hug. Curious how to make this comforting treat come to life? Let’s dive into the simple steps!
Why is This Egg Custard a Must-Try?
Simplicity in Preparation: Whipping up this custard requires minimal effort and just a handful of ingredients, making it perfect for busy weeknights or spontaneous gatherings.
Irresistibly Creamy Texture: The combination of eggs and milk creates a silken feel that melts in your mouth, offering a truly indulgent experience.
Versatile Serving Options: Whether enjoyed warm with a sprinkle of nutmeg or chilled for a refreshing dessert, this custard adapts perfectly to your mood or occasion.
Customizable Ingredients: Easily tweak this recipe to suit your dietary needs—try it dairy-free using almond or coconut milk, or lighten it with a sugar substitute for a guilt-free treat.
This creamy custard pairs wonderfully with other delightful dishes, such as Butternut Squash Custard or a classic French Apple Custard Pie. Make it your own, and revel in the deliciousness!
Creamy Fail-Proof Egg Custard Ingredients
• Get ready to delight your taste buds with these simple components!
For the Custard Base
- Eggs – Fresh large eggs provide richness and flavor. Substitution: Use commercial egg replacer for vegan options, but texture may vary.
- Milk – Whole milk creates a creamy texture. Substitution: Almond, coconut, or soy milk can be used for a lighter custard; expect a flavor change.
- Sugar – Granulated sugar is the standard, while brown sugar offers a deeper taste. Substitution: Sugar substitutes like stevia for a lower-calorie option.
- Vanilla Extract – Essential for classic flavor. Substitution: Vanilla essence can be used if pure extract is unavailable but less rich.
Optional Garnish
- Nutmeg – A sprinkle adds a lovely warming touch when serving. Enhance flavor by freshly grating it on top before serving.
Step‑by‑Step Instructions for Creamy Fail-Proof Egg Custard
Step 1: Preheat the Oven
Begin by preheating your oven to 325°F (165°C). This ensures a warm environment for the custard, allowing it to bake evenly. While the oven warms up, gather all your ingredients and equipment, including a medium bowl, saucepan, whisk, and ramekins, so you’re ready for the next steps.
Step 2: Whisk the Eggs
In a medium bowl, gently whisk together the fresh large eggs until just combined, being careful not to whip in too much air. This step is essential for creating the smooth texture of your Creamy Fail-Proof Egg Custard. Set the egg mixture aside as you prepare the milk for the next step.
Step 3: Warm the Milk
Pour the whole milk into a saucepan and heat it over medium heat. Stir continuously until the milk is warm and small bubbles appear around the edges, taking about 5 minutes. Avoid letting it come to a boil, as this could affect the final texture of your custard.
Step 4: Temper the Eggs
Gradually pour the warm milk into the whisked eggs while continuously whisking. This process, known as tempering, prevents the eggs from scrambling. Keep an eye on the mixture’s consistency; it should be smooth and creamy as the warm milk incorporates with the eggs.
Step 5: Mix in Sugar and Vanilla
Once the milk and eggs are combined, stir in the granulated sugar, vanilla extract, and a pinch of salt until fully dissolved. This sweetens your Creamy Fail-Proof Egg Custard and adds that comforting vanilla flavor. The mixture should look glossy and cohesive.
Step 6: Strain the Mixture
Pour the custard mixture through a fine sieve into a large measuring cup or bowl. This step removes any lumps, ensuring that your final custard has a silky texture. You’ll notice a smooth, creamy liquid free from any egg bits collecting in the sieve—this is exactly what you want.
Step 7: Prepare the Ramekins
Carefully pour the strain custard into your ramekins, filling each about three-quarters full. This gives the custard room to expand slightly as it bakes. Place the filled ramekins aside while you prepare them for the water bath, which is essential for even cooking.
Step 8: Create a Water Bath
To create a water bath, place the filled ramekins in a deep baking dish. Pour hot water into the dish until it reaches halfway up the sides of the ramekins. This gentle cooking method ensures your Creamy Fail-Proof Egg Custard bakes stealthily without overheating or curdling.
Step 9: Bake the Custard
Carefully transfer the baking dish to the preheated oven and bake for 35-40 minutes. The custard should set around the edges but remain slightly jiggly in the center when done, indicating it’s ready to be taken out. Keep an eye on it toward the end of the baking time to avoid overcooking.
Step 10: Cool and Chill
Once baked, remove the custard from the oven and let it cool at room temperature for about 15 minutes. After that, refrigerate for at least 2 hours to allow it to firm up and chill thoroughly, enhancing the creamy texture and flavor before serving.
Step 11: Garnish and Serve
Before serving, sprinkle your Creamy Fail-Proof Egg Custard with freshly grated nutmeg or your favorite garnish for an added touch of warmth and flavor. Whether enjoyed warm or chilled, this delightful dessert is sure to impress and satisfy with every creamy spoonful!
Expert Tips for Creamy Fail-Proof Egg Custard
-
Egg Tempering: Avoid scrambling: Gradually add warm milk to the eggs while whisking continuously to maintain a smooth custard texture.
-
Watch the Bake: Jiggly Center: If the custard jiggles slightly in the center, it’s just right. Overbaking can lead to a grainy texture, so keep a close eye!
-
Strain Well: Remove Lumps: Always strain the custard mixture before baking to ensure a silky-smooth finish, free of any unwanted clumps.
-
Water Bath Importance: Even Cooking: The water bath helps cook the custard gently, preventing it from drying out and ensuring a creamy consistency throughout.
-
Chill Before Serving: Flavor Development: Refrigerate the custard for at least 2 hours before serving to allow flavors to meld and texture to set beautifully.
How to Store and Freeze Creamy Fail-Proof Egg Custard
Fridge: Store any leftover custard in an airtight container in the refrigerator for up to 3 days. Make sure to cover the surface with plastic wrap to prevent a skin from forming.
Freezer: For longer storage, you can freeze the custard in individual portions for up to 2 months. Use freezer-safe containers, leaving space for expansion as it freezes.
Thawing: When ready to enjoy, thaw the custard in the fridge overnight. For a faster option, place the sealed container in a bowl of cold water until soft.
Reheating: Serve chilled or gently warm in the microwave for 15-20 seconds, stirring midway to ensure even heating. Enjoy the creamy texture by sprinkling fresh nutmeg on top before serving!
Creamy Fail-Proof Egg Custard Variations
Explore delightful twists on this classic recipe and make it your own!
-
Dairy-Free: Substitute whole milk with almond, coconut, or soy milk for a lighter custard that caters to vegan diets without sacrificing creaminess.
Almond milk adds a subtle nutty flavor, while coconut milk enhances the tropical allure. -
Lower-Calorie: Swap granulated sugar for stevia or a sugar substitute for a guilt-free version. This keeps the sweetness without the extra calories.
You’ll still enjoy the custard’s richness while making a healthier choice! -
Flavor Infusion: Enhance the milk with flavorings like almond extract or citrus zest for a unique twist. This opens the door to endless flavor possibilities!
Imagine a bright citrus note dancing throughout your custard, taking it to a whole new level. -
Chocolate Twist: Add cocoa powder or melted dark chocolate into the custard base for a decadent chocolate version. This indulgent treat will satisfy any sweet tooth.
Serve it chilled, and you have a heavenly chocolate delight that everyone will rave about. -
Nutty Flavor: Incorporate a few tablespoons of creamy peanut butter into the custard mixture. This adds richness and depth with a satisfying nutty flavor.
It creates a comforting, nostalgic vibe reminiscent of childhood treats. -
Spiced Variants: Sprinkle in some cinnamon or cardamom for warm spices that elevate your custard to the next level. These spices pair beautifully with the custard’s creamy texture.
They also add a lovely, warming aroma that fills your kitchen with cozy scents. -
Garnish Variations: Swap out nutmeg for other toppings like crushed cookies, toasted coconut, or fresh berries for a fresh presentation. Crisp textures and vibrant colors will draw you in!
Each garnish adds a unique flair, turning a simple custard into an elegant dessert. -
Maple Sweetener: Instead of sugar, use maple syrup for a beautifully rich flavor. This not only sweetens but also adds complexity to the custard.
Imagine the delightful maple taste intertwining with the creamy base as you enjoy each spoonful.
Feel free to experiment with these variations, integrating your favorite combinations as you craft the perfect dessert. Enjoy every creamy bite, and consider pairing your creations with a comforting Bean Soup or a classic Reuben Soup for an unforgettable meal!
What to Serve with Easy and Creamy Egg Custard
The comforting sweetness of creamy custard calls for delightful companions to create a complete dessert experience.
- Fresh Berries: Adding a medley of strawberries, blueberries, and raspberries brightens up the plate, offering a refreshing contrast to the silky custard.
- Chai Spiced Cookies: These lightly spiced cookies provide a delightful crunch and flavor depth, making each bite of custard even more indulgent. Pairing cookies with custard creates a perfect balance of textures.
- Whipped Cream: A dollop of freshly whipped cream lends a light and airy element to the custard, enhancing its rich creaminess without overpowering it.
- Caramel Sauce: Drizzling warm caramel adds a luxurious sweetness that complements the custard’s texture, making it an irresistible treat. The combination is truly decadent!
- Chocolate Shavings: A sprinkle of dark chocolate shavings introduces a touch of bitterness, elevating the custard’s sweetness while adding an elegant flair.
- Hazelnut Praline: For those wanting an extra crunch, a sprinkle of crushed hazelnut praline adds a satisfying texture and nutty flavor that pairs beautifully.
- Iced Tea or Lemonade: A chilled glass of herbal iced tea or refreshing lemonade acts as a perfect palate cleanser, balancing the custard’s creamy richness. Drinks can enhance your dessert experience!
- Tiramisu Cupcakes: These delightful little cakes bring in coffee and cocoa flavors, adding complexity that harmonizes beautifully with the creamy egg custard.
- Apple Compote: A warm spoonful of spiced apple compote serves as a delightful contrast, enhancing the dessert’s comforting feel while adding a zing of fruitiness.
- Almond Biscotti: The crunch of biscotti offers a satisfying dip into the custard, and almond flavors resonate beautifully with the vanilla notes of the dish.
Make Ahead Options
These Easy and Creamy Fail-Proof Egg Custard are perfect for meal prep enthusiasts! You can prepare the custard mixture up to 24 hours in advance. Simply follow the instructions to whisk the eggs, warm the milk, and combine everything before straining it into the ramekins. Cover the filled ramekins with plastic wrap and refrigerate them until you’re ready to bake. This not only saves you time on busy weeknights but also maintains the custard’s silky texture. When you’re ready to enjoy, just create the water bath and bake as directed; the custard will be just as delicious, ready to impress your family or guests!
Creamy Fail-Proof Egg Custard Recipe FAQs
How do I choose the right eggs for custard?
Absolutely! When selecting eggs, opt for large, fresh eggs, as they provide the richness and flavor essential for a creamy fail-proof egg custard. To check for freshness, submerge them in water: fresh eggs sink while older ones float.
What’s the best way to store leftover custard?
Very! Store any leftover custard in an airtight container in the refrigerator for up to 3 days. To prevent a skin from forming, cover the surface with plastic wrap, ensuring it touches the custard.
Can I freeze creamy egg custard?
Absolutely! To freeze, pour the custard into freezer-safe containers, leaving space for expansion. It can be frozen for up to 2 months. When you’re ready to enjoy, thaw it overnight in the fridge or place the sealed container in cold water until soft.
What should I do if my custard turns out grainy?
If it comes out grainy, don’t worry! This can happen if the eggs were overheated. To salvage, strain the mixture again before serving to smooth out the texture. For a delightful touch, serve with whipped cream over the custard to mask any imperfections.
Is this recipe suitable for a dairy-free diet?
Very! You can substitute whole milk with almond, coconut, or soy milk for a lighter, dairy-free option. Keep in mind the flavor will change slightly, but it will still produce a delicious creamy fail-proof egg custard.
How can I tell when my custard is finished baking?
Great question! The custard is perfectly done when the edges are set but it still jiggles slightly in the center. This usually takes about 35-40 minutes of baking at 325°F (165°C). Be sure to check closely towards the end to avoid overbaking!
Creamy Fail-Proof Egg Custard That Melts in Your Mouth
Ingredients
Equipment
Method
- Preheat your oven to 325°F (165°C) and gather all your ingredients and equipment.
- In a medium bowl, gently whisk together the fresh large eggs until just combined.
- Heat whole milk in a saucepan over medium heat until warm and small bubbles appear around the edges.
- Gradually pour the warm milk into the whisked eggs while continuously whisking to prevent scrambling.
- Stir in sugar, vanilla extract, and a pinch of salt until fully dissolved.
- Pour the custard mixture through a fine sieve into a large measuring cup or bowl.
- Pour the strained custard into ramekins, filling each about three-quarters full.
- Place the ramekins in a deep baking dish and pour hot water into the dish until halfway up the sides of the ramekins.
- Bake for 35-40 minutes, until the custard sets around the edges but remains slightly jiggly in the center.
- Cool at room temperature for about 15 minutes, then refrigerate for at least 2 hours before serving.
- Before serving, sprinkle with freshly grated nutmeg or your favorite garnish.
Leave a Reply