
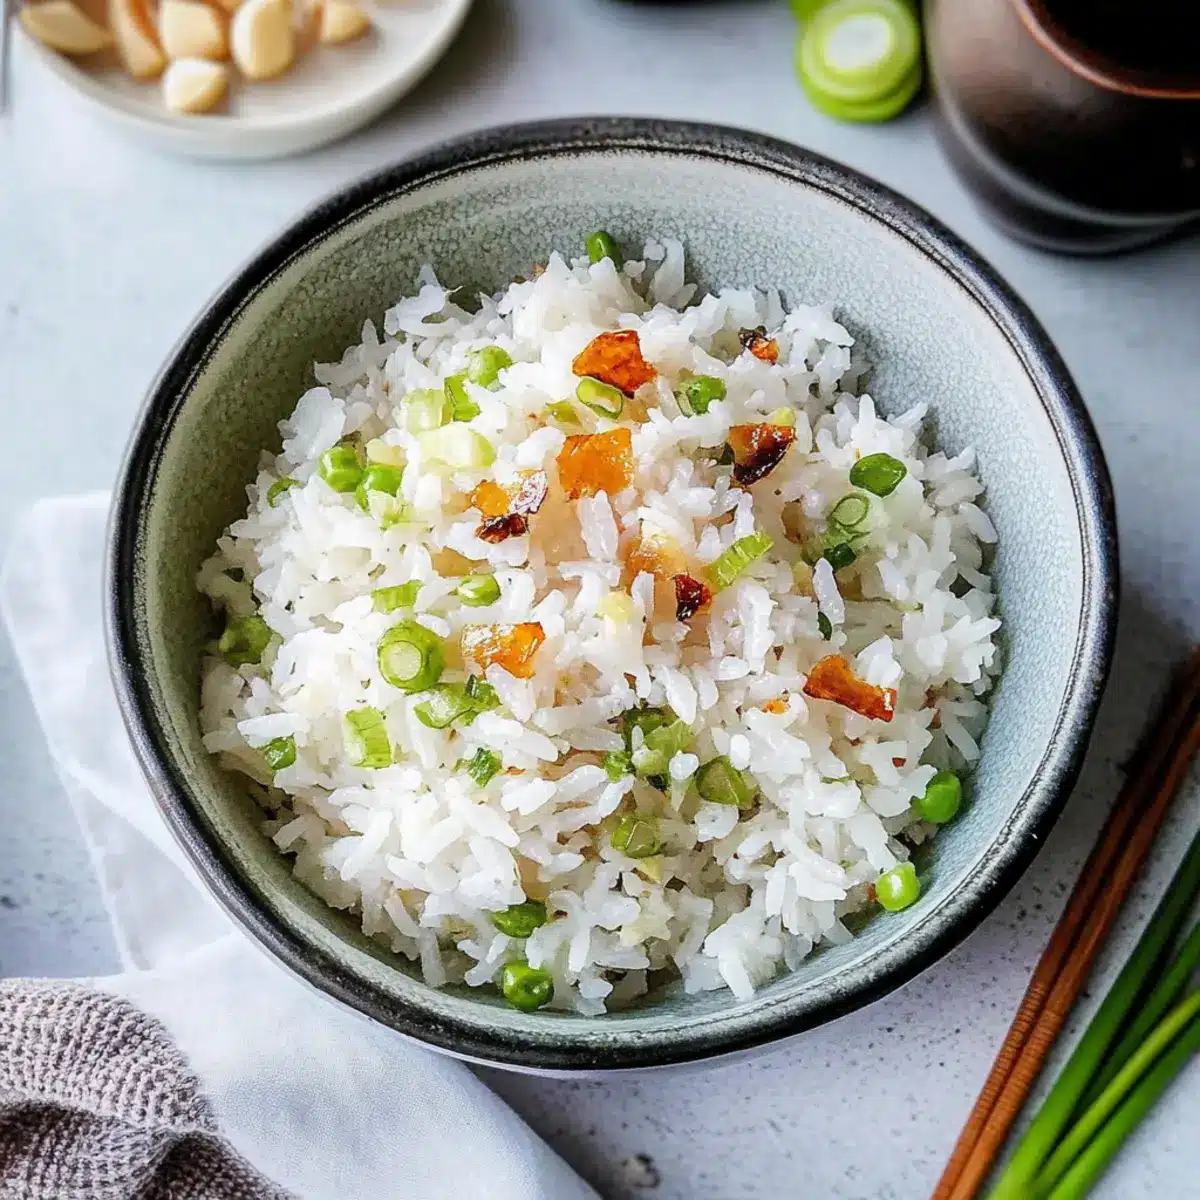
The aroma of sizzling garlic fills the air as I prepare to whip up a breakfast favorite: Filipino Garlic Rice, or Sinangag. This dish is the delightful answer to lazy mornings, transforming leftover Jasmine rice into a quick and soulful meal in just 10 minutes. Packed with fragrant garlic oil and crunchy garlic chips, it’s an easy, gluten-free recipe that brings joy to your plate while helping you tackle food waste. Whether you’re serving it as a standalone breakfast or as a side to your favorite proteins, this sinangag will quickly become a beloved staple in your home. Are you ready to experience the perfect blend of simplicity and flavor? Let’s dive into creating this delicious garlic-infused masterpiece!
Why is Filipino Garlic Rice a Must-Try?
Quick and Easy: This dish takes only 10 minutes to prepare, making it perfect for those busy mornings when you crave something delicious without the fuss.
Incredible Flavors: The warm, aromatic garlic oil combined with crispy garlic chips creates an explosion of flavor that elevates simple rice to new heights.
Versatile Delight: Enjoy it as a standalone breakfast or pair it with proteins like Chicken Tinola or a savory fish dish. You can even customize it with veggies to enhance nutrition.
Waste-Free Wonder: Transform leftover Jasmine rice into a scrumptious meal, helping you cut down on food waste while still indulging in a comforting dish.
Crowd-Pleasing Favorite: Its irresistible taste makes this sinangag a hit with family and friends, ensuring everyone at the table leaves satisfied. When you’re looking for something else to complement this dish, check out our Garlic Roast Potatoes for a tasty side!
Filipino Garlic Rice Ingredients
• Get ready to savor this flavor-packed dish!
For the Rice
- Cooked Cold Leftover Long Grain Rice (2 cups) – Ideal for sinangag; using cold rice prevents mushiness and ensures the best texture.
- Rock Salt (1/4 teaspoon) – Enhances flavor without overpowering; substitute with regular salt if needed.
For the Garlic
- Garlic (5 cloves, thinly sliced) – The star of the dish; fresh garlic offers the best aroma and taste.
- Vegetable or Grapeseed Oil – Acts as the cooking medium; feel free to swap with olive oil for a different twist.
For the Finishing Touch
- Scallions (2, finely chopped) – Adds a fresh crunch; green onions are a great substitute if you prefer.
Now that you’ve gathered your ingredients, let’s dive into crafting your delightful Filipino Garlic Rice!
Step‑by‑Step Instructions for Filipino Garlic Rice
Step 1: Heat the Oil
Begin by pouring about 2 to 3 tablespoons of vegetable or grapeseed oil into a large skillet. Set the skillet over medium-low heat and allow the oil to warm for about 1 minute. As it heats, you’ll notice the oil shimmering, which signals that it’s ready for the next step in crafting your flavorful Filipino Garlic Rice.
Step 2: Fry the Garlic
Once the oil is hot, carefully add the thinly sliced garlic to the skillet. Cook the garlic for 4 to 5 minutes, stirring frequently, until it turns golden brown and releases that irresistible aroma. Watch closely, as you want to avoid burning the garlic; the perfect result should be crispy and fragrant, setting the stage for your sinangag.
Step 3: Add the Rice
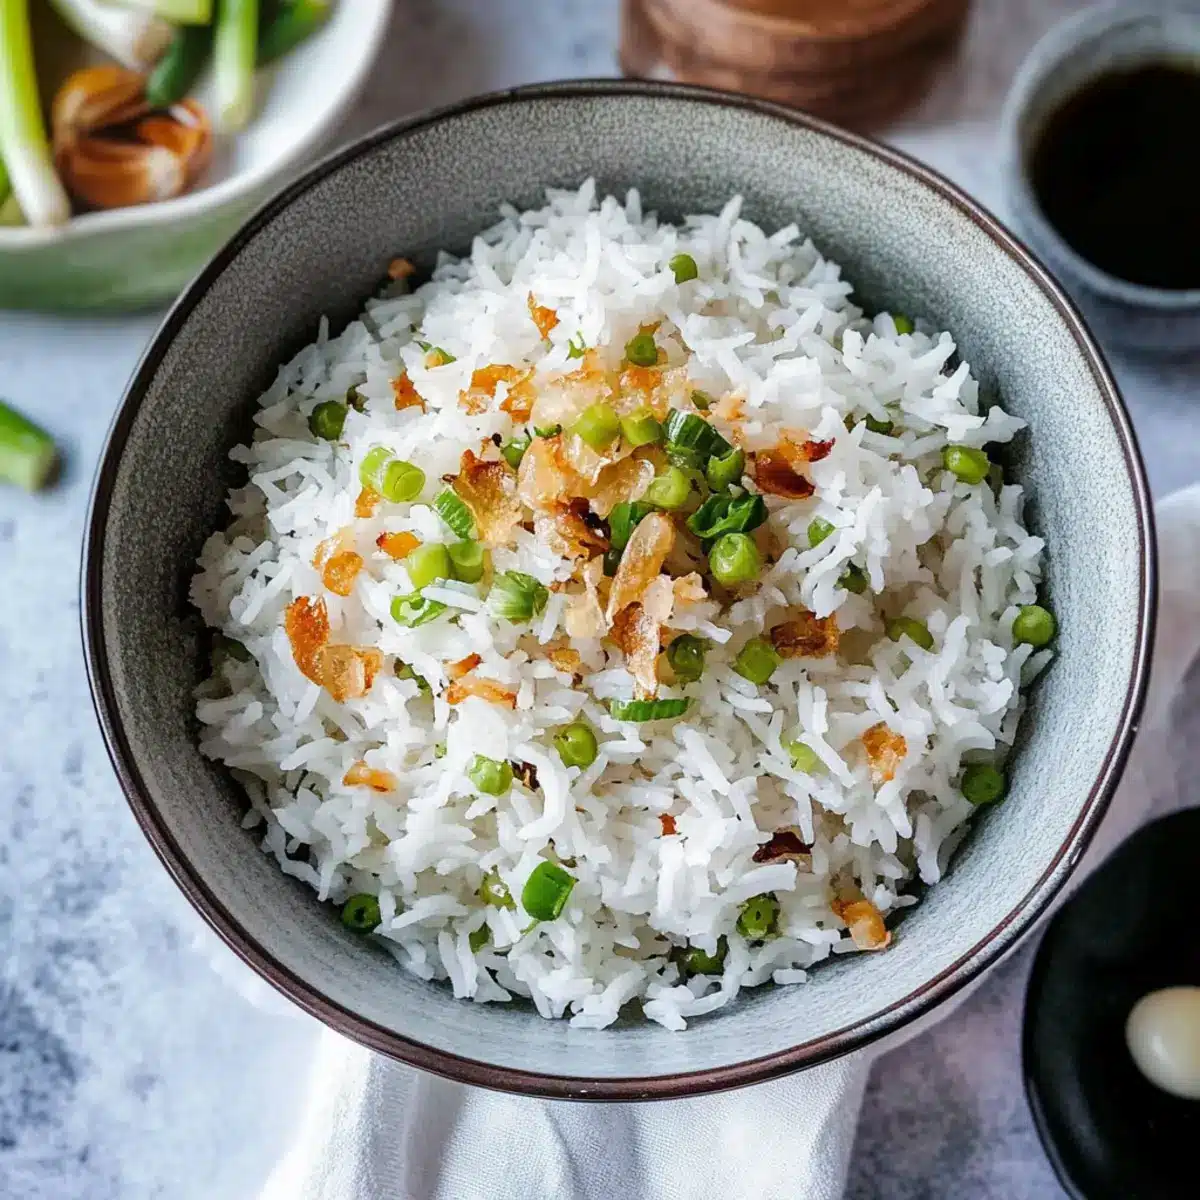
Next, take your cold leftover Jasmine rice and add it to the skillet with the crispy garlic. Use a spatula to break up any clumps gently and integrate the garlic throughout the rice. Stir continuously for about 2 to 3 minutes, ensuring the rice is heated through and infused with that rich garlic flavor, creating a delightful golden hue.
Step 4: Season the Rice
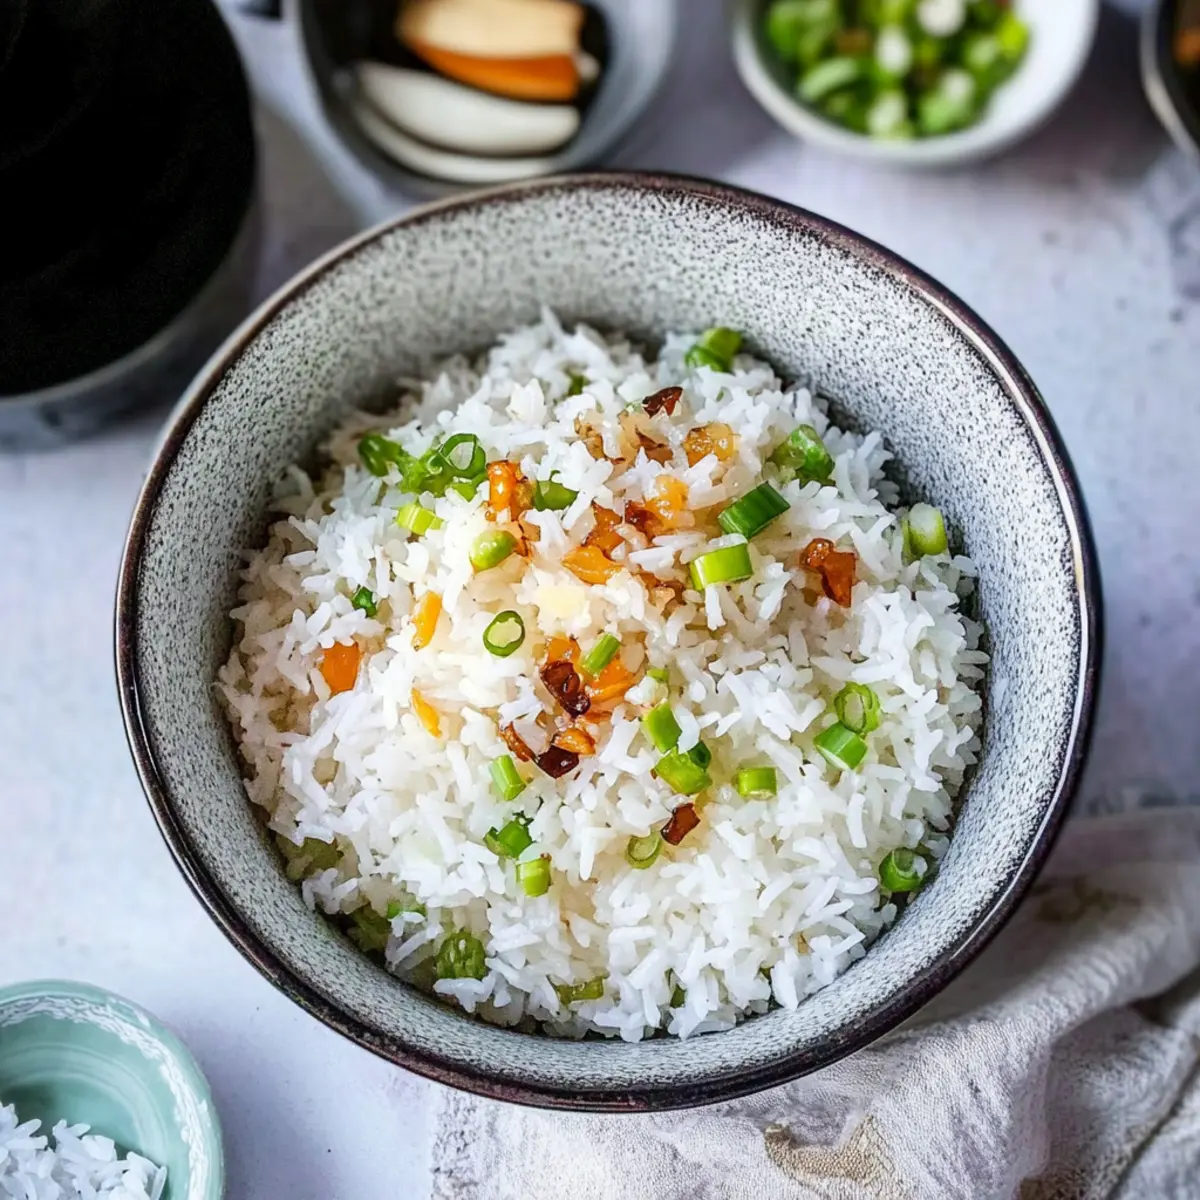
After warming the rice, remove the skillet from the heat. It’s time to add your finishing touches! Stir in 1/4 teaspoon of rock salt to enhance the flavor, mixing thoroughly to ensure every grain is well-seasoned. The garlic should be beautifully distributed, creating mouthwatering Filipino Garlic Rice that’s ready to enjoy.
Step 5: Garnish and Serve
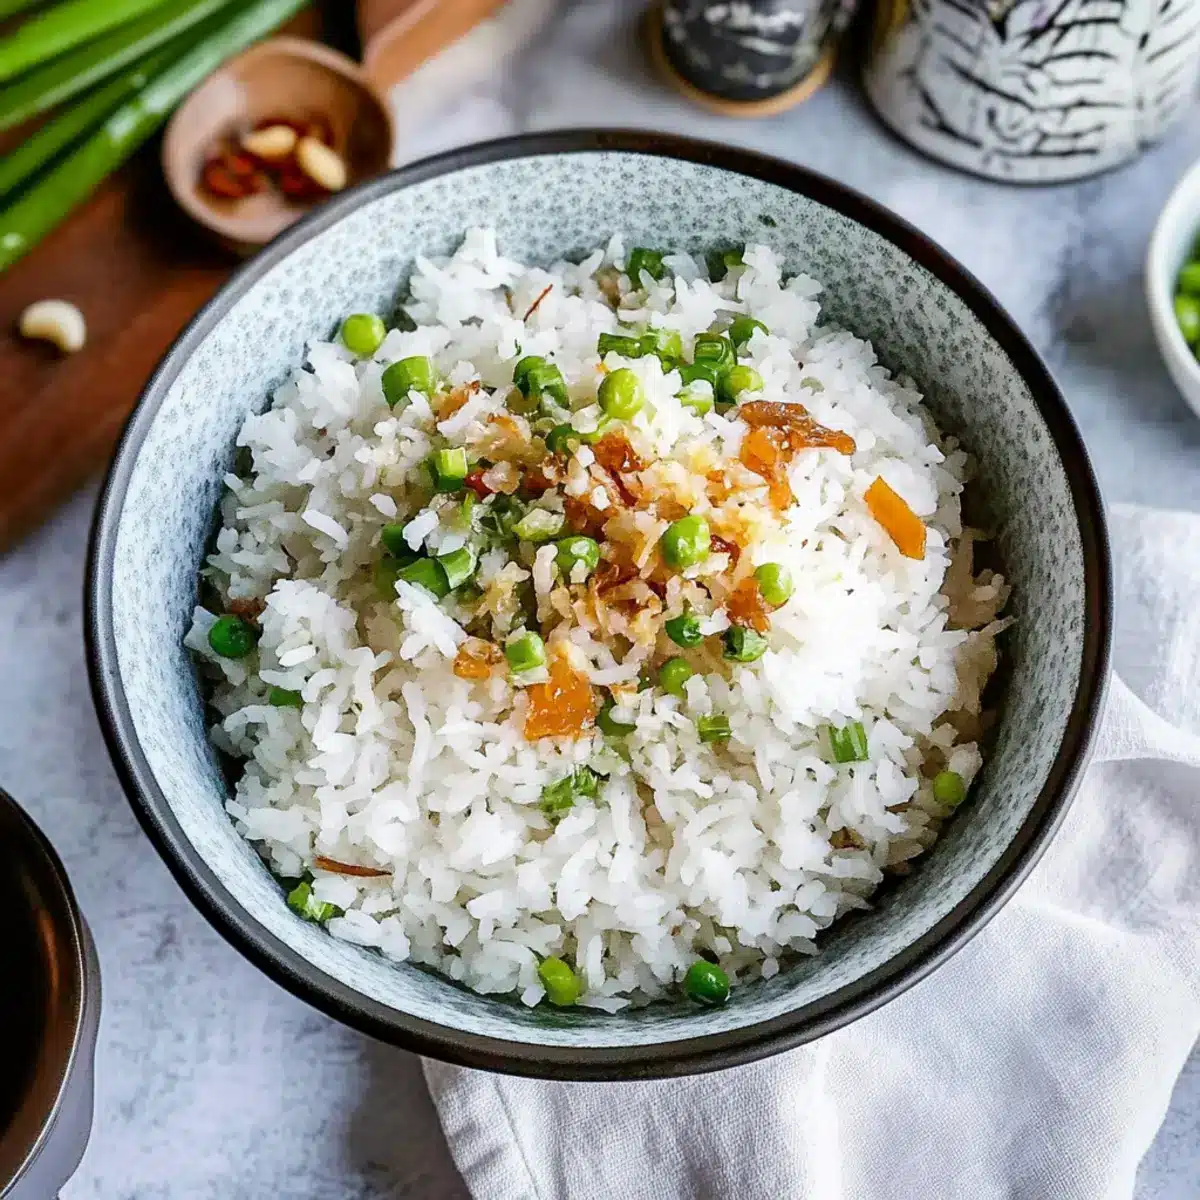
Finally, sprinkle the finely chopped scallions over the warm rice, adding a fresh crunch to every bite. Gently mix to combine the scallions with the rice. Serve your delectable Filipino Garlic Rice hot in a bowl, either on its own or as a delicious accompaniment to your favorite breakfast proteins, making each meal wholesome and satisfying.
What to Serve with Quick Filipino Garlic Rice (Sinangag)
Imagine sitting down to a meal filled with comforting aromas and vibrant flavors that dance on your palate.
-
Fried Egg: A perfect addition that adds richness and protein, elevating your garlic rice to a hearty breakfast.
-
Chicken Tinola: This soothing chicken soup with ginger and leafy greens complements the garlicky flavors beautifully, creating a well-rounded meal.
-
Longganisa: The sweet and savory flavors of this Filipino sausage pair wonderfully with garlic rice, making each bite a delightful experience.
-
Sautéed Vegetables: Add color and nutrition by serving sinangag with vibrant, sautéed vegetables like bell peppers and green beans for a fresh crunch.
-
Sweet Pineapple Salsa: This fruity side adds a refreshing contrast to the rich garlic flavor, balancing out your meal perfectly.
-
Thai Iced Tea: Enjoy this creamy, sweet beverage alongside sinangag to lounge in delightful tropical vibes.
-
Coconut Flan: For dessert, this sweet, smooth flan offers a luscious finish to your meal, creating a satisfying sweet ending.
Expert Tips for Filipino Garlic Rice
• Low Heat Cooking: Keep your skillet on medium-low heat while frying the garlic. This prevents burning and allows for crispy, golden perfection.
• Cold Rice Essential: Always use cold leftover rice for the best texture. Freshly cooked rice tends to be too moist and can result in mushy sinangag.
• Watch the Garlic: Stir the garlic frequently, ensuring it browns evenly without turning bitter. Overcooked garlic can spoil the flavor of your Filipino Garlic Rice.
• Flavor Boost Ideas: For extra taste, consider topping your sinangag with a fried egg or drizzling chili oil for a kick.
• Versatile Base: Don’t hesitate to experiment—add vegetables like peas or carrots for added nutrition, or serve with your favorite meat dishes for a complete meal.
How to Store and Freeze Filipino Garlic Rice
Fridge: Store leftover Filipino Garlic Rice in an airtight container for up to 5-7 days. Reheat in a skillet or microwave for best results.
Freezer: Freeze Filipino Garlic Rice in individual portions for 4-6 months. Thaw in the refrigerator overnight before warming in a skillet or microwave.
Room Temperature: It’s best to avoid leaving cooked garlic rice out at room temperature for more than 2 hours to ensure freshness and safety.
Reheating: Reheat the rice gently on low heat to retain its texture, adding a splash of water if needed to prevent dryness.
Filipino Garlic Rice Variations & Substitutions
Feel free to mix things up with these delicious twists on your Filipino Garlic Rice!
-
Protein Boost: Serve sinangag alongside a fried egg or your choice of meats like tapa or tocino for a hearty breakfast. The combination of flavors creates a robust morning meal that’s truly satisfying.
-
Veggie Medley: Incorporate quick-cooking veggies like peas or carrots into the rice for added nutrition and a pop of color. It’s an easy way to sneak in some extra vitamins without sacrificing taste!
-
Dairy-Free Delight: Swap out your vegetable oil for coconut oil to infuse a tropical flavor into this classic dish. This variation adds a subtle sweetness while keeping the recipe entirely dairy-free.
-
Heated Up: For those who enjoy some spice, add a pinch of red pepper flakes or chopped chili peppers during the garlic step. This simple addition packs a flavorful punch that takes the dish to new heights.
-
Garlic Lover’s Dream: If you can’t get enough garlic, try adding roasted garlic cloves for a mellower yet delicious garlic flavor. The creamy texture complements the crispy garlic chips beautifully.
-
Quinoa Alternative: For a gluten-free twist, substitute cooked Jasmine rice with cooked quinoa. This adds a nutty flavor and a nice texture while ensuring your dish remains light and healthy.
-
Savory Soupside: Pair your sinangag with a hot bowl of Chicken Tinola or any savory broth-based dish. The warmth of both plates will create an inviting meal, perfect for cozy gatherings!
Take your pick or mix and match these variations for a personalized touch, and don’t forget to check out our Garlic Parmesan Roasted vegetables to complete your meal experience!
Make Ahead Options
These Filipino Garlic Rice (Sinangag) are fantastic for meal prep, saving you precious time on busy mornings! You can prepare the garlic oil and crispy garlic chips up to 24 hours in advance. Simply cook the garlic as instructed, then let it cool before storing it in an airtight container in the refrigerator. Additionally, the cooked cold leftover rice can be refrigerated for 3-5 days. When you’re ready to serve, just reheat the rice in a skillet with the prepared garlic oil over medium heat for a couple of minutes. This way, you’ll enjoy warm, flavorful sinangag that’s just as delicious as when it was freshly made, simplifying your breakfast routine!
Filipino Garlic Rice Recipe FAQs
What type of rice works best for Filipino Garlic Rice?
Using cooked cold leftover long-grain rice, like Jasmine, is ideal for making sinangag. Cold rice prevents mushiness, ensuring each grain remains distinct and fluffy. If you only have freshly cooked rice, refrigerate it for at least 30 minutes to help firm it up before using.
How long can I store Filipino Garlic Rice in the fridge?
Store your Filipino Garlic Rice in an airtight container for up to 5-7 days. When you’re ready to enjoy it again, reheat in a skillet over medium-low heat, adding a splash of water if it seems dry to keep it fluffy.
Can I freeze Filipino Garlic Rice?
Absolutely! Freeze your Filipino Garlic Rice in individual portions for up to 4-6 months. To do this, allow the rice to cool completely, then pack it into freezer-safe bags or containers. When you’re ready to eat, thaw it overnight in the refrigerator and reheat in a skillet or microwave for the best texture.
What should I do if my garlic rice turns out mushy?
If your Filipino Garlic Rice ends up mushy, it might be due to using freshly cooked rice instead of cold rice. To combat this, next time ensure that you use rice that has been refrigerated beforehand. If you’re already in mushy territory, try spreading the rice on a baking sheet and reheating it in the oven at a low temperature to help evaporate excess moisture.
Is Filipino Garlic Rice safe for pets or people with dietary restrictions?
While Filipino Garlic Rice is gluten-free and generally safe for people without garlic allergies, it’s not recommended for pets. Garlic can be harmful to dogs and cats. If you’re serving this dish to guests with dietary restrictions, consider omitting the garlic or using a garlic-infused oil for flavor, ensuring everyone can enjoy this starch indulgence!
How can I add more nutrition to my Filipino Garlic Rice?
For an extra boost of nutrition, consider adding colorful vegetables like peas or carrots to the rice while heating it. You can also serve it topped with a fried egg or alongside protein-rich dishes like tapa or tocino for a hearty breakfast that’s wholesome and satisfying!
Flavor-Packed Filipino Garlic Rice for Quick Comfort Meals
Ingredients
Equipment
Method
- Begin by pouring about 2 to 3 tablespoons of vegetable or grapeseed oil into a large skillet. Set the skillet over medium-low heat and allow the oil to warm for about 1 minute.
- Once the oil is hot, carefully add the thinly sliced garlic to the skillet. Cook the garlic for 4 to 5 minutes, stirring frequently, until it turns golden brown.
- Next, take your cold leftover Jasmine rice and add it to the skillet with the crispy garlic. Use a spatula to break up any clumps and stir continuously for about 2 to 3 minutes.
- After warming the rice, remove the skillet from the heat. Stir in 1/4 teaspoon of rock salt to enhance the flavor, mixing thoroughly.
- Finally, sprinkle the finely chopped scallions over the warm rice, gently mixing to combine. Serve hot.
Leave a Reply