
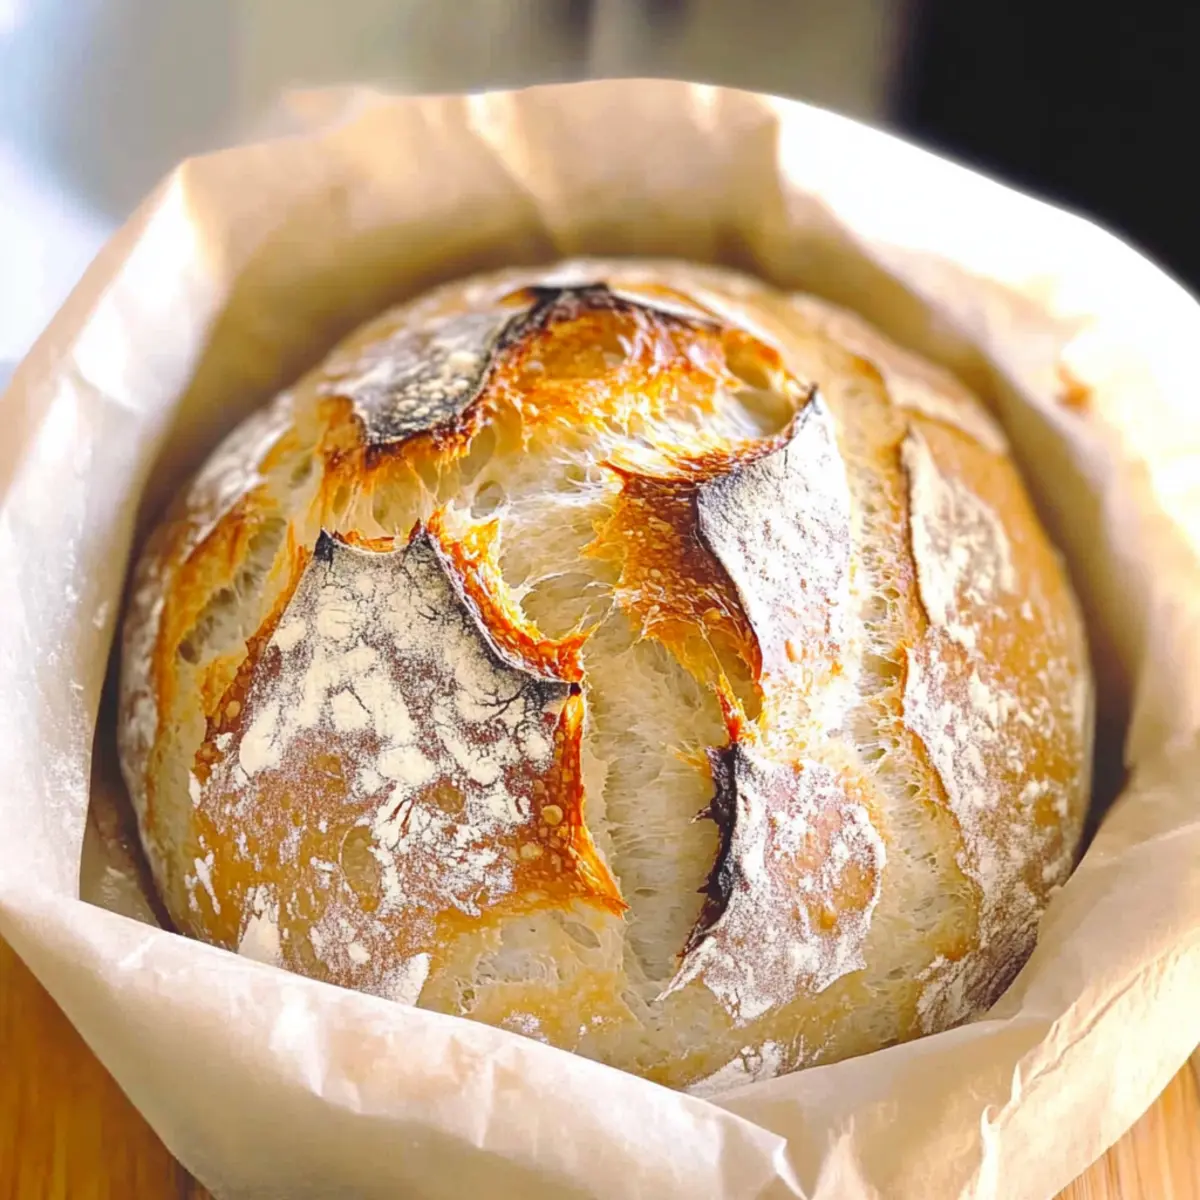
There’s something magical about the scent of freshly baked bread wafting through your home, like a warm hug on a chilly day. This No Knead Dutch Oven Bread recipe is an exciting blend of simplicity and deliciousness, perfect for anyone eager to embrace the art of bread-making with minimal effort. You won’t believe that with just five minutes of prep and no kneading required, you can achieve an artisan-style loaf boasting a crisp crust and an airy, chewy interior. Whether you’re a novice in the kitchen or simply tired of store-bought loaves, this recipe is a game-changer for your homemade meals. Imagine pulling a gorgeous loaf from the oven, ready to be savored just on its own or with a simple dip in olive oil. Are you ready to discover your new favorite baking project?
Why Is This Bread So Special?
Simplicity shines through in this No Knead Dutch Oven Bread, making it ideal for beginners eager to explore homemade baking. Minimal Effort is required – just five minutes of prep and you’re on your way to your own artisan loaf! Versatility allows for delicious pairings with soups, salads, or even just a warm dip in olive oil. Plus, incredible aroma fills your kitchen, making it a cozy hotspot for family and friends. Enjoy a rustic, hearty texture that beats any store-bought option! If you’re looking for more delicious homemade treats, check out my Christmas Tree Bread for a festive twist or the decadent Gingerbread Latte Mousse for dessert!
Dutch Oven Bread Ingredients
• Discover the simplicity behind this delightful Dutch Oven Bread!
For the Dough
- Warm Water – Supports yeast activation and flour hydration; aim for around 110°F for best results.
- All-Purpose Flour – Forms the backbone of the bread; can be swapped with bread flour for more chewiness.
- Fine Grain Salt – Enhances the bread flavor and manages yeast activity; sea salt works as a great substitute.
- Yeast – Essential for leavening and helping the dough rise; use fresh active dry or instant yeast for optimal results.
Step‑by‑Step Instructions for No Knead Dutch Oven Bread
Step 1: Mix Wet Ingredients
Start by combining 1.5 cups of warm water (about 110°F) with 2.25 tsp of yeast and 0.5 tbsp of fine grain salt in a large mixing bowl. Stir gently until the yeast and salt dissolve completely. This initial step is crucial for the yeast activation that will make your Dutch Oven Bread rise beautifully.
Step 2: Incorporate Flour
Next, add in 3.25 cups of all-purpose flour, stirring until a sticky dough begins to form. This mixture should remain quite shaggy and wet, as sticking is essential for achieving that perfect chewy texture. Once incorporated, stop mixing; it’s okay if you see some dry flour left.
Step 3: Allow the Dough to Rise
Cover the mixing bowl with a clean kitchen towel or plastic wrap and place it in a warm area. Allow the dough to rise undisturbed for 2 to 3 hours, or until it has doubled in size and bubbles form on the surface. This fermentation stage is key for developing flavor in your Dutch Oven Bread.
Step 4: Shape the Dough
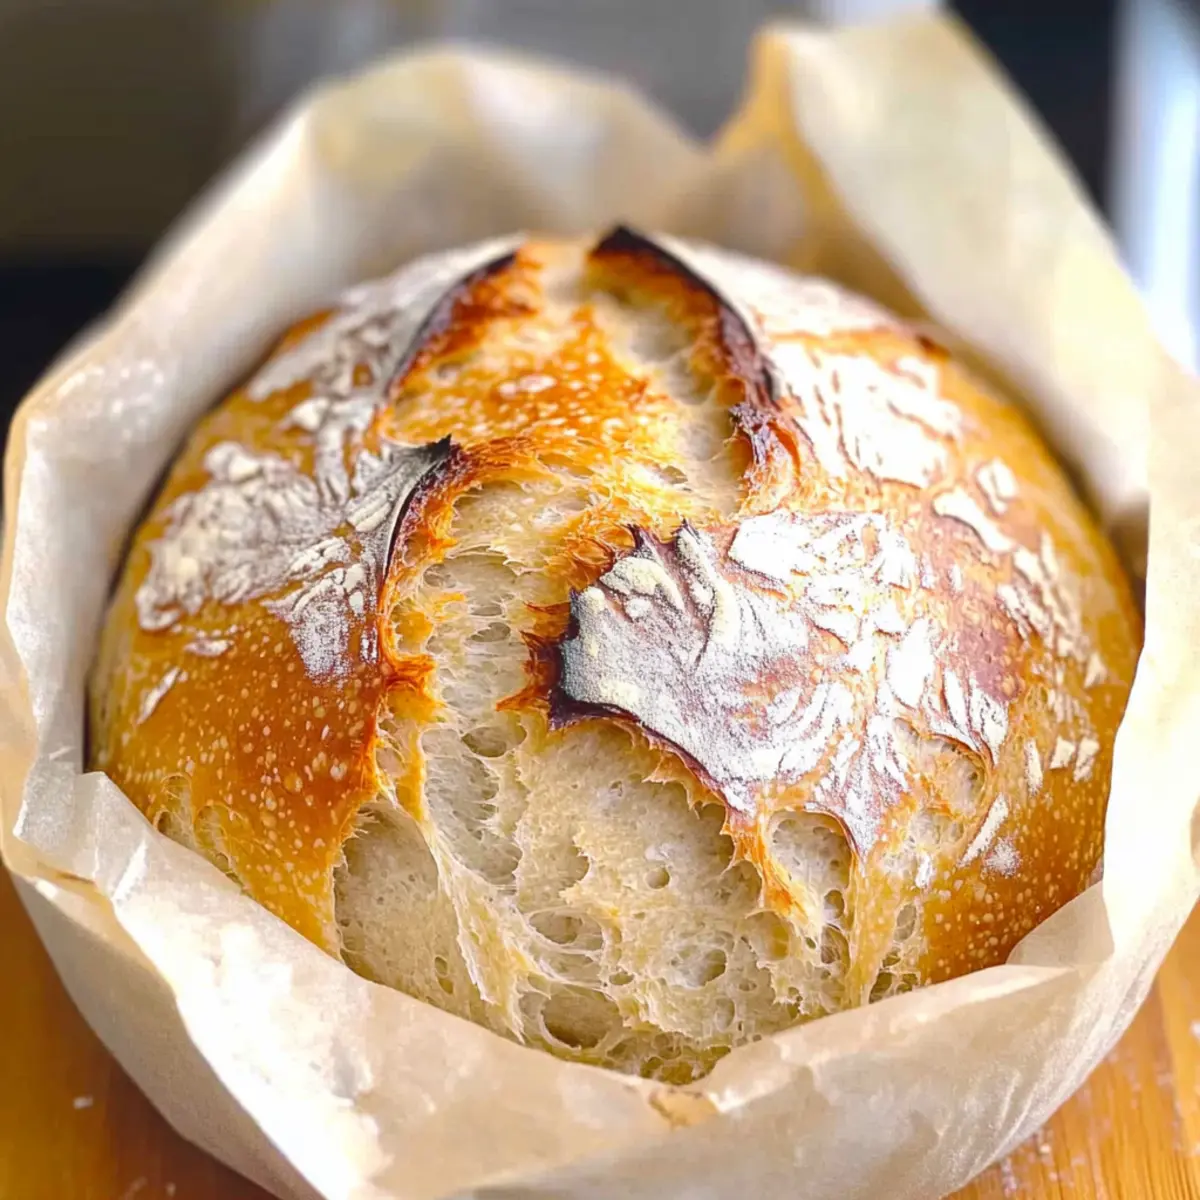
After the dough has risen, sprinkle some flour on a piece of parchment paper to prevent sticking. Carefully transfer the sticky dough onto the floured paper. Using floured hands, shape it into a round loaf, handling it gently to retain air bubbles. Optionally, score the top with a sharp knife for an artistic touch.
Step 5: Preheat the Oven
Preheat your oven to 450°F and place your Dutch oven with its lid inside to heat up. Allow it to preheat for about 30 minutes. The scorching heat will help create that delightful crust when you bake the Dutch Oven Bread, so patience here pays off!
Step 6: Transfer the Dough
Once the Dutch oven is hot, carefully remove it from the oven, lifting the lid with an oven mitt. Gently place the shaped loaf (with parchment paper) into the Dutch oven. Cover it again with the lid to trap steam, which will enhance the crust’s texture while baking.
Step 7: Bake the Bread
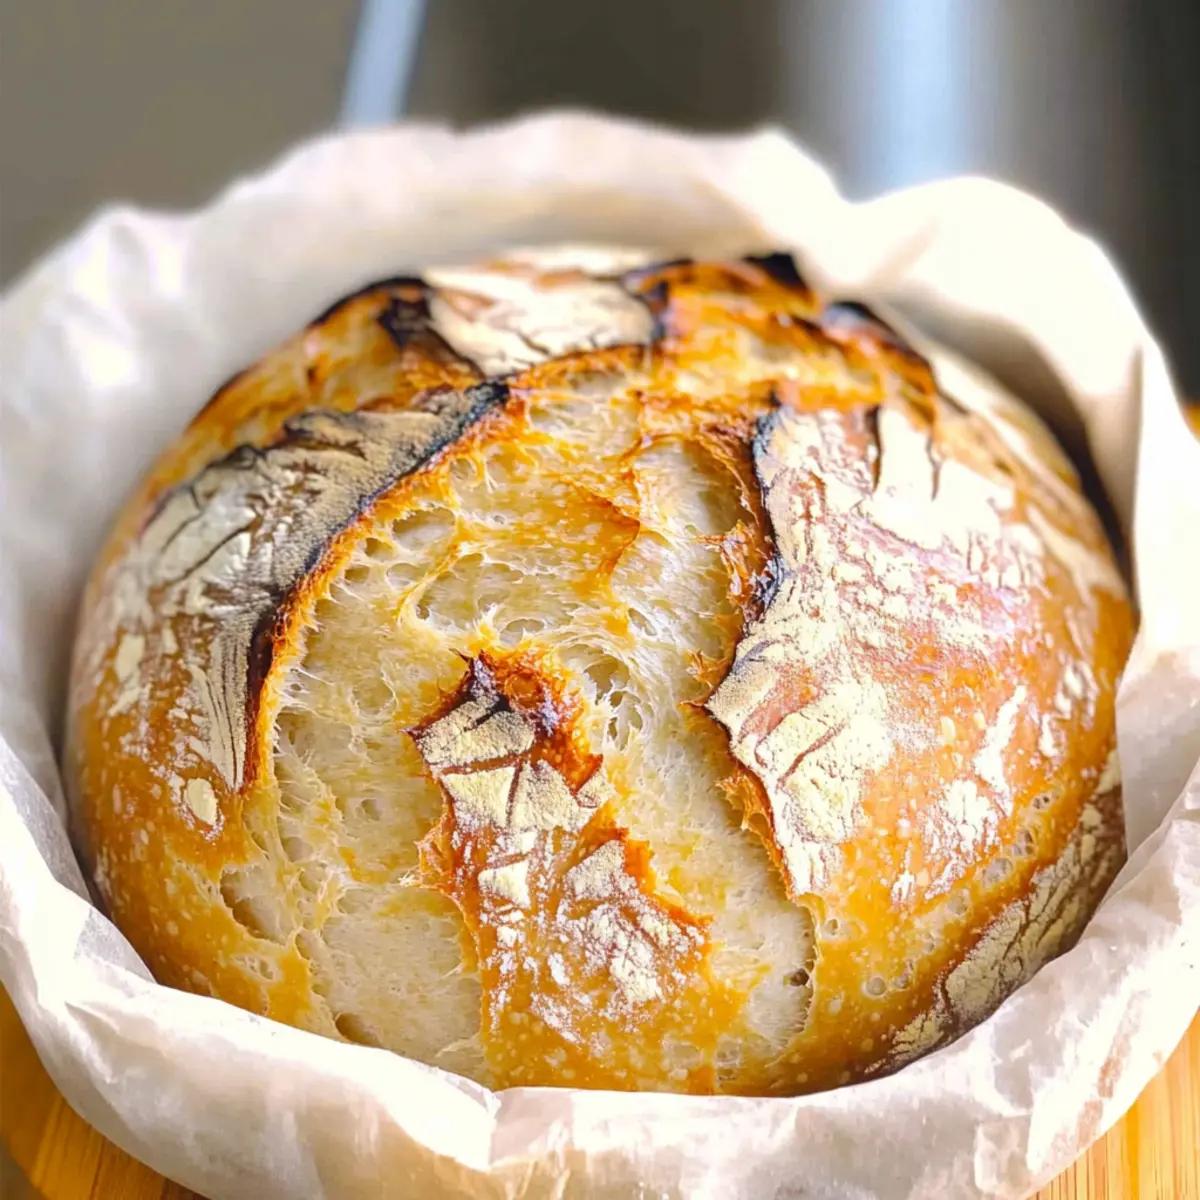
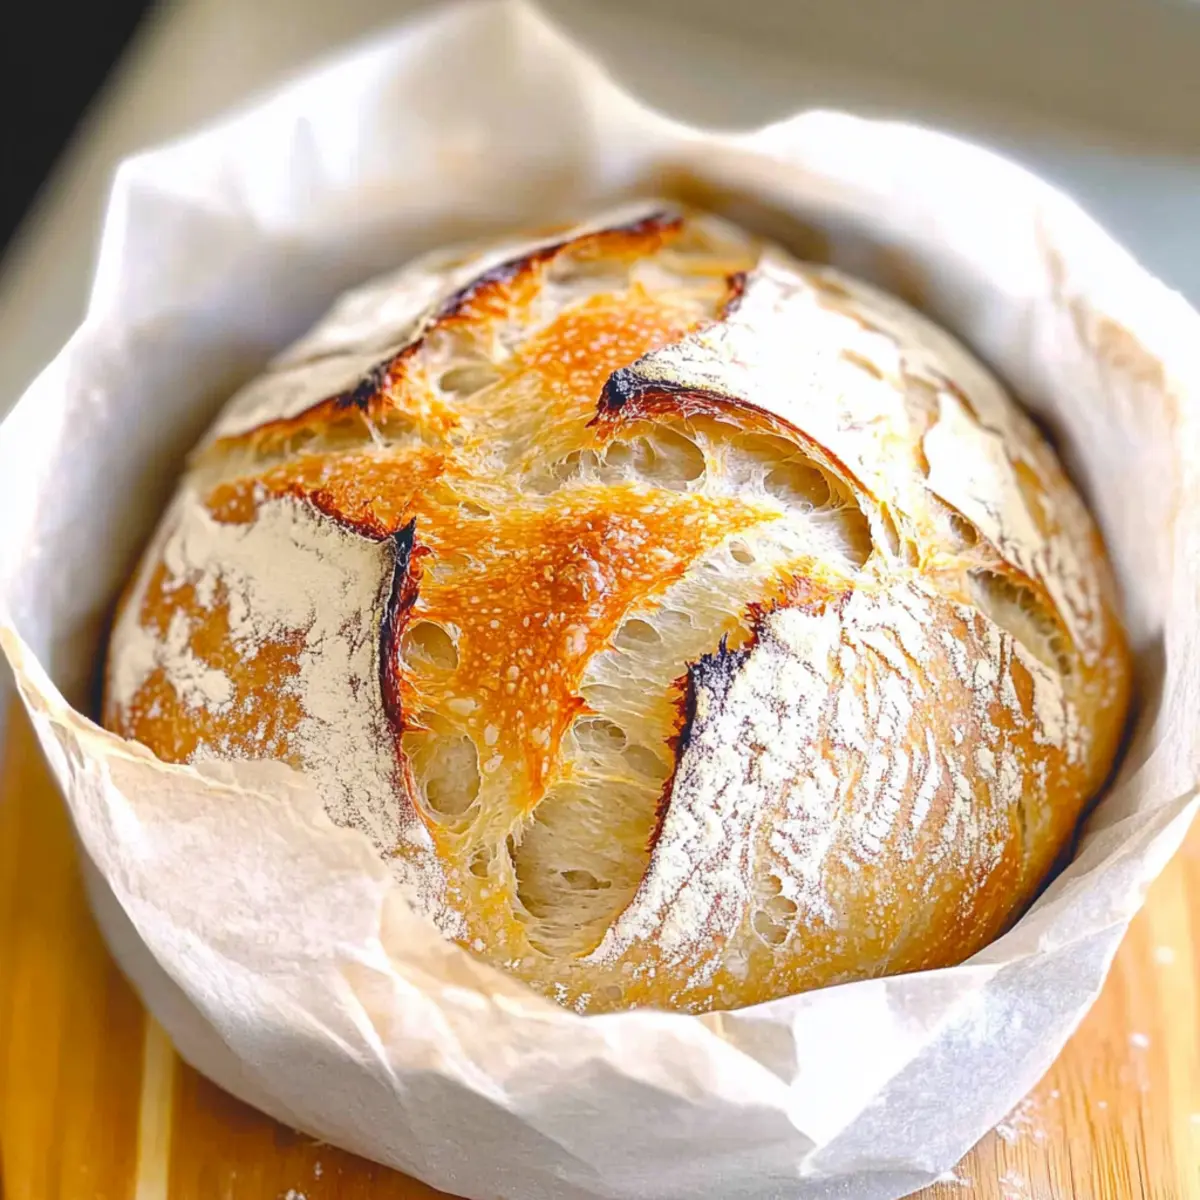
Bake the covered bread for 35 minutes. Then, take off the lid and bake for another 5 to 10 minutes, until it turns a deep golden brown and has a lovely crackling crust. Keep an eye on it during the last moments to achieve your desired crustiness.
Step 8: Cool Before Slicing
Once baked, remove the Dutch oven from the oven and lift out the bread using the parchment paper. Allow the loaf to cool completely on a wire rack. This cooling period is vital for the moisture to redistribute within the bread, ensuring each slice is fluffy and delicious.
What to Serve with No Knead Dutch Oven Bread?
There’s nothing quite like the heartwarming experience of balancing flavors and textures for a perfect meal at home.
-
Savory Olive Oil: Drizzle high-quality olive oil for dipping, enhancing the bread’s flavors with a rich and fruity note. It’s a delightful, uncomplicated pairing that brings comfort to every bite.
-
Hearty Vegetable Soup: Serve alongside a warm bowl of vegetable soup, where the broth’s richness complements the bread’s crusty texture, creating a wholesome and satisfying dish.
-
Fresh Garden Salad: A crisp garden salad with vibrant greens and a tangy vinaigrette cuts through the bread’s density, providing a refreshing contrast that brightens the meal.
-
Creamy Butter: Spread a pat of real butter or flavored compound butter atop a warm slice. The decadent creaminess beautifully melds with the bread’s chewiness, making each mouthful feel indulgent.
-
Cheese Platter: Pair with a selection of cheeses—think sharp cheddar, creamy brie, or tangy goat cheese. The variety of flavors and textures invite creativity as they mingle with the bread’s rustic charm.
-
Homemade Jam: Serve with a side of homemade jam or fruit preserves for a sweet contrast. The sweetness of the jam against the warm bread brings a delightful balance to your breakfast or evening snack.
-
Red Wine: A glass of red wine, like Merlot or Chianti, enhances the overall meal experience. The wine’s bold flavors accentuate the bread’s heartiness, complementing the textures beautifully.
-
Chocolate Chip Cookies: For a comforting dessert twist, offer warm chocolate chip cookies. The warm, gooey chocolate chips create a joyful end to a cozy meal centered around your Dutch Oven Bread.
-
Herbed Garlic Oil: For an extra layer of flavor, dip your bread into herbed garlic oil. The aromatic mix infuses warmth into your meal, enhancing the crunch with every dip.
How to Store and Freeze Dutch Oven Bread
Room Temperature: Store your Dutch Oven Bread in a paper bag or loosely wrapped in a kitchen towel for up to 2 days to maintain its crusty exterior.
Fridge: While not recommended, if you need to store it longer, you can place the bread in an airtight container in the fridge. However, consume it within a week to avoid staleness.
Freezer: For longer storage, slice the bread and freeze it in a single layer on a baking sheet. Once frozen, transfer slices to a zip-top bag, where they will keep fresh for up to 2 months.
Reheating: To enjoy your frozen slices, simply reheat in a preheated oven at 350°F for about 10-15 minutes, or toast them for a quick, warm treat.
Expert Tips for Dutch Oven Bread
-
Stickiness is Key: The dough should remain quite sticky; this is crucial for achieving the perfect chewy texture in your Dutch Oven Bread.
-
Watch Your Flour: Adjust your flour or water measurements slightly based on humidity levels to ensure a consistent dough texture every time.
-
Take Your Time: Don’t rush the rising process! Allowing your dough to ferment thoroughly enhances the flavor of your Dutch Oven Bread and contributes to its airy texture.
-
Wait to Slice: Resist the urge to cut into your hot loaf right away. Letting it cool properly prevents a gummy interior and allows for better slicing.
-
Scoring the Loaf: Lightly score the top of your loaf before baking. This not only adds an artistic touch but also helps control the bread’s expansion while baking, leading to a more appealing crust.
Dutch Oven Bread Variations & Substitutions
Feel free to get creative and customize your Dutch Oven Bread to suit your taste preferences or dietary needs!
-
Herby Twist:
Add dried herbs like rosemary or thyme into the dry ingredients for a fragrant flavor boost. Imagine the inviting aroma wafting through your kitchen! -
Cheesy Delight:
Incorporate grated cheese like Parmesan or cheddar into the dough for a rich, savory depth. This variation elevates every bite into a cheesy experience that pairs delightfully with soups. -
Whole Wheat Wonders:
Swap half of the all-purpose flour with whole wheat flour for a nuttier flavor and added nutrition. Not only does this bring a wholesome touch, but it also enhances texture. -
Sweet Surprise:
Mix in a tablespoon of honey or sugar to the dough for a hint of sweetness. Enjoy this version with a spread of butter, perfect for breakfast or brunch! -
Nuts & Seeds:
Add sunflower seeds, walnuts, or pumpkin seeds to your dough for an exciting crunch and a boost of healthy fats. This twist will add layers of texture and surprise in each slice. -
Spicy Kick:
If you love heat, sprinkle in some crushed red pepper flakes or finely chopped jalapeños before mixing. You’ll love the fiery surprise that complements soups beautifully! -
Fruit Infusion:
Incorporate dried fruits like cranberries or chopped figs into the dough for a sweet and tangy note. This variation is particularly lovely when served with cheeses or in a savory salad.
For even more delightful recipes, don’t forget to explore my Orange Cranberry Shortbread to satisfy your sweet tooth or add a festive vibe to your holiday baking with the Christmas Tree Bread!
Make Ahead Options
This No Knead Dutch Oven Bread is a fantastic option for meal prep, making busy weeknights a breeze! You can prepare the dough up to 24 hours in advance. Simply mix the ingredients and let the dough rise for 2-3 hours at room temperature before transferring it to the refrigerator for slow fermentation; this enhances flavor while keeping the dough fresh. When you’re ready to bake, take it out and let it sit at room temperature for about 30 minutes before shaping and baking as directed. This method ensures that your bread is just as delicious and beautifully airy when baked, allowing you to enjoy fresh artisan bread with minimal effort!
No Knead Dutch Oven Bread Recipe FAQs
What type of flour is best for making Dutch Oven Bread?
For the best results, I recommend using all-purpose flour, as it provides a great structure for the bread. However, you can also use bread flour for a chewier texture. If you’re feeling adventurous, try substituting part of the all-purpose flour with whole wheat flour for a nuttier flavor and added nutrition.
How do I store my Dutch Oven Bread to keep it fresh?
To maintain the deliciousness of your Dutch Oven Bread, store it at room temperature in a paper bag or loosely wrapped in a clean kitchen towel for up to 2 days. This method allows the bread to breathe, keeping the crust nice and crisp. If you need to keep it longer, you can freeze it for up to 2 months.
Can I freeze the Dutch Oven Bread?
Absolutely! Once your bread has cooled completely, slice it into individual pieces. Lay the slices out on a baking sheet to freeze for a couple of hours, then transfer them to a zip-top bag. This way, you can grab a slice whenever you crave that fresh-baked flavor! To reheat, simply preheat your oven to 350°F and warm the slices for about 10-15 minutes.
How do I know if my bread is rising correctly?
During the rising phase, look for your dough to double in size and become bubbly on the surface—this indicates that the yeast is working its magic! If it isn’t rising, it could mean your yeast is old or the water temperature didn’t activate it properly. Remember, a warm and draft-free area is ideal for letting it rise.
Is this recipe suitable for people with dietary restrictions?
While this No Knead Dutch Oven Bread is vegan and contains no common allergens like nuts or dairy, always check the specific brands of ingredients you use for any hidden allergens. If you’re preparing this for someone with gluten intolerance, consider using a gluten-free flour blend instead, but note that adjustments in the recipe may be necessary for the best results.
Effortless Dutch Oven Bread for a Cozy Home Baking Experience
Ingredients
Equipment
Method
- Mix warm water, yeast, and salt in a bowl. Stir until dissolved.
- Add all-purpose flour and mix until a sticky dough forms.
- Cover bowl and let dough rise in a warm place for 2 to 3 hours.
- Transfer dough to floured parchment paper and shape into a round loaf.
- Preheat oven to 450°F with the Dutch oven inside for 30 minutes.
- Carefully place dough in the heated Dutch oven and cover with lid.
- Bake covered for 35 minutes, then uncover and bake for 5 to 10 minutes.
- Remove from oven and let the loaf cool on a wire rack.
Leave a Reply