
It happened on a sun-drenched afternoon while savoring the scents wafting from my kitchen. The simplicity of fresh corn caught my attention, whispering promises of a delightful treat. Thus began my journey into making Brazilian corn pudding, or curau de milho, a glorious dessert that marries comfort with a sweet, creamy richness. One of the best things about this recipe is how effortlessly it comes together—minimal ingredients and straightforward steps make it a must-try for any home chef. Gluten-free and vegetarian? It checks all the boxes for those seeking a wholesome dessert without the fuss. Whether served warm or chilled, this pudding promises to be a family favorite that wraps you in warmth with every spoonful. Curious about how to make this comforting dish? Let’s dive into this delicious experience together!

Why is Brazilian corn pudding so beloved?
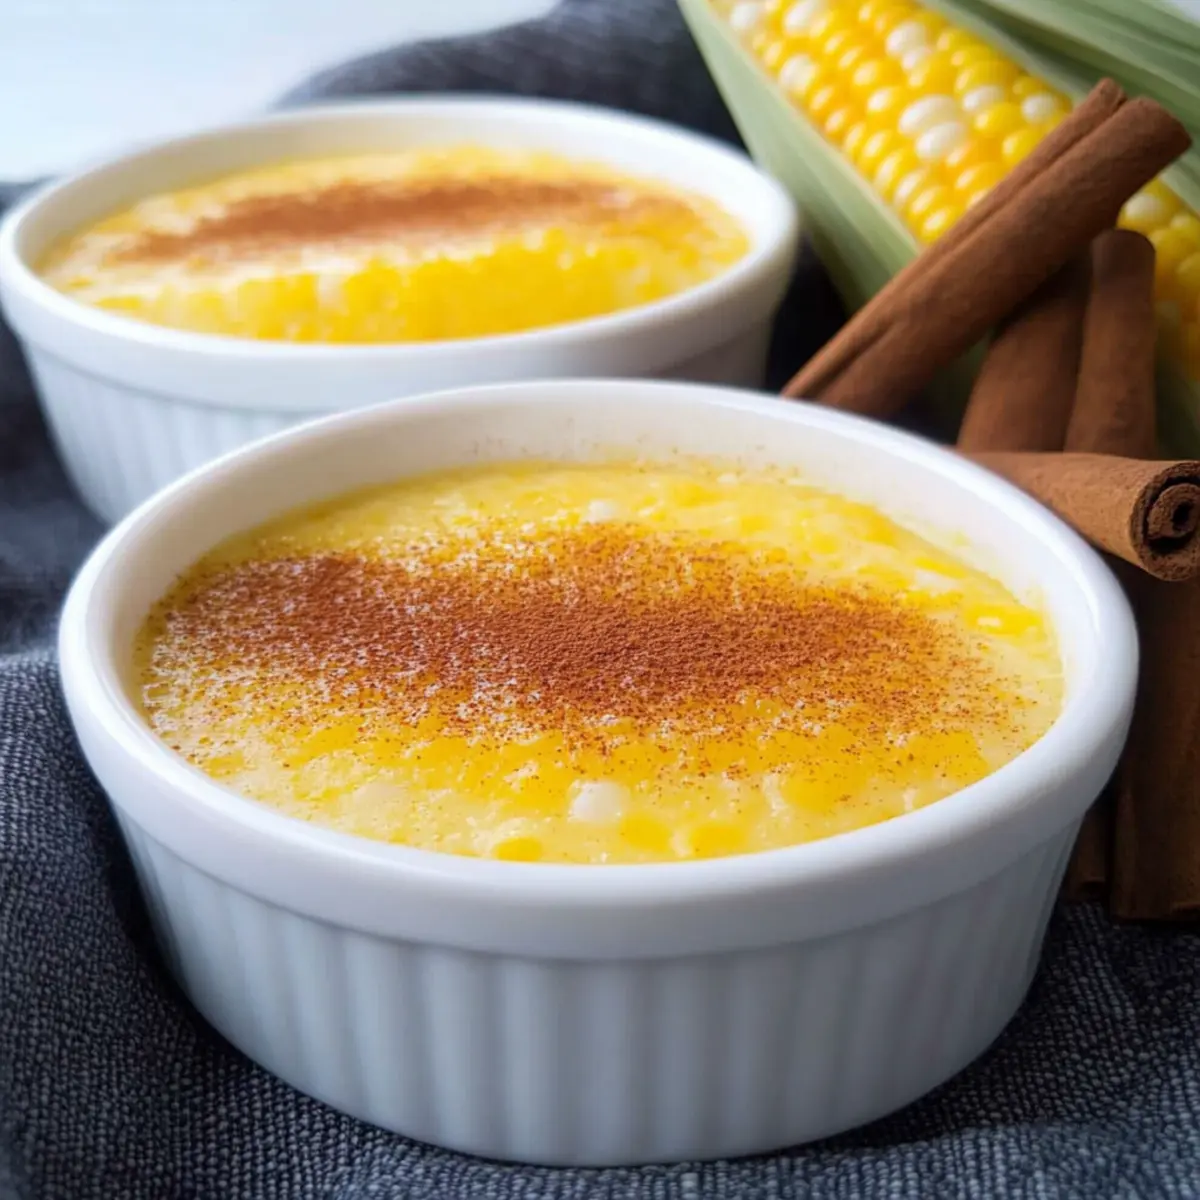
Irresistible Creaminess: This Brazilian corn pudding boasts a velvety, custard-like texture that melts in your mouth, making it an absolute delight.
Quick to Prepare: With just a few basic ingredients and straightforward steps, anyone can whip up this dessert in no time, perfect for busy weekdays or last-minute gatherings.
Naturally Sweet: The natural sweetness of fresh corn shines through, offering a comforting taste that reminds you of home-cooked meals.
Gluten-Free & Vegetarian: This dessert caters to various dietary preferences without compromising on flavor, ensuring everyone can enjoy it.
Serve It Your Way: Enjoy it warm or chilled, and personalize it with toppings like cinnamon or toasted coconut for an extra touch. You might also explore other delicious treats like Cheddar Sweet Corn for a savory twist or serve this pudding alongside Spice Vanilla Pudding for a delightful dessert spread.
Brazilian Corn Pudding Ingredients
• Discover the simple wonders of Brazilian Corn Pudding with these essential ingredients!
For the Pudding
- Fresh Corn – 3 cups for that natural sweetness and creamy texture. Aim for about 3 ears of corn.
- Whole Milk – Adds the rich creaminess essential for this dish’s luscious consistency.
- Sugar – Approximately ½ cup to enhance the overall sweetness, but feel free to adjust to your taste!
- Salt – A pinch elevates all the flavors in this delightful dessert.
For Serving
- Cinnamon – An optional sprinkle brings warm spice notes that perfectly complement the sweetness of the pudding.
Embrace the joy of creating this Brazilian Corn Pudding, a dish that promises to bring comfort and cheer to your table!
Step‑by‑Step Instructions for Brazilian Corn Pudding
Step 1: Prepare the Corn
Begin by carefully cutting the kernels off three fresh ears of corn, aiming for about 3 cups of kernels. Make sure to remove all the kernels to get the full corn flavor that’s essential for Brazilian corn pudding. Set aside the kernels for blending, ensuring you have a clean working area and a large bowl handy for collecting the kernels.
Step 2: Blend the Mixture
In a blender, combine the corn kernels with 2 cups of whole milk. Blend until you achieve a smooth and creamy consistency, typically around 1-2 minutes. The mixture should resemble a thick smoothie. This step is crucial as it creates the foundation of flavors for your Brazilian corn pudding, so ensure there are no chunky pieces left.
Step 3: Strain the Corn Mixture
Once blended, strain the corn mixture through a fine mesh strainer or cheesecloth into a large bowl. This step helps separate the creamy liquid from the solid corn pulp, leaving you with a smooth base for your pudding. Use a spatula or the back of a spoon to press down, ensuring all the liquid is extracted while discarding any solids.
Step 4: Combine Ingredients in a Pot
Transfer the strained liquid to a large pot over medium heat. Add around ½ cup of sugar and a pinch of salt, then stir well to dissolve the sugar completely. This mixture should begin to warm up, releasing a sweet aroma, and is the essential step to embarking on the cooking journey of your Brazilian corn pudding.
Step 5: Heat and Simmer
Increase the heat to medium-high and bring the mixture to a gentle simmer, stirring regularly. Watch for the first bubbles to surface, indicating that it is heating properly. This process should take about 5-7 minutes. Stirring is key to prevent any sticking at the bottom while the pudding develops its creamy texture.
Step 6: Thicken the Pudding
Continue to cook the mixture for 15-20 minutes, stirring frequently to prevent it from sticking. As it heats, you will notice it thickening to a custard-like consistency. If it doesn’t thicken as desired, consider adding a teaspoon of cornstarch mixed with a bit of cold water, stirring until combined and smooth.
Step 7: Serve and Enjoy
Once the Brazilian corn pudding has reached your desired thickness, remove it from heat and portion it into serving dishes. You can serve it warm right away or allow it to cool before refrigerating if you prefer it chilled. For an added touch, sprinkle a dash of cinnamon over the top just before serving for a warm, spiced finish that enhances this delightful dessert.

What to Serve with Brazilian Corn Pudding
Serving up a delightful Brazilian corn pudding is only the beginning of a warm and inviting meal!
- Coconut Flan: This creamy dessert complements the sweet notes of corn pudding with its luscious texture and tropical flavor profile.
- Grilled Pineapple: The caramelized sweetness of grilled pineapple adds a sunny touch, balancing the creamy richness of curau de milho beautifully.
- Black Bean Salad: A fresh salad with black beans, corn, and lime adds vibrant, zesty flavors and a crunchy texture, creating a well-rounded meal.
- Honey-Glazed Carrots: These tender, sweet carrots contribute a pop of color and a hint of sweetness that pairs wonderfully with the pudding’s rich taste.
- Spiced Chai Tea: The warm spices in a cup of chai tea enhance the comforting experience, making your dessert journey even more flavorful.
- Toasted Coconut: Sprinkle some toasted coconut on top of your pudding for a delightful crunch and extra flavor that complements the dish perfectly.
- Cinnamon Ice Cream: Serving a scoop of cinnamon ice cream alongside the warm pudding creates a delightful contrast of temperatures and textures, enhancing the experience.
- Mango Salsa: The fresh, tangy notes of mango salsa offer a refreshing contrast and a burst of brightness to the rich corn pudding.
Make Ahead Options
These Brazilian corn pudding preparations are ideal for meal prep enthusiasts! You can blend and strain the corn mixture up to 24 hours in advance, then store it in the refrigerator for optimal freshness. To maintain quality and prevent a skin from forming, cover the surface with cling wrap while chilling. On the day you intend to serve, simply combine the strained liquid with sugar and salt, heat over medium, and cook until thickened, which usually takes about 15-20 minutes. This time-saving approach ensures that your Brazilian corn pudding remains just as delicious while allowing you to enjoy more time with family and friends!
How to Store and Freeze Brazilian Corn Pudding
Fridge: Store your Brazilian corn pudding in an airtight container for up to 3 days. Ensure it’s completely cooled before sealing to maintain its creamy texture.
Freezer: You can freeze the pudding for up to 2 months. Just portion it into freezer-safe containers, leaving space for expansion. Thaw in the fridge overnight before reheating.
Reheating: To serve warm, gently reheat the pudding in the microwave or a saucepan over low heat, adding a splash of milk to restore its creaminess if needed.
Serving Tip: If you’ve made the pudding ahead of time, give it a good stir before serving, and consider topping it with cinnamon for a delightful experience!
Brazilian Corn Pudding Variations
Feel free to explore these delightful twists and substitutions to make the Brazilian corn pudding your own!
-
Richer Flavor: Adding sweetened condensed milk gives the pudding a creamy richness that elevates the dessert to new heights. It’s an excellent option for those who love a sweeter finish!
-
Honey Drizzle: Give it a natural sweetness boost by drizzling honey over the finished pudding. This not only enhances flavor but adds a beautiful touch that’s lovely for presentation.
-
Nutty Crunch: Incorporate toasted coconut or chopped nuts like pecans or almonds as a topping for added texture and flavor. The crunch will beautifully contrast with the pudding’s creaminess.
-
Spice It Up: Add a pinch of nutmeg or extra cinnamon to the pudding mixture during cooking for a warm spiced twist. This will infuse your dessert with cozy flavors reminiscent of festive gatherings.
-
Fruit Fusion: Top the pudding with fresh fruits like mango, berries, or bananas for a refreshing contrast. Their natural acidity will balance the sweetness and create a beautiful color presentation.
-
Plant-Based Version: Swap whole milk for coconut milk or almond milk for a dairy-free alternative. This variant will still keep the pudding creamy, while introducing delightful coconut or nutty flavors.
-
Slow Cooker Method: For an effortless approach, try cooking the pudding in a slow cooker. Combine all the ingredients and let it simmer on low for about 2-3 hours; the result will be blissfully creamy!
-
Chili Kick: If you enjoy a bit of heat, sprinkle a dash of cayenne pepper or jalapeño into the mixture. This unexpected twist will add an exciting layer of flavor that pleasantly surprises your palate.
Let your creativity shine as you mix, match, and elevate this classic Brazilian corn pudding! Plus, consider pairing it with a comforting dish like Southern Thanksgiving Dinner or serving it alongside a delightful treat such as Spice Vanilla Pudding for an unforgettable dessert spread. Enjoy!
Expert Tips for Brazilian Corn Pudding
-
Fresh Corn is Key: Use fresh corn for the best flavor and maximum starch content, ensuring a thick and creamy Brazilian corn pudding. Frozen or canned corn may require additional cornstarch.
-
Strain Well: Straining the blended corn mixture is essential. It ensures your pudding remains silky smooth without any graininess from the solid corn pulp.
-
Avoid Burning: Stir frequently as the mixture cooks to prevent it from sticking to the pot. A wide vessel promotes even thickening and reduces burning risk.
-
Prevent Skin Formation: Press cling wrap directly onto the surface of the pudding as it cools to avoid forming a skin. This keeps it looking lovely and tasting fresh!
-
Customize Sweetness: Feel free to adjust the sugar levels based on your preference. Tweak it to achieve your desired sweetness in this delightful Brazilian corn pudding.

Brazilian Corn Pudding (Curau de Milho) Recipe FAQs
How do I select fresh corn for Brazilian corn pudding?
Absolutely! Look for ears of corn that have bright green husks and moist, plump kernels. When you peel back the husk, you should see kernels that are full and milky, without any dark spots or shriveling. Three ears of corn will typically yield the 3 cups needed for this recipe.
How should I store leftover Brazilian corn pudding?
You can store your Brazilian corn pudding in an airtight container in the refrigerator for up to 3 days. Ensure it cools fully before sealing, to keep that creamy texture intact. If you’ve topped it with cinnamon, you might want to keep the topping separate until serving for the best flavor and presentation.
Can I freeze Brazilian corn pudding?
Very good question! Yes, you can freeze this dessert for up to 2 months. Portion the pudding into freezer-safe containers, leaving some space for expansion as it freezes. When you’re ready to enjoy it again, simply thaw in the fridge overnight, then reheat gently in the microwave, adding a splash of milk if needed to restore its creamy consistency.
What if my Brazilian corn pudding doesn’t thicken?
No worries! If your pudding hasn’t thickened as desired after 15-20 minutes, try mixing one teaspoon of cornstarch with a bit of cold water to create a slurry, and gradually stir this into the pudding while cooking over medium heat until it thickens. Just remember to stir frequently to prevent any sticking at the bottom of your pot!
Is Brazilian corn pudding safe for those with dietary restrictions?
Yes! This dessert is gluten-free and vegetarian, making it a great option for friends and family with those dietary considerations. However, if you have concerns about allergens, double-check that the milk and any toppings used do not contain any ingredients that might pose a risk. It’s always best to check labels to ensure everyone can indulge safely!
Creamy Brazilian Corn Pudding: A Sweet Taste of Home
Ingredients
Equipment
Method
- Carefully cut the kernels off three ears of corn, aiming for about 3 cups of kernels.
- In a blender, combine the corn kernels with 2 cups of whole milk. Blend until smooth, around 1-2 minutes.
- Strain the corn mixture through a fine mesh strainer into a large bowl, pressing down to extract all liquid.
- Transfer the strained liquid to a large pot over medium heat. Add ½ cup of sugar and a pinch of salt.
- Increase the heat to medium-high and bring the mixture to a gentle simmer, stirring regularly.
- Continue to cook the mixture for 15-20 minutes, stirring frequently to prevent sticking.
- Once the desired thickness is reached, remove from heat and portion into serving dishes. Serve warm or chilled.
- Optionally, sprinkle a dash of cinnamon over the top just before serving.
Leave a Reply