
As I was preparing dinner one evening, the idea of a baked sushi dish danced in my head, combining comfort and convenience. Enter my Salmon Sushi Bake: a versatile masterpiece that transforms your favorite sushi flavors into one easy, creamy pan! This dish is perfect for those busy weeknights or gatherings with friends, allowing you to savor every delightful bite without the fuss of traditional sushi rolling. With the rich taste of salmon complemented by a spicy kick from the creamy Sriracha sauce, it’s bound to become a new family favorite. Plus, it’s freezer-friendly, meaning you can whip it up ahead of time and have a scrumptious meal ready to go. Curious how to achieve this delicious blend of flavors all in one dish? Let’s dive in!
Why is Salmon Sushi Bake a Winner?
Simplicity at its finest: This one-pan dish requires minimal effort, making it perfect for busy weeknights.
Versatile flavors: Customize your bake with different proteins or veggies to suit your taste, like imitation crab or sautéed mushrooms.
Creamy, Dreamy Texture: The combination of cream cheese and Kewpie mayo delivers a delightful richness that melts in your mouth.
Crowd-Pleasing Appeal: Serve it as a hearty appetizer or a main dish, and watch it disappear at your next gathering—just like when you serve it with a side of Christmas Dinner Ideas!
Meal Prep Friendly: Prepare it ahead of time and keep it in the fridge or freezer. Just pop it in the oven for a hassle-free, delicious dinner!
Salmon Sushi Bake Ingredients
For the Rice
• Sushi Rice – The essential foundation for perfect texture; be sure to rinse well to remove excess starch.
• Water – Necessary for cooking the sushi rice to fluffy perfection.
• Lite Seasoned Rice Vinegar – Adds a lovely tang and flavor to the sushi rice.
• Furikake – A delightful Japanese seasoning that enhances the rice’s taste; feel free to substitute with sesame seeds if you’re in a pinch.
For the Salmon Mixture
• Salmon Filet – The star ingredient that brings rich flavor; use skinless and cut into ½ inch cubes.
• Imitation Crab Meat – Adds extra flavor and texture; can be swapped with cooked shrimp or omitted for a seafood-free version.
• Kewpie Mayo – Japanese mayo that adds a creamy richness; regular mayo works as a great alternative.
• Cream Cheese – Contributes a dreamy creaminess to the mixture.
• Sriracha – Delivers a spicy kick; adjust to your preferred heat level.
• Soy Sauce or Tamari – Adds umami depth; opt for gluten-free tamari if needed.
• Green Onions – Brings freshness and crunch to the dish; substitute with chives if desired.
For the Sauces
• Unagi Sauce – A sweet glaze that enhances the umami experience; teriyaki sauce serves as a fine substitute.
• Spicy Mayo – A zesty mix of Kewpie mayo, sriracha, lime juice, and salt for extra flavor.
For the Toppings
• Avocado – Creamy slices that elevate both flavor and presentation.
• Cucumber – Adds a refreshing crunch to each bite.
• Sesame Seeds – A delightful garnish that introduces a nutty flavor.
• Nori Sheets – Use for wrapping or garnishing to pay homage to traditional sushi.
Step‑by‑Step Instructions for Salmon Sushi Bake
Step 1: Prepare Sushi Rice
Begin by rinsing 2 cups of sushi rice under cold water until the water runs clear, which removes excess starch. Soak the rice in water for 15 minutes before draining. In a pot, combine the rice with 2 cups of fresh water, bring to a boil, then reduce heat, cover, and simmer for 20 minutes. Once cooked, let it stand for 10 minutes, then season with ¼ cup of lite seasoned rice vinegar and fluff it with a fork.
Step 2: Prepare Salmon Mixture
While the rice cools, take 1 pound of skinless salmon filet and cut it into ½ inch cubes. In a mixing bowl, combine the cubed salmon with ½ cup of Kewpie mayo, 4 ounces of cream cheese, 2 tablespoons of sriracha, 2 tablespoons of soy sauce, and ¼ cup of chopped green onions. Mix until well blended, then cover and chill in the refrigerator to let the flavors meld while you handle the next steps.
Step 3: Make Unagi Sauce
In a small saucepan, combine ¼ cup soy sauce, ¼ cup mirin, ¼ cup sake (or water), and 2 tablespoons of sugar. Heat the mixture over medium heat, stirring occasionally until the sugar has completely dissolved. Bring to a simmer, then reduce the heat and cook for about 10-15 minutes or until the sauce thickens slightly. Remove from heat and let the unagi sauce cool to room temperature.
Step 4: Make Spicy Mayo
Prepare the spicy mayo by mixing together ½ cup of Kewpie mayo, 2 tablespoons of sriracha, the juice of half a lime, and a pinch of salt in a bowl. Adjust the spiciness to your preference by adding more sriracha if desired. Once combined, cover the spicy mayo and refrigerate to allow the flavors to develop while you assemble the bake.
Step 5: Assemble Bake
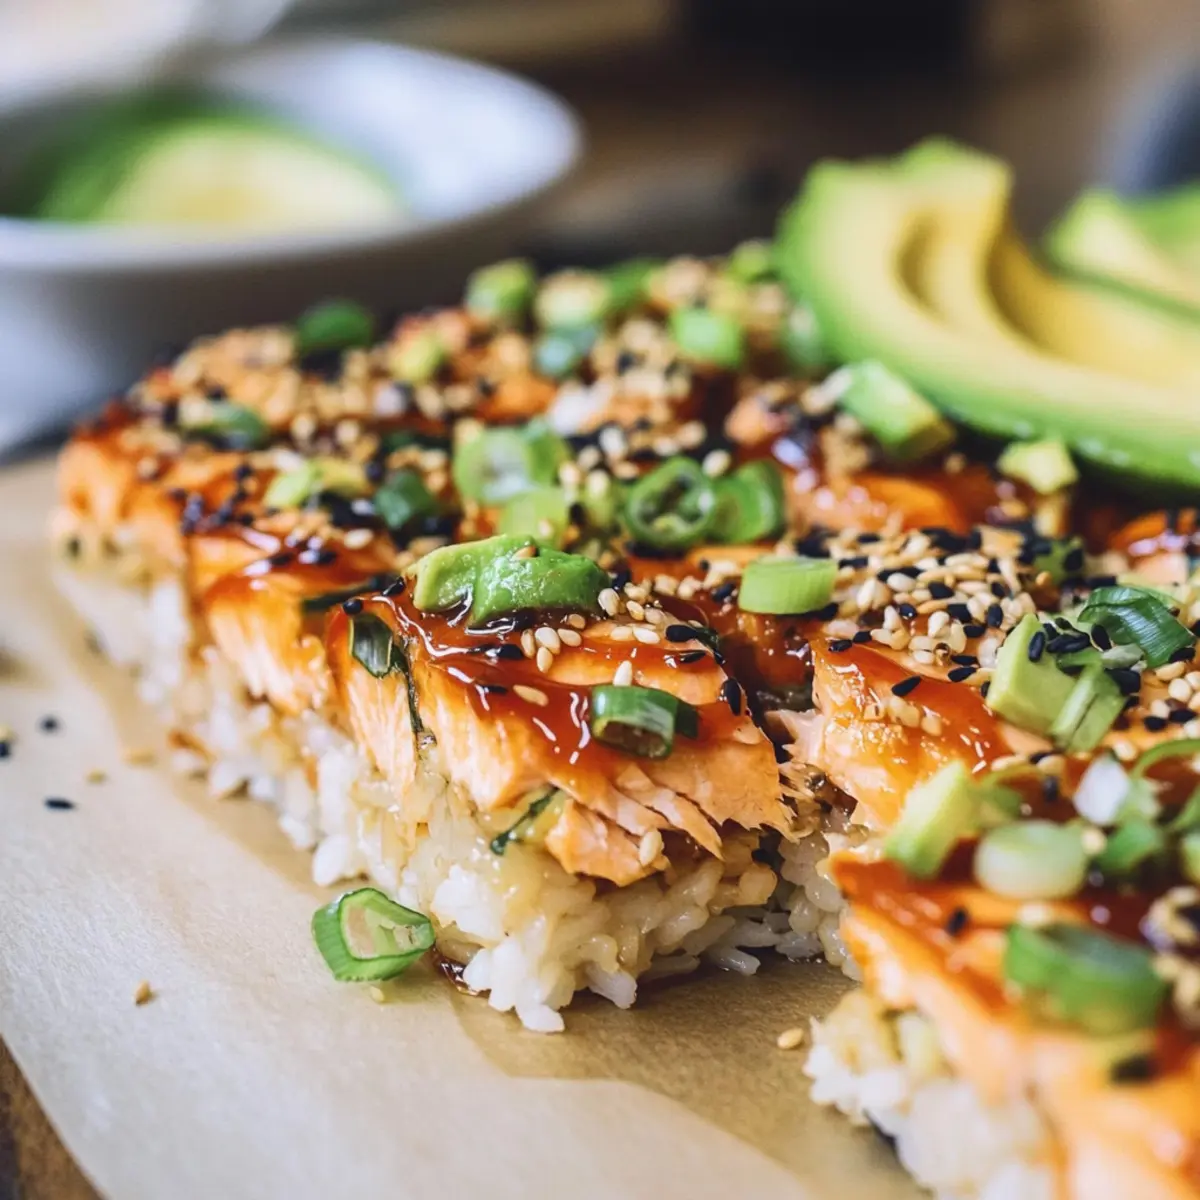
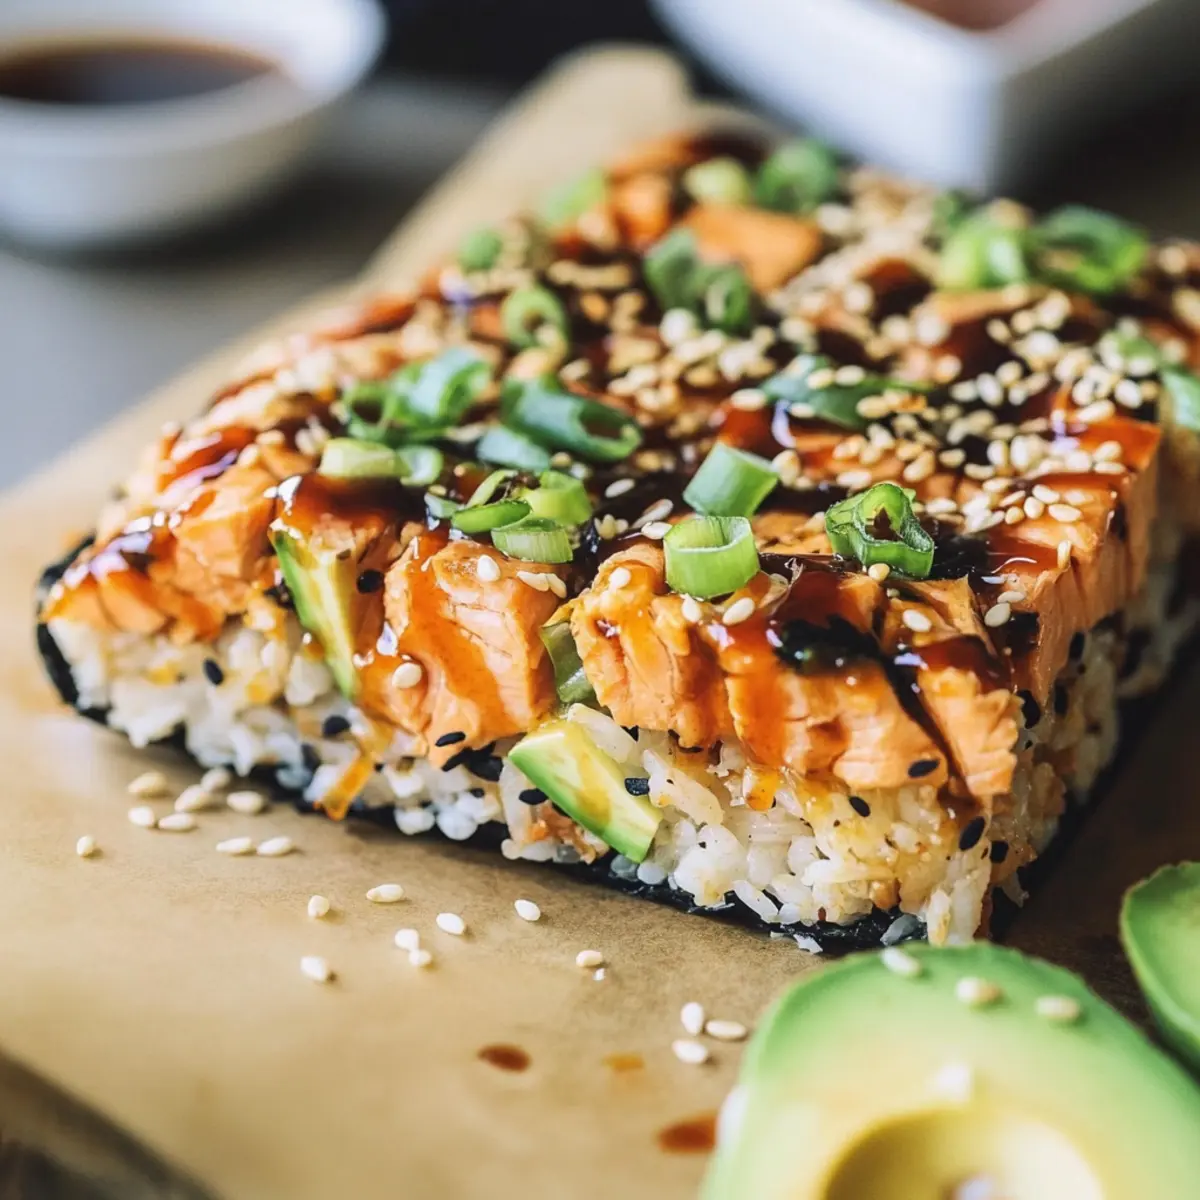
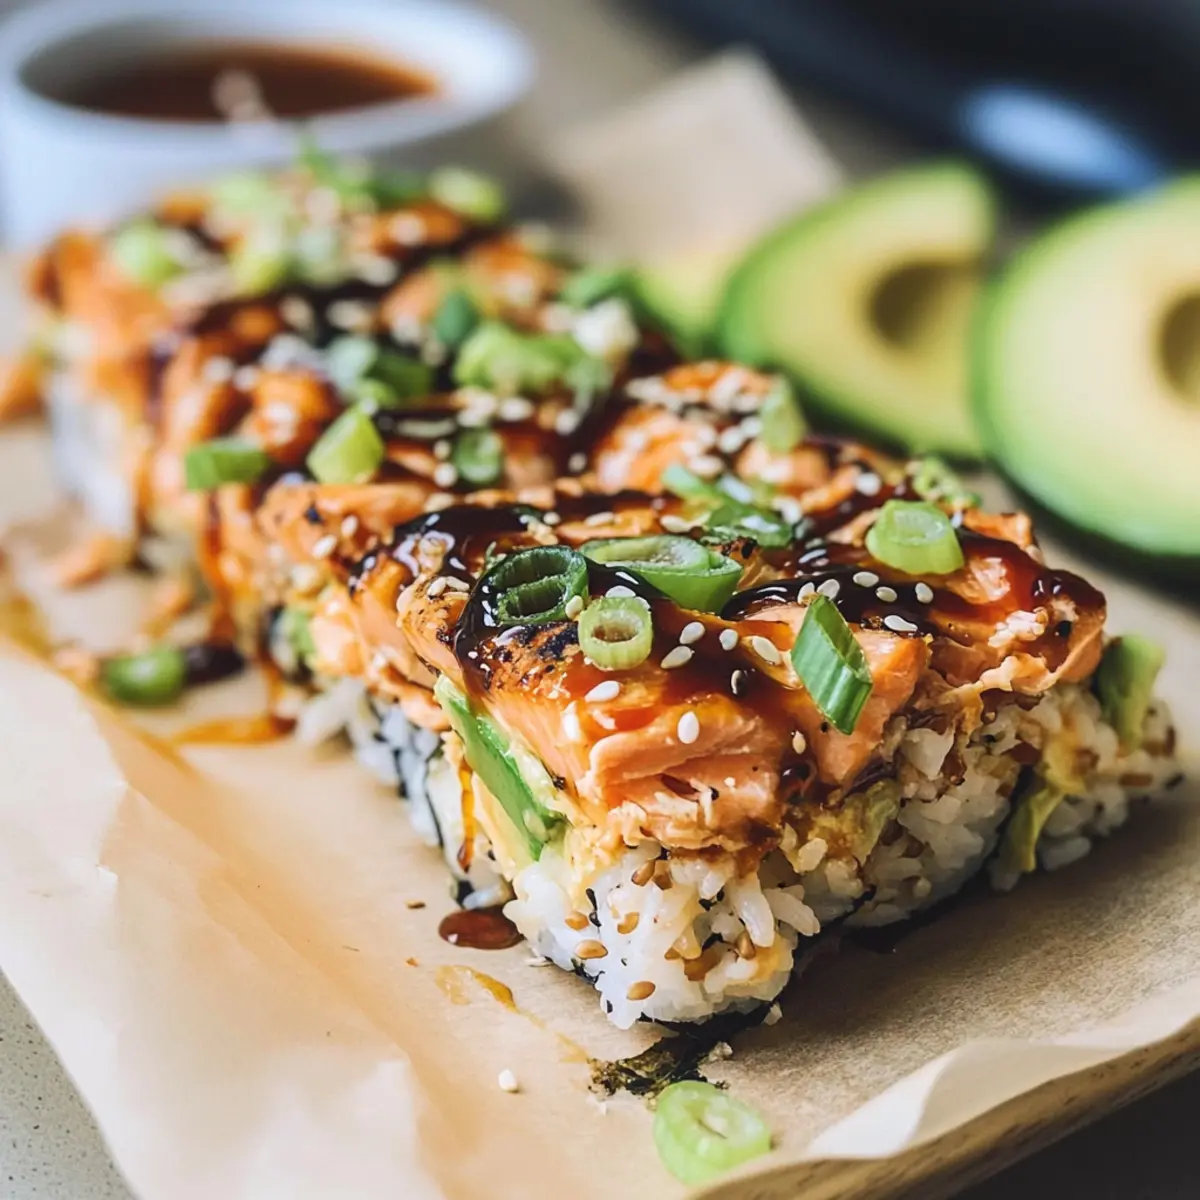
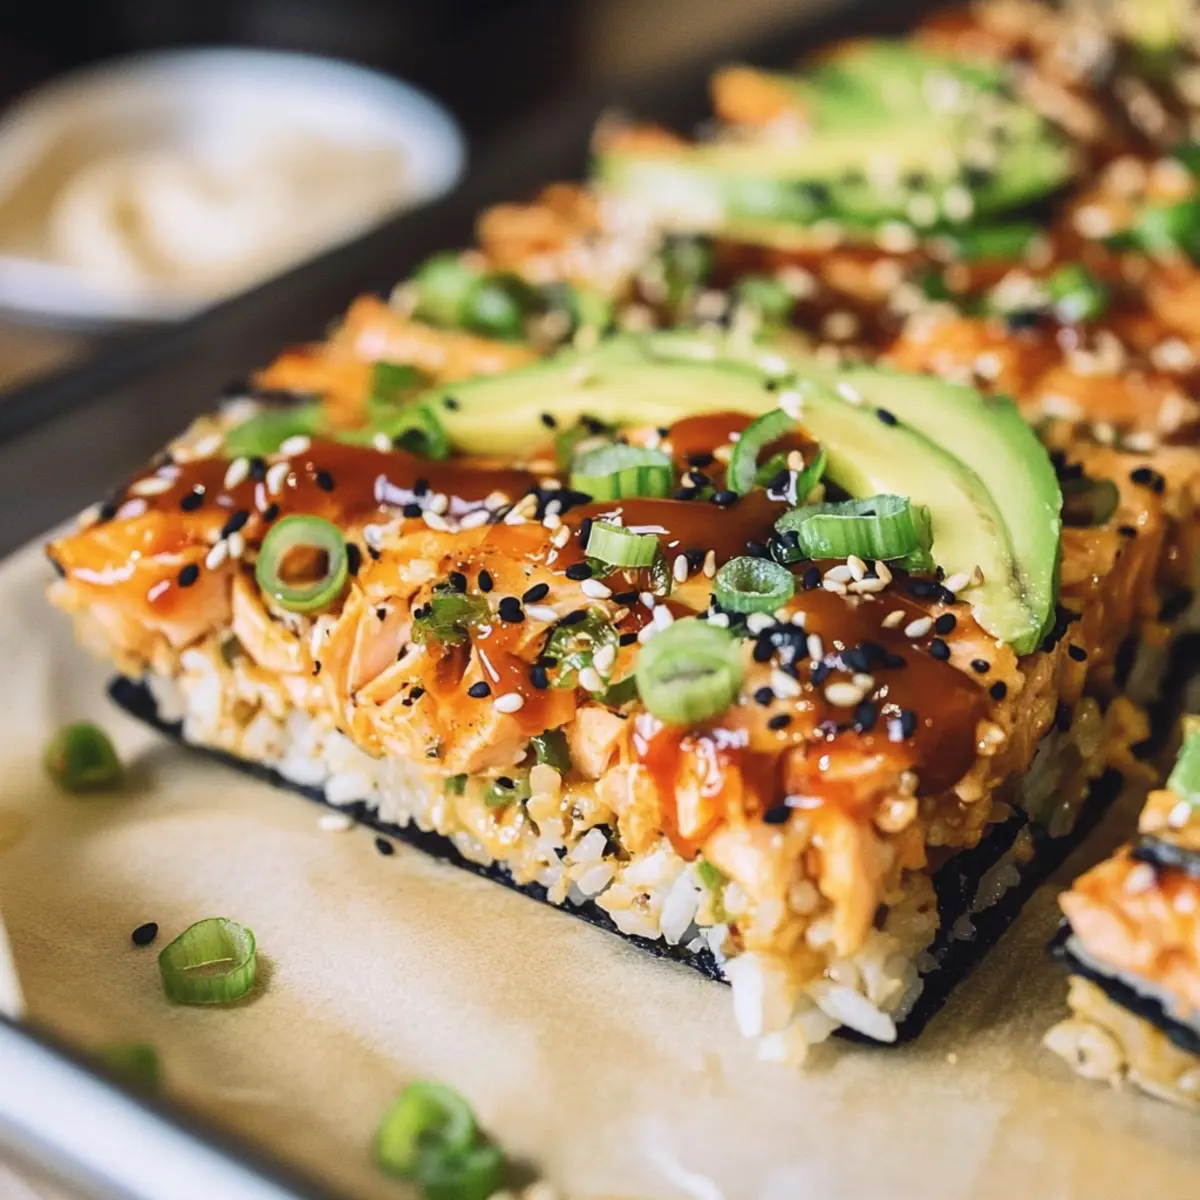
Preheat your oven to 425°F. Lightly grease a 9×13 inch baking dish with nonstick spray and line the bottom with parchment paper for easy removal. Spread the cooled sushi rice evenly in the prepared dish, pressing it down gently. Sprinkle 2 tablespoons of furikake over the rice, then layer the chilled salmon mixture on top, smoothing it out evenly across the surface.
Step 6: Bake and Broil
Bake the assembled Salmon Sushi Bake in the preheated oven for 10-15 minutes or until the top is hot and bubbly. For an added crispy texture, switch on the broiler and broil for an additional 2-3 minutes, keeping a close eye to avoid burning. Once it reaches a golden color, remove it from the oven and let it cool slightly before serving.
Step 7: Serve
Once cooled for about 5 minutes, drizzle your unagi sauce and spicy mayo generously over the top of the baked dish. Garnish with sliced avocado, cucumber, sesame seeds, and remaining chopped green onions for added flavor and presentation. Serve warm with nori sheets for wrapping, and enjoy your delicious Salmon Sushi Bake!
Expert Tips for Salmon Sushi Bake
• Rinse Thoroughly: Always rinse your sushi rice until the water runs clear to reduce stickiness and achieve the right texture.
• Cool Before Mixing: Let the sushi rice cool to room temperature before adding vinegar; this helps with better absorption and flavor.
• Layer Carefully: When assembling your bake, spread the rice and salmon mixture evenly to ensure uniform cooking and that every bite is flavorful.
• Broil with Caution: Use the broiler carefully to avoid burning the top. Keep a close watch while broiling for that perfect crispy finish.
• Prep in Advance: Prepare sauces and toppings ahead of time for a hassle-free cooking experience, making this Salmon Sushi Bake a great meal prep option.
Make Ahead Options
These versatile Salmon Sushi Bake components are perfect for busy meal prep! You can prepare the sushi rice up to 24 hours in advance; just store it in an airtight container in the fridge to maintain its freshness. Additionally, the salmon mixture can be made and refrigerated for up to 3 days—simply mix the salmon, mayo, cream cheese, sriracha, soy sauce, and green onions ahead of time and keep it covered. When you’re ready to enjoy the dish, assemble the bake with the prepared rice and salmon mixture, then bake as instructed. This way, you’ll have a delightful meal ready with minimal effort and just as delicious as if you made it on the spot!
Salmon Sushi Bake Variations & Substitutions
Feel free to get creative and put your own spin on this delightful dish!
-
Protein Swap: Substitute salmon with cooked shrimp, tuna, or even crab for a different seafood twist. Each option brings its own unique flavor and can elevate the dish in exciting ways.
-
Vegetarian Option: For a meat-free delight, replace the seafood with sautéed mushrooms or crispy tofu. You’ll still achieve that savory goodness while keeping the dish plant-based and satisfying.
-
Rice Variation: Use jasmine or brown rice instead of sushi rice for a heartier texture. The nuttiness of brown rice adds an interesting layer to your Salmon Sushi Bake you’ll love!
-
Gluten-Free Adaptation: Make it gluten-free by ensuring all sauces used, like soy sauce or tamari, are certified gluten-free. Enjoy your meal without a worry!
-
Spicy Kick: Increase the heat by adding extra sriracha or diced jalapeños into the salmon mixture. This way, you can tailor the spice level to please your palate.
-
Flavor Boosts: Enhance the umami goodness by adding a splash of mirin or rice wine vinegar to the salmon mixture. This can deepen the overall flavor profile beautifully.
-
Topping Twists: Switch up the toppings by incorporating a mix of shredded carrots or radishes for an extra crunch. These additions not only boost flavor but also add vibrant color!
-
Layered Flavors: As an alternative to the unagi sauce, try drizzling a homemade teriyaki sauce over the top for a sweet twist on the classic flavors.
Don’t forget, if you’re looking for other comforting options, check out my hearty Sweet Potato Bake or the delightful Baked Mini Hasselback Potatoes. Enjoy exploring these variations!
How to Store and Freeze Salmon Sushi Bake
Fridge: Store leftovers in an airtight container in the fridge for up to 3 days. Reheat in the oven at 350°F for about 15-20 minutes to retain creaminess.
Freezer: Freeze portions by wrapping them tightly in plastic wrap and then placing them in a freezer-safe bag—good for up to 2 months.
Reheating: For best results, thaw in the fridge overnight before reheating. Use the oven for even heating, ensuring it’s heated through to avoid dryness.
Make-Ahead: Prepare the Salmon Sushi Bake 1-2 days in advance, assemble but don’t bake. Cover and refrigerate; then bake when ready to serve for optimal freshness.
What to Serve with Easy Salmon Sushi Bake
Elevate your meal experience by pairing your creamy creation with delightful sides that complement its rich flavors.
-
Miso Soup: A warm, savory broth that balances the creaminess and adds umami depth, enhancing the dish’s overall experience.
-
Crispy Seaweed Salad: The refreshing crunch of seaweed salad provides texture and a hint of ocean flavor that pairs beautifully with the sushi bake.
-
Cucumber Salad: A zesty cucumber salad dressed in rice vinegar offers a cooling contrast to the warm, spicy elements of your dish, refreshing each bite.
-
Edamame: These tender and slightly salty soybeans serve as a great appetizer, providing a fun, finger-food element that’s both healthy and satisfying.
-
Sushi Rolls: Keep the sushi theme alive with complementary rolls filled with avocado or tempura shrimp, allowing guests to enjoy a taste adventure alongside your bake.
-
Sake or Green Tea: Pair your meal with a chilled sake or a steaming cup of green tea. The subtle flavors refresh your palate while enhancing the dining experience.
-
Fresh Fruit Platter: End your meal with a vibrant fruit platter—think ripe mango, juicy strawberries, and sweet melon—to cleanse the palate and finish on a sweet note.
Salmon Sushi Bake Recipe FAQs
How do I select the best salmon for my sushi bake?
Absolutely! When choosing your salmon, look for fresh, bright-colored fillets without dark spots or an overpowering fishy smell. I recommend skinless, boneless salmon that feels firm to the touch, as it will hold together well in your bake. If possible, opt for wild-caught salmon for the best flavor and quality.
How should I store leftover Salmon Sushi Bake?
Store any leftovers in an airtight container in the fridge for up to 3 days. This helps to maintain its creamy texture. To reheat, simply place it in a preheated oven at 350°F for about 15-20 minutes until warmed through, ensuring you don’t dry it out.
Can I freeze Salmon Sushi Bake, and if so, how?
Yes, you can freeze it! Start by letting the bake cool completely, then slice it into portions. Wrap each piece tightly in plastic wrap and place them in a freezer-safe bag. It will keep well for up to 2 months. When ready to enjoy, thaw in the fridge overnight and reheat in the oven.
What if my sushi rice turns out too sticky?
Very! If your sushi rice is too sticky, be sure to rinse it thoroughly before cooking. If you’ve already cooked it, you might try mixing in a little extra seasoned rice vinegar while it’s warm to help separate the grains. In the future, rinse the rice until the water runs clear before soaking to avoid this issue.
Is this recipe suitable for gluten-free diets?
Absolutely! To make your Salmon Sushi Bake gluten-free, ensure that you use gluten-free soy sauce or tamari instead of regular soy sauce. Also, double-check any sauces or ingredients listed to make sure they’re gluten-free. This way, everyone can enjoy the delicious flavors together!
Can I prepare the Salmon Sushi Bake ahead of time?
I often make this dish in advance! You can assemble the sushi bake 1-2 days ahead. Simply layer everything in your dish, cover tightly with foil or plastic wrap, and store it in the fridge. When you’re ready to serve, just pop it in the oven without needing to wait for it to come to room temperature. This prep makes it super convenient for busy nights!
Creamy Salmon Sushi Bake That's Easy and Irresistible
Ingredients
Equipment
Method
- Rinse 2 cups of sushi rice under cold water until clear, soak in water for 15 minutes, then drain. Combine with 2 cups of water in a pot, boil, reduce heat, cover, and simmer for 20 minutes. Let stand for 10 minutes, then add ¼ cup of seasoned rice vinegar and fluff.
- While rice cools, cut 1 pound of salmon into ½ inch cubes. Mix with ½ cup of Kewpie mayo, 4 ounces of cream cheese, 2 tablespoons of sriracha, 2 tablespoons of soy sauce, and ¼ cup of chopped green onions. Chill in refrigerator.
- Combine ¼ cup soy sauce, ¼ cup mirin, ¼ cup sake (or water), and 2 tablespoons of sugar in a saucepan. Heat until sugar dissolves, simmer for 10-15 minutes until thickened, then cool.
- Mix together ½ cup of Kewpie mayo, 2 tablespoons of sriracha, juice of half a lime, and a pinch of salt in a bowl for the spicy mayo.
- Preheat oven to 425°F. Grease a 9x13 inch baking dish, line with parchment. Spread cooled sushi rice in the dish, press down, sprinkle with 2 tablespoons of furikake, then layer chilled salmon mixture on top.
- Bake for 10-15 minutes until bubbly. Broil for 2-3 minutes for a crispy top, keeping an eye to avoid burning.
- Cool for 5 minutes, drizzle unagi sauce and spicy mayo over the top, garnish with avocado, cucumber, sesame seeds, and green onions. Serve warm with nori sheets.
Leave a Reply